Model 380 Two Stage Snow Thrower
5
9.3.
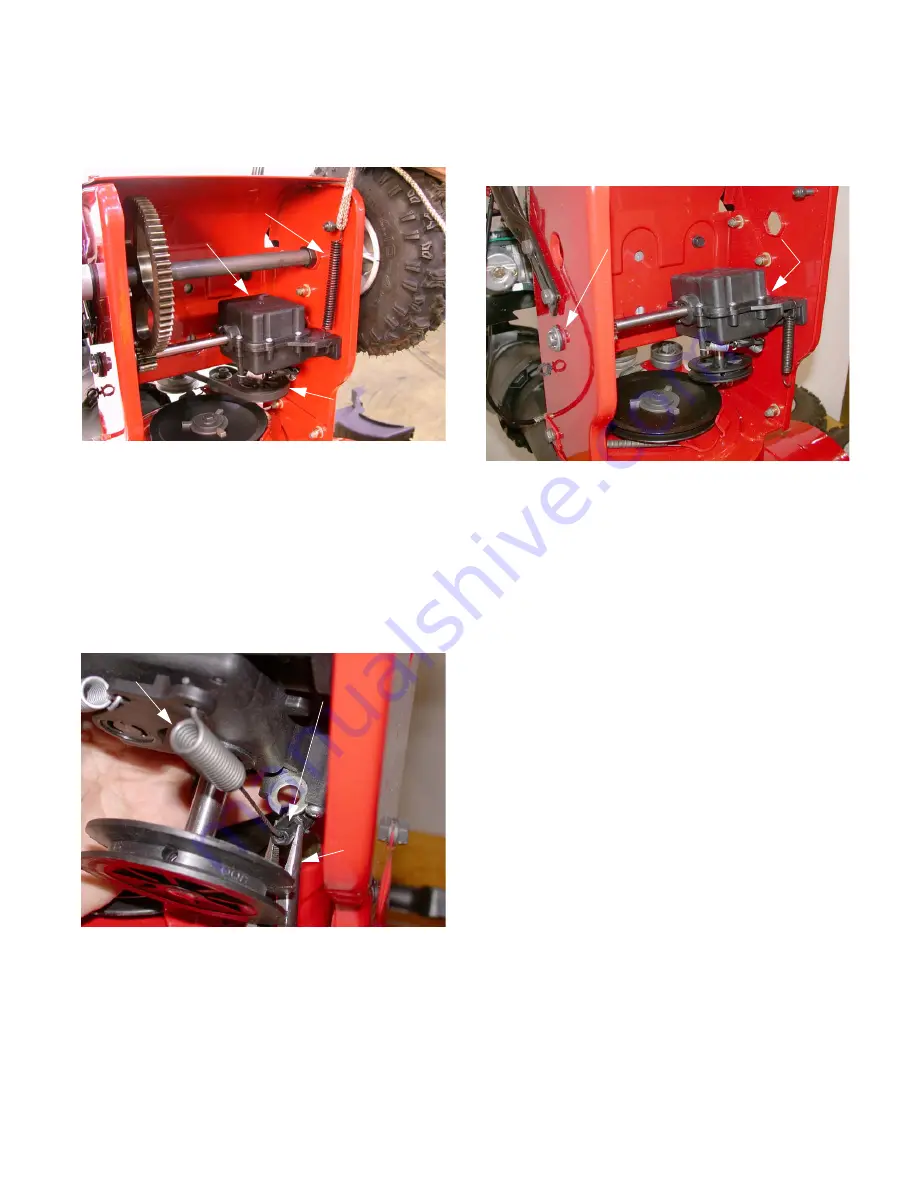
Remove the tension spring attached to the frame
and transmission. See Figure 9.3.
9.4.
Remove the belt from around the transmission
pulley.
9.5.
Tip the transmission forward. Using a pair of
needle nose pliers, squeeze the tabs on the
drive cable where it attaches to the transmission
and remove the cable from the bracket. See Fig-
ure 9.5.
9.6.
Remove the drive cable Z fitting from the trans-
mission housing.
Figure 9.3
Extension Spring
Transmission
Transmission Pulley
Figure 9.5
Drive Cable Tabs
Drive Cable Spring
Pliers
9.7.
Remove the cotter pins and flat washers secur-
ing the transmission mounting axle to the drive
housing. See Figure 9.7.
9.8.
Move the transmission to the left and to the right
and pivot it from the drive housing.
9.9.
Remove the two hex flange bearings from the
drive housing.
NOTE:
The transmission is not serviceable. The
transmission must be returned to the factory
unopened for warranty reimbursement.
NOTE:
The pinion gear and roll pin are service-
able.
10.
AUGER PULLEY REMOVAL
NOTE:
In order to ease removal of the auger
pulley it is recommended that you remove the
transmission first. See transmission removal
section for instructions.
Figure 9.7
Cotter Pins and Flat Washers


