background image

2

TABLE OF CONTENTS

Content

Page

Important Safe Operation Practices................................................................... 3

Slope Gauge...................................................................................................... 6

Assembling Your


Lawn Mower........................................................................... 7

Know Your Lawn Mower .................................................................................... 10

Operating Your Lawn Mower ............................................................................. 11

Making Adjustments .......................................................................................... 12

Maintaining Your Lawn Mower........................................................................... 14

Off Season Storage ........................................................................................... 16

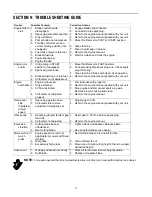
Troubleshooting ................................................................................................. 17

Parts List ............................................................................................................ 18

FINDING MODEL NUMBER

This Operator’s Manual is an important part of your new lawn mower. It will help you assemble, prepare and 
maintain the unit for best performance. Please read and understand what it says. 

Before you start assembling your new equipment, please locate the model plate on the 
equipment and copy the information from it in the space provided below. The information on 
the model plate is very important if you need help from our Customer Support Department or 
an authorized dealer. 

You can locate the model number by standing at the operating position and looking down at the rear 
of the mower deck. A sample model plate is explained below. For future reference, please copy the 
model number and the serial number of the equipment in the space below.

CALLING CUSTOMER SUPPORT

If you have difficulty assembling this product or have any questions regarding the controls, operation or 
maintenance of this unit, please call the Customer Support Department. 

Call 1- (330) 220-4MTD (4683) or 1- (800)-800-7310 to reach a Customer Support 
representative. Please have your unit’s model number and serial number ready when you 
call. See previous section to locate this information. You will be asked to enter the serial 
number in order to process your call .

MTD PRODUCTS INC

CLEVELAND, OHIO  44136

Copy the model number here:

Copy the serial number here:

(Model Number)

(Serial Number)

For more details about your unit, visit our website at www.mtdproducts.com 


Summary of Contents for 430 Series

Page 1: ...h a spark arrester meeting applicable local or state laws if any If a spark arrester is used it should be maintained in effective working order by the operator In the State of California the above is required by law Section 4442 of the California Public Resources Code Other states may have similar laws Federal laws apply on federal lands A spark arrester for the muffler is available through your n...

Page 2: ...rized dealer You can locate the model number by standing at the operating position and looking down at the rear of the mower deck A sample model plate is explained below For future reference please copy the model number and the serial number of the equipment in the space below CALLING CUSTOMER SUPPORT If you have difficulty assembling this product or have any questions regarding the controls opera...

Page 3: ...en bystanders helpers and pets at least 75 feet from the mower while it is in operation Stop machine if anyone enters the area 6 Always wear safety glasses or safety goggles during operation and while performing an adjustment or repair to protect your eyes Thrown objects which ricochet can cause serious injury to the eyes 7 Wear sturdy rough soled work shoes and close fitting slacks and shirts Shi...

Page 4: ...er 5 Keep children away from hot or running engines They can suffer burns from a hot muffler 6 Never allow children under 14 years old to operate a power mower Children 14 years old and over should read and understand the operation instructions and safety rules in this manual and should be trained and supervised by a parent Service Safe Handling Of Gasoline 1 To avoid personal injury or property d...

Page 5: ...ting and operating the mower 8 Never attempt to make a wheel or cutting height adjustment while the engine is running 9 Grass catcher components discharge cover and trail shield are subject to wear and damage which could expose moving parts or allow objects to be thrown For safety protection frequently check components and replace immediately with original equipment manufacturer s O E M parts only...

Page 6: ... DETERMINE SLOPES WHERE YOU MAY NOT OPERATE SAFELY Do not mow on inclines with a slope in excess of 15 degrees a rise of approximately 2 1 2 feet every 10 feet A riding mower could overturn and cause serious injury If operating a walk behind mower on such a slope it is extremely difficult to maintain your footing and you could slip resulting in serious injury Operate RIDING mowers up and down slop...

Page 7: ...ur mower NOTE Reference to right or left hand side of the mower is observed from the operating position Setting Up Your Lawn Mower Remove any packing material which may be between the upper and lower handles for shipping purposes Pull up and back on the upper handle to raise the handle into the operating position Make certain the lower handle is seated securely into the handle mounting brackets Ti...

Page 8: ...er top of bag attach from the outside of bag Center top of bag attaches from the inside of bag Figure 5 Hardtop Grass Bag Parts for Hardtop Grass Bag 1 Front Frame 2 Rear Frame packed inside hardtop cover 3 Bag 4 Hardtop Cover 5 Mounting Bracket 6 Phillips Screw 7 Hex Lock Nut Figure 6 Assemble hard top grass bag as follows Insert one end of the rear frame into the slit in the cloth channel on the...

Page 9: ...o remove the mulching baffle lift the rear discharge door on the mower Remove the mulching baffle See Figure 11 Figure 10 IMPORTANT Make sure cables are routed to the outside of the handle so they are not in the way when attaching the grass catcher Lift the rear discharge door on the mower Place the hooks on the grass catcher into the slots in the handle bracket assemblies See Figure 11 Release th...

Page 10: ...lf with the location of various controls and adjustments WARNING The operation of any lawn mower can result in foreign objects being thrown into the eyes which can result in severe eye damage Always wear safety glasses or eye shields We recommend wide vision safety mask for over spectacles or standard safety glasses Figure 13 Hinge Pin Mulching Plug Hook Deflector Slide hooks under the two sides o...

Page 11: ...rass Remember to put all four levers at the same height to avoid uneven cut SECTION 5 OPERATING YOUR LAWN MOWER WARNING Keep hands and feet away from the chute area on cutting deck The blade will be rotating whenever the engine is running NOTE For shipping purposes your mower is set with the wheels in a low cutting height position For best results raise the cutting position until it is determined ...

Page 12: ... thoroughly inspect the mower for any damage and repair the damage before restarting and operating the mower Extensive vibration of the mower during operation is an indication of damage The unit should be promptly inspected and repaired Using the Mulcher For effective mulching do not cut wet grass because it tends to stick to the underside of the deck preventing proper mulching of grass clippings ...

Page 13: ...n replaced proceed as follows Note that engines with fixed throttle cannot be adjusted Three types of engines are illustrated in Figure 16 Follow the illustration that is applicable to your mower Figure 16 Remove the screw that secures the cable clamp Remove the cable clamp from the cable NOTE If you have a Tecumseh engine simply loosen the screw shown in Figure 16 so the cable will move freely be...

Page 14: ...ricate the pivot points on the blade control handle and the brake cable at least once a season with light oil The blade control must operate freely in both directions Rear Side Discharge Doors The torsion springs and pivot points should be lubricated periodically with light oil to prevent any rust or binding Door must work freely Wheels The wheels require no lubrication However if the wheels are r...

Page 15: ...holes of the blade and insert the hex bolt Tighten the hex bolt to the torque listed in the Blade Mounting Torque section below Blade Mounting Torque Center Bolt 450 in lbs min 600 in lbs max IMPORTANT To ensure safe operation all nuts and bolts must be checked periodically for correct tightness Deck Care NOTE We do not recommend the use of pressure washers or garden hose to clean your unit These ...

Page 16: ...rrect engine storage instructions Coat mower s cutting blade with chassis grease to prevent rusting Store mower in a dry clean area Do not store next to corrosive materials such as fertilizer NOTE When storing any type of power equipment in an unventilated or metal storage shed care should be taken to rust proof the equipment Using a light oil or silicone coat the equipment especially cables and a...

Page 17: ...tank with clean fresh gasoline 4 Refer to the engine manual packed with your unit Engine overheats 1 Engine oil level low 2 Dirty aircleaner 3 Air flow restricted 4 Carburetor not adjusted properly 1 Fill crankcase with proper oil 2 Refer to the engine manual packed with your unit 3 Stop engine and disconnect spark plug wire Remove blower housing and clean 4 Refer to the engine manual Occasional s...

Page 18: ...1 16 61 15 70 18 69 3 2 68 19 19 4 6 4 31 50 48 47 44 45 79 64 56 20 55 63 36 34 33 32 40 39 57 59 59 20 46 46 59 45 44 43 41 42 59 59 23 66 67 58 30 51 53 62 65 81 49 22 72 21 14 13 12 71 52 54 39 40 29 A A 76 79 45 80 46 76 Hardware for wheel 734 1978 77 ...

Page 19: ...47 720 0190 Spring Lever Knob 48 732 0417A Rear Spring Lever 49 14578 Height Adj Assy Comp RH N I 14579 Height Adj Assy Comp LH 50 14765 Pivot Bar R H N I 14766 Pivot Bar L H 51 782 5002 Front Baffle 52 710 0654A Hex L Wash Scr 3 8 16 x 1 Lg 53 782 5003 Rear Baffle 54 710 1017 Torx Mach AB Tap Scr 1 4 x 62 55 710 0896 HexIndWash Scr 1 4 14 625 56 682 0516A Handle Brkt Ass y RH 57 682 0515A Handle ...

Page 20: ... Hardware 710 1256 Screw Part No 731 1402A 731 1694 731 1695 731 1934A Color Yellow Black Silver Charcoal Hardware 7510042823 Part No 7510143208 Color Black Hardware 7510042823 Part No 731 1586B 731 1612A Color Black Red Hardware 710 1274 Screw Part No 731 1585B Color Black Part No 7511681311 7511681911 7511682011 Color Black Red Gray Hardware 710 1256 Screw Part No 751B281451 Color Gray Hardware ...

Page 21: ...y on these items b Log splitter pumps valves and cylinders have a sepa rate one year warranty c Routine maintenance items such as lubricants filters blade sharpening and tune ups or adjustments such as brake adjustments clutch adjustments or deck adjustments and normal deterioration of the exterior finish due to use or exposure d MTD does not extend any warranty for products sold or exported outsi...

Reviews: