background image

11

S

ection

 5 — o

peration

Using the Log Splitter

NOTE: 

Always operate on level ground, otherwise fluid may be 

forced out through the air vent hole.
1. 

Block the front and back of both wheels.

2. 

Place the log against the splitting wedge. Only split wood 

in the direction of the grain.

3. 

Stabilize the log — if needed — with your left hand on 

the side of the log only. Never place a hand on the end 

between the log and the ram.

NOTE: 

Only one adult should stabilize the log and operate 

the hydraulic valve control so that the operator has full 

control over the log and the ram.

4. 

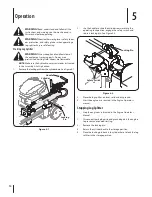
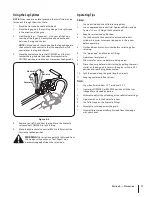
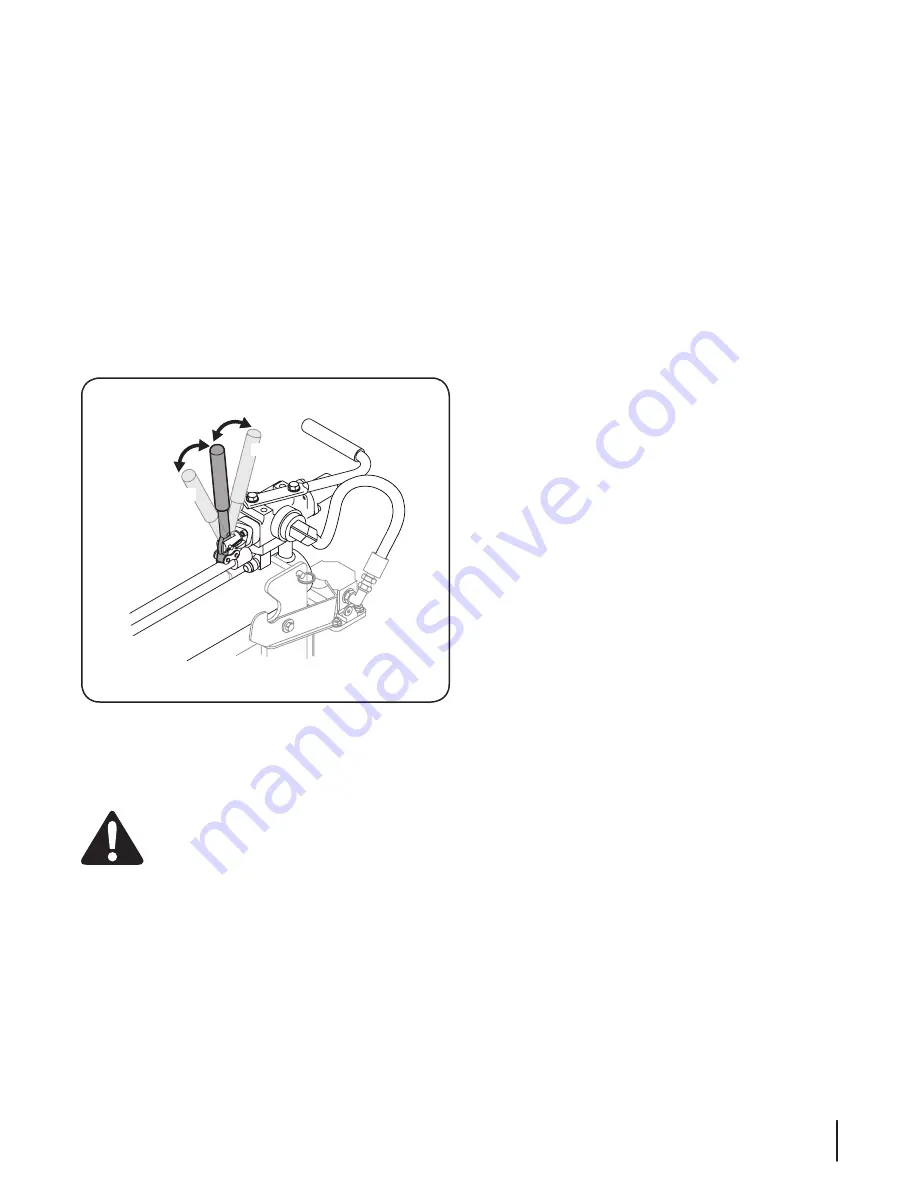
Move the hydraulic valve control FORWARD until the ram 

touches the log. Release the hydraulic valve control to 

NEUTRAL position to stop the ram movement. See Figure 5-3.

Forward

Neutral

Reverse

Figure 5-3

5. 

Remove your left hand from the log. Move the hydraulic 

valve control FORWARD to split the log.

6. 

Move the hydraulic valve control BACK to fully retract the 

ram to the locked position.

WARNING! 

Never remove partially split wood from 

the wedge with your hands. Your fingers may 

become trapped between the split wood.

Operating Tips

Always:

1. 

Use clean fluid and check fluid level regularly.

2. 

Use an approved hydraulic fluid. Approved fluids include 

Dexron® III, or a 10 Weight AW hydraulic oil. 

3. 

Keep hoses clear and unblocked.

4. 

Use the hydraulic valve control to extend and retract 

cylinder 4-6 cycles to remove trapped air in the system 

before operating.

5. 

Flush and clean hydraulic system before restarting after 

servicing.

6. 

Use “pipe dope” on all hydraulic fittings. 

7. 

Operate on level ground.

8. 

Allow time for warm-up before splitting wood.

9. 

Prime the pump before initial start-up by pulling the recoil 

starter on the engine 4-6 times with engine switch in OFF 

position and spark plug disconnected.

10.  Split the wood along the grain (lengthwise) only.
11.  Keep log centered in front of ram.

Never:

1. 

Use when fluid is below 20° F or above 150° F.

2. 

Operate in FORWARD or REVERSE position with the ram 

stopped for extended an period. 

3. 

Attempt to adjust the unloading or the relief valve settings.

4. 

Operate with air in the hydraulic system.

5. 

Use Teflon tape on the hydraulic fittings.

6. 

Attempt to cut wood across the grain.

7. 

Attempt to remove partially split wood from the wedge 

with your hands.

Summary of Contents for compact log splitter

Page 1: ...on Maintenance Service Troubleshooting Warranty WARNING READ AND FOLLOW ALL SAFETY RULES AND INSTRUCTIONS IN THIS MANUAL BEFORE ATTEMPTING TO OPERATE THIS MACHINE FAILURE TO COMPLY WITH THESE INSTRUCT...

Page 2: ...information available at the time of printing Review this manual frequently to familiarize yourself with the machine its features and operation Please be aware that this Operator s Manual may cover a...

Page 3: ...m components d Do not adjust the pressure settings of the pump or valve 10 Leaks can be detected by passing cardboard or wood while wearing protective gloves and safety glasses over the suspected area...

Page 4: ...clothes dryer or other gas appliances j Allow machine to cool at least five 5 minutes before storing Operation 1 Before starting this machine review the Safety Instructions Failure to follow these ru...

Page 5: ...e Consumer Products Safety Commission CPSC and the U S Environmental Protection Agency EPA this product has an Average Useful Life of seven 7 years or 130 hours of operation At the end of the Average...

Page 6: ...time The adult who loads and holds log must be the one who operates control handle WARNING PRESSURIZED FLUID Never check for hose leaks with your hands High pressure fluid can escape through a pin ho...

Page 7: ...x Oil Plug Figure 3 1 2 Tilt the log splitter back and add 1 5 gallons of hydraulic fluid Dexron III or 10 weight AW hydraulic oil 3 Replace and tighten the oil plug 4 Lower the machine to level groun...

Page 8: ...pin from the cylinder base See Figure 3 4 Handle Cylinder Locking Pin Figure 3 4 11 Use the handle to slide the cylinder back to lock in place 12 Reinstall the pin 13 Lubricate the beam area where the...

Page 9: ...der into operating position Air Vent The air vent is located on the rear of the wedge and is used to help vent air out of the hydraulic fluid reservoir To prevent fluid from escaping out of this hole...

Page 10: ...in from the cylinder base See Figure 5 1 Handle Cylinder Locking Pin Figure 5 1 2 Use the handle to slide the cylinder rearward into the operating lock position engage the safety switch and reinsert l...

Page 11: ...Your fingers may become trapped between the split wood Operating Tips Always 1 Use clean fluid and check fluid level regularly 2 Use an approved hydraulic fluid Approved fluids include Dexron III or...

Page 12: ...dryers stoves electric motors etc 1 Clean the log splitter thoroughly NOTE Using a pressure washer or garden hose to clean your machine is not recommended They may cause damage to bearings or the engi...

Page 13: ...it to the frame See Figure 7 1 Self Tapping Screws Self Tapping Screws Belt Cover Figure 7 1 5 Chock both wheels front and rear and have your helper grasp the front of the log splitter and carefully t...

Page 14: ...etracting 1 Gear sections damaged 2 Excessive pump inlet vacuum 3 Slow engine speed 4 Damaged relief valve 5 Incorrect oil level 6 Contaminated oil 7 Directional valve leaking internally 8 Internally...

Page 15: ...itter Hose 727 04156 Return Hose 727 04157 Inlet Hose 726 04079 Hose Clamp 734 1781 Wheel 8 x 1 75 720 04088 Grip 625 Phone 800 800 7310 to order replacement parts or a complete Parts Manual have your...

Page 16: ...ch as Blades Bump Knobs Outer Spools Cutting Line Inner Reels Starter Pulley Starter Ropes Drive Belts Saw Blades Guide Bars Cultivator Tines Spark Plugs Carburettor Adjustments and Filters which can...

Reviews: