English
Operating manual for snow thrower
8
Set the direction and
distance of throw
Fig. 8
oáëâ=çÑ=áåàìêó
aç=åçí=ëÉí=íÜÉ=Ñä~é=ENF=çÑ=íÜÉ=íÜêçïJçìí=
ÅÜìíÉ=EOF=áå=íÜÉ=ÇáêÉÅíáçå=çÑ=éÉçéäÉI=
~åáã~äëI=ïáåÇçïëI=Å~êë=~åÇ=ÇççêëK
Set the direction of throw
Put the throw-out chute (2) in
the desired direction by rotating
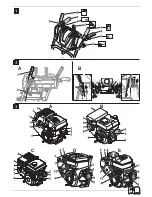
the handle (Fig. 1, Pos. 7)
Set the throw distance
The steeper the angle of the flap (1)
is set, the higher and further the
snow will be ejected.
Press lever (Fig. 1, Pos. 5)
forwards to move the flap (1)
higher and vice versa.
Working with the snow-
clearing machine
Fig. 1
Adjust throw-out chute (see
“Set the direction and distance
of throw and distance of throw”).
Start the engine (see “Starting
the engine”).
With the coupling levers (1 and 2)
released, choose a forwards gear
with shift lever (6).
Press coupling lever for worm
drive (1) and hold it down; worm
and throw turbine are driven.
Press coupling lever for the drive
system (2) and hold it down;
the machine moves forwards
and clears the snow.
As long as this lever is pressed
(optional), the clutch lever for the
worm drive (1) remains locked and
can be released.
If you want to change gear, first
release the coupling lever for the
drive system (2) and then change
gear with the shift lever (6).
Note
Depending on the model, the unit is
fitted with freewheel levers (3 and 4).
Using these enables the machine
to be steered more easily:
– to the right: pull on the right free-
wheel lever (4),
– to the left: pull on the left free-
wheel lever (3).
Working on slopes
oáëâ=çÑ=áåàìêó=Ñêçã=ã~ÅÜáåÉ=
íáééáåÖ=çîÉê
tçêâ=ëäçïäó=~åÇ=Å~êÉÑìääóI=ÉëéÉÅá~ääó=
ïÜÉå=óçì=ÅÜ~åÖÉ=ÇáêÉÅíáçåK
dìáÇÉ=íÜÉ=ã~ÅÜáåÉ=ìé=çê=Ççïå=
íÜÉ=ëäçéÉI=åçí=ÅêçëëïáëÉ=íç=áíK
t~íÅÜ=çìí=Ñçê=çÄëí~ÅäÉëI=Çç=åçí=
ïçêâ=åÉ~ê=áåÅäáåÉëK
aç=åçí=ìëÉ=íÜÉ=ã~ÅÜáåÉ=çå=ëäçéÉë=
ïáíÜ=~=Öê~ÇáÉåí=ÖêÉ~íÉê=íÜ~å=OM=BK
Tips on clearing snow
Clear snow immediately after
it has stopped snowing; later on,
the underneath layer will ice up
and will make clearing the snow
more difficult.
If at all possible, clear snow in the
direction of the wind.
Clear the snow in such a way
that the tracks you have cleared
overlap slightly.
Eliminate any blockages
in the worm or the throw-
out chute
oáëâ=çÑ=áåàìêó
_ÉÑçêÉ=ÇçáåÖ=~åó=ïçêâ=çå=íÜáë=
ã~ÅÜáåÉ
Ó qìêå=çÑÑ=íÜÉ=ÉåÖáåÉK
Ó t~áí=ìåíáä=~ää=ãçîáåÖ=é~êíë=Ü~îÉ=
ÅçãÉ=íç=~=ëí~åÇëíáääX=íÜÉ=ÉåÖáåÉ=
ãìëí=Ü~îÉ=ÅççäÉÇ=ÇçïåK
Ó oÉãçîÉ=íÜÉ=áÖåáíáçå=âÉó=~åÇ=íÜÉ=
ëé~êâJéäìÖ=ÅçååÉÅíçêK
Remove the blockage with the clea-
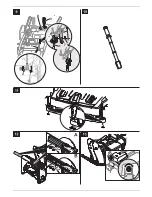
ning tool (Fig. 10 – enclosed with
the unit depending on the model)
or with a shovel.
Heatable handles
(optional depending on
model)
Fig. 9
Switch (8) on the
dashboard:
– /ON = switched on
– /OFF = switched off
At the end of work move the switch
to OFF.
kçíÉW
eÉ~í~ÄäÉ=Ü~åÇäÉë=Çç=åçí=êÉéä~ÅÉ=
ÖäçîÉëK
Light (optional depending
on model)
– The headlight is on when
the engine is running.
“Drift cutters” (optional
depending on model).
Fig. 12
– Facilitates working in extremely
deep snow.
Snow chains (optional)
In extreme weather conditions,
snow chains can be obtained from
specialist dealers and used on the
machine.
Transportation
Driving
To manoeuvre or get across short
distances.
Start the machine.
Select a forwards or reverse gear.
Press the drive clutch lever for the
wheel drive and hold in position.
Move the machine carefully.
Transporting the
machine without it
operating from its own
power
oáëâ=çÑ=áåàìêó
_ÉÑçêÉ=íê~åëéçêíáåÖ=íÜÉ=ìåáí
Ó qìêå=çÑÑ=íÜÉ=ÉåÖáåÉK
Ó t~áí=ìåíáä=~ää=ãçîáåÖ=é~êíë=Ü~îÉ=
ÅçãÉ=íç=~=ëí~åÇëíáääX=íÜÉ=ÉåÖáåÉ=
ãìëí=Ü~îÉ=ÅççäÉÇ=ÇçïåK
Ó oÉãçîÉ=íÜÉ=áÖåáíáçå=âÉó=~åÇ=
íÜÉ=ëé~êâJéäìÖ=ÅçååÉÅíçêK
!
!
!
!
Summary of Contents for Cub Cadet E 22
Page 1: ...769 20912B MTD Products Aktiengesellschaft Saarbrücken Germany E 22 ...
Page 2: ......
Page 3: ...E D C A B A B 1 2 A A ...
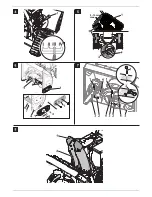
Page 4: ...9 10mm max ...
Page 5: ...3 8 2 6 1 7 5 4 1 ...
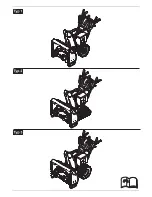
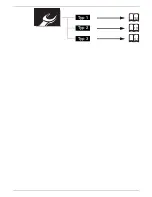
Page 6: ...Typ 1 Typ 2 Typ 3 109 111 113 ...
Page 7: ...4 13 24 34 44 54 63 72 81 90 99 ...
Page 113: ...1 66 Typ 5 Typ 1 109 ...
Page 114: ...A B Typ 5 Typ 1 110 ...
Page 115: ...1 66 Typ 5 Typ 2 111 ...
Page 116: ...A B Typ 5 Typ 2 112 ...
Page 117: ...1 66 Typ 3 113 ...
Page 118: ...A B Typ 5 Typ 3 114 ...


