O-Gauge Installation
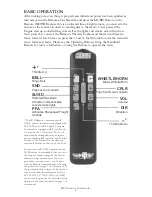
The DCS Remote Commander set includes a handheld Remote and Receiver. You
will need to supply your own power source by using one of the following MTH AC
Power Supplies from one of your MTH RTR train sets, or the separate sale Z-1000
AC power supply (Item No. 40-1000A).
• Z-500 AC Power Supply • Z-750 AC Power Supply • Z-1000 AC Power Supply
To install the DCS Remote Commander and power supply please use the following
instructions:
1. Ensure the power supply is unplugged.
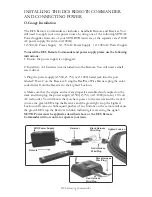
2. Install two AA batteries (not included) into the Remote. You will need a small
screw driver.
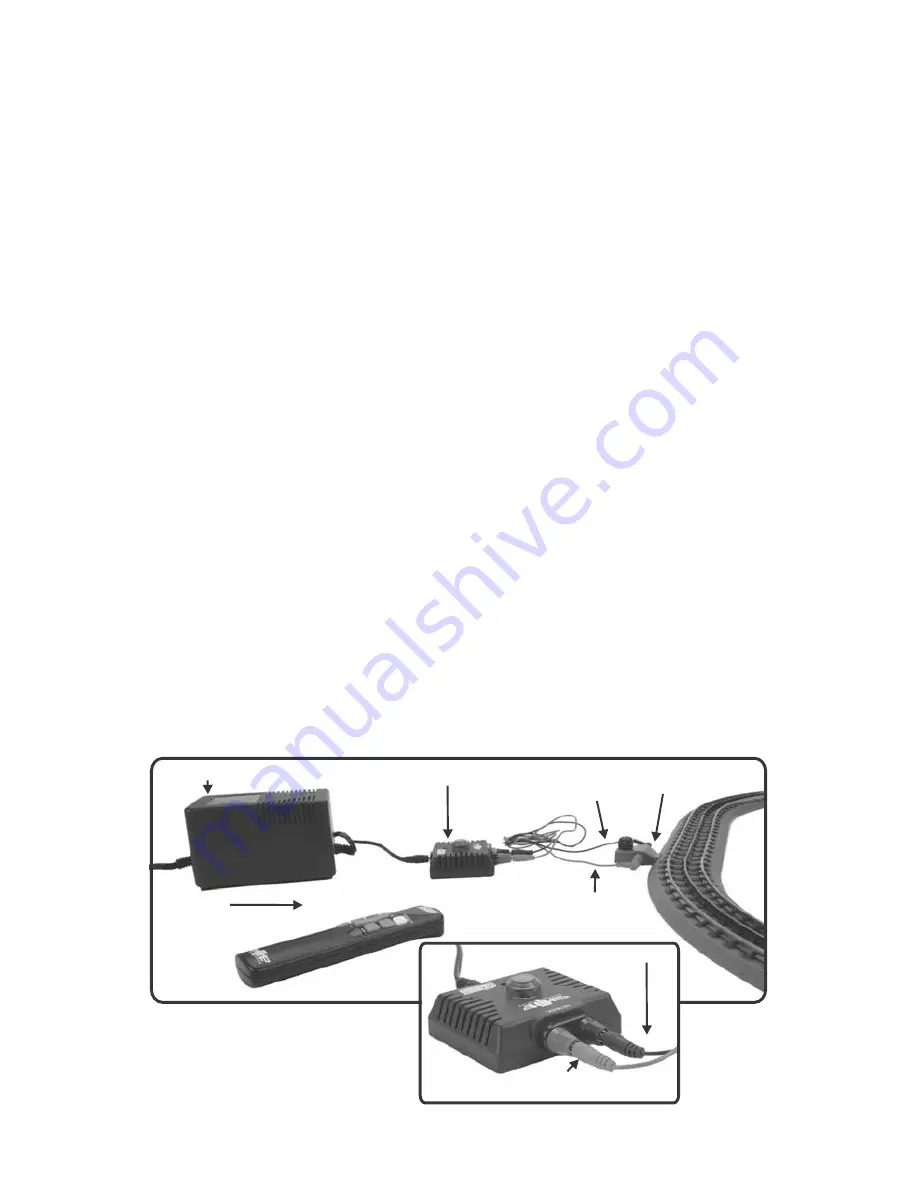
3. Plug the power supply (Z-500, Z-750, or Z-1000) barrel jack into the port
labeled “Power” on the Receiver. Using the RealTrax Wire Harness plug the color-
coded wires from the Receiver to the Lighted Lock-on.
4. Make sure that the engine and cars are properly assembled and coupled on the
track and then plug the power supply (Z-500, Z-750, or Z-1000) into any 110 volt
AC wall outlet. You will know that you have power to the receiver and the track if
you see the green LED atop the Receiver and the green light atop the Lighted
Lock-on will come on. Subsequent pushes of any buttons on the remote will cause
the green LED atop the Receiver to blink, indicating it is receiving the signal.
NOTE: Power must be applied as described above or the DCS Remote
Commander will not control or operate your train.
Red Harness
Wire/Plug
Black Harness
Wire/Plug
Lighted Lock-on
Receiver
MTH Power Supply
Remote
Red Harness
Wire/Plug
Black Harness
Wire/Plug
DCS Remote Commander
3
INSTALLING THE DCS REMOTE COMMANDER
AND CONNECTING POWER


