MUELLER
®
Shur Stop
TM
Unit 812 PE Line Stopping System
Operating Instructions
9
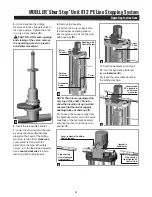
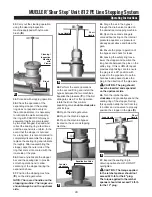
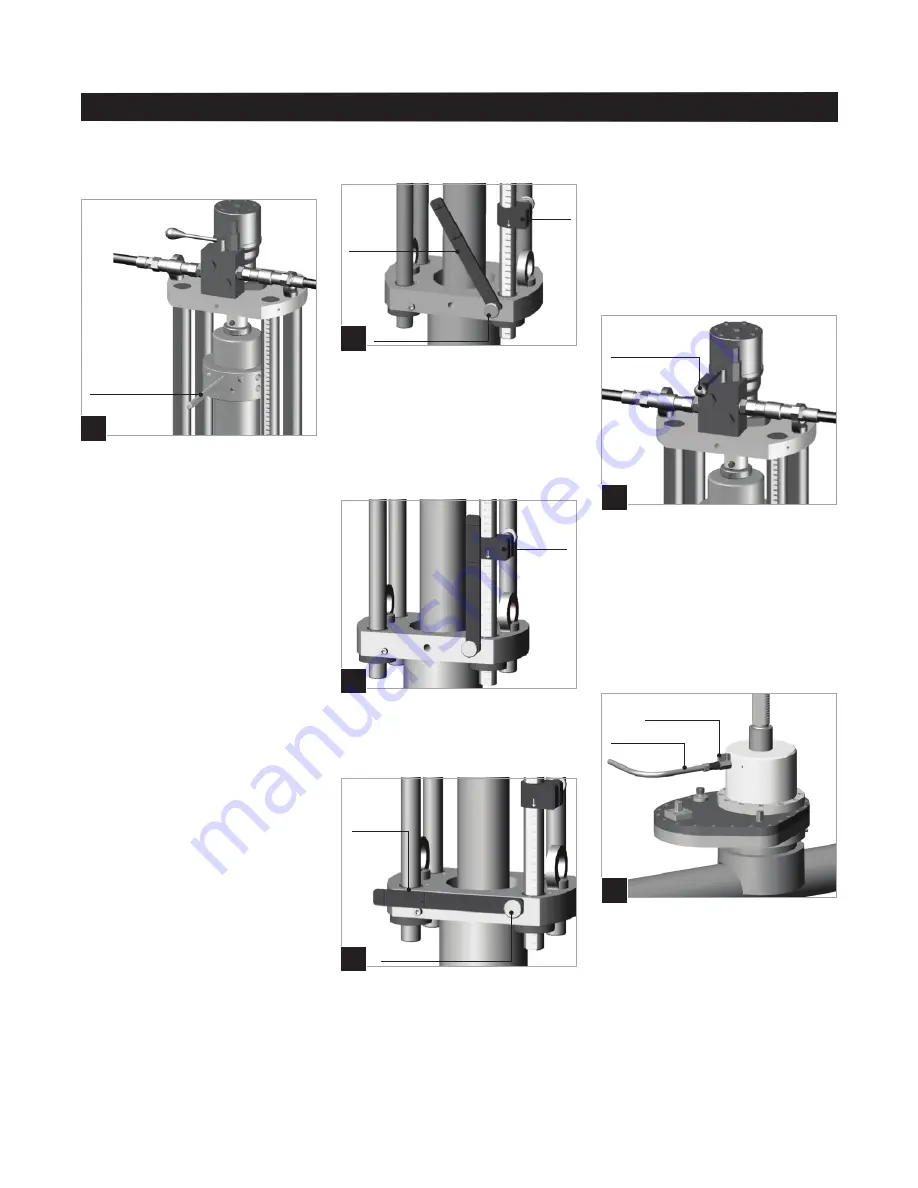
14. Use the removable handle,
turning it clockwise to begin drilling
(
h.
)
15. When the removable handle
comes into contact with the guiding
column insert the second handle
into the previous openings and
simultaneously slide out the first one.
Continue in this way until the drilling
is complete.
16. When the cutter shell makes
contact with the pipe, turn off the
hydraulic operator and stop drilling.
17. Loosen the knob on the
graduated scale.
18. Turn the graduated scale 90°
clockwise.
19. Then turn the knob on the
graduated scale until it is tight (
i.
)
20. Loosen the collar using the knob.
21. Move the collar down to bring
the lower part (indicated by the tip
of the arrow) in correspondence to
the line below the diameter of the
pipe on which the operation is being
carried out (
J.
).
22. Loosen the knob on the
graduated scale, turn the graduated
scale 90° counter-clockwise and
then tighten the knob (
K.
).
J.
Collar
23. Open the oil flow and begin
drilling again, until the pipe coupon
detaches. The location of the collar
indicates the farthest travel the
machine can be operated safely,
without contacting the bottom of the
pipe.
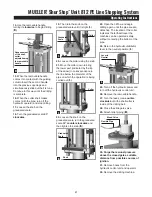
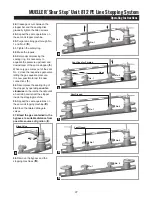
24. Return the hydraulic distributor
lever to the neutral position (
L.
)
25. Turn off the hydraulic power and
turn off the hydraulic control unit.
26. Remove the removable handle.
27. Turn the feed screw counter-
clockwise until the shell cutter is
inside of the drilling bell.
28. Close the slide gate valve.
29. Attach relief piping (
M.
).
30. Purge the residual pressure
above the closed gate a suitable
distance from possible sources of
ignition.
31. Remove hoses from the
hydraulic control unit and operator.
32. Remove the drilling machine.
M.
Flexible Pipe
Bleed Valve
L.
Lever in
Neutral
K.
Graduated
Scale
Knob
i.
Collar
Graduated
Scale
Knob
h.
Advancement
of the shell
cutter,
adjusted using
the removable
handle


