background image

10

MAINTENANCE AND LUBRICATION

HG561 FABRICATED SLIDE GATE

Maintenance

General Information

Occasional adjustment and 
lubrication of Hydro Gate slide gate 
components will be required. The 
frequency will depend upon how 
often the gate is used, location, 
and operating conditions. Periodic 
inspection, adjusting, and cleaning 
are recommended as conditions at 
the site permit.

Lift and Stem Maintenance

Maintenance of the threaded 
operating portion of the gate stem 
is critical and should be performed 
as frequently as the operating 
environment requires. 

IMPORTANT: Failure to maintain 
stem thread lubrication causes 
operating difficulties and 
premature failure of the lift nut 
and stem threads.

Recommended inspection 
frequency and procedures are 
listed on the maintenance 
schedule:
• Initial inspection at the time of 
installation and again at the date 
of commissioning.
A “cycle” of gate operation is 
operation of the gate slide from 
closed to open to closed position. 
At each inspection, verify the 
following items:
• Inspect the stem threads and 
lift nut threads for wear and verify 
the trueness and dimension of the 
thread form. See wear checking 
procedure.
• Check the amount and condition 
(diary and day) of lubricant 
remaining and add if necessary.

• Relubricate if necessary – 
threads should be cleaned and 
relubricated with fresh lubricant.
More severe conditions or 
operating modes require a slightly 
different schedule of inspection 
and service. For example: 
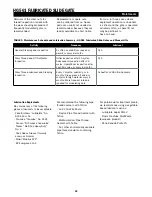
Modulating gates with electric 
motor operators may make position 
changes several times a day but 
seldom go full stroke. There is a 
portion of the stem that gets a 
lot of use. These stems should 
be inspected at least weekly. The 
lubricant on the stem threads 
should be monitored closely. 
As the lubricant is depleted and 
becomes contaminated, it should 
be cleaned and replenished.
When excess dried grease or other 
foreign material is carried into the 
threads of the lift nut, extremely 
hard operation will result. If serious 
binding occurs, the only way to 
correct it is to remove the threaded 
stem from the lift nut and clean 
the thread interior. If this foreign 
material is not cleaned from the 
interior threads of the lift nut, 
heavy pulls on the handcrank or 
seizure will result.
Stem threads may be cleaned with 
solvent, rags, and brushes. Run 
the gate open. While in the process 
of opening (running the stem out 
above the lift nut), clean off the 
old grease. Inspect the threads 
for roughness. If the threads 
are rough, they may be filed and 
polished. Be careful to keep filings 
and grit out of the lift nut. Rough 
stem threads accelerate the wear 
of the lift nut threads.
Relubricate stem threads by 
brushing or smearing grease 

onto/into the threads as the 
gate is closing (the stem is going 
into the lift). This puts fresh 
lubricant into the lift nut and 
carries out the old contaminated 
grease. It is recommended that 
the contaminated grease be 
cleaned from the stem as it exits 
underneath the lift where the 
stem is accessible from below. 
Replenish grease on the underside 
stem.
The recommended stem thread 
lubricant is Schaeffer’s 238 ultra-
supreme.
Recommended for potable water 
is a vegetable-based lubricant, 
Shaeffer’s (XXXXXX).
Lifts may be furnished with a 
stem lubricator Zerk Fitting which 
is located in the “stem cover 
adapter” to facilitate lubrication 
of stem threads with pressure 
greasing equipment. To be 
effective, lubricant should be 
injected while the stem is moving 
through the lift.
Manual crank lifts have sealed 
thrust bearing and do not require 
lubrication.
Exercise of infrequently operated 
lifts and gates is recommended. 
A Semi-annual (every 6 months) 
exercise will ensure the gate 
is operable when needed and 
the lubrication condition will be 
maintained.

Summary of Contents for HYDRO GATE HG561

Page 1: ...ion is critical to satisfactory operation We assume no liability expressed or implied for interpretation of the contents of this manual If you have any questions concerning the interpretation of the contents of this manual or installation procedures in general you should contact the Hydro Gate facility in Colorado We expressly disclaim all liability expressed or implied for faulty installation of ...

Page 2: ...r area Special Tools Special tools are not required to operate and or maintain the heavy items during placement of equipment Wear proper personal protective equipment PPE and clothing when working on or around gates e g hard hats heavy boots safety glasses and breathing apparatus if necessary NEVER place bodily obstructions in the path of moving parts When operating gates and accessories stand cle...

Page 3: ... with some twist warp non flat conditions The larger the gate the more out of plane conditions can be tolerated Consult factory for extreme limits Mounting the Gate on Concrete Surface with Adhesive Type Stud Anchors 1 Use only adhesive type or epoxy grouted studs Mechanical wedge studs are not recommended and gate performance cannot be guaranteed with wedge type studs We usually furnish the all t...

Page 4: ...nuts are tight and hold the frame stable Wall Thimble Installation 1 Place the wall thimble in the correct position in the forms and block it in this position The top centerline of the thimble is stamped on its flange face The bottom centerline is also marked 2 Plumb the front face of the thimble using the marks indicating top and bottom centerline This face should be plumbed with respect to final...

Page 5: ...tening is not required 7 Check the squeeze out of mastic on the inside and outside of the flange and clean off excess No squeeze out indicates insufficient mastic and likelihood of future leak 8 Allow sufficient cure time of mastic before applying water pressure to the gate see manufacturer instructions Installation Of Flush Bottom Closure Gates Gates that are to be installed with bottom frame mem...

Page 6: ...Double check the installation drawings to ensure that the stem guide collars are in the correct locations Join together with splices as provided Fig F Note Insert all bolts or keys in each stem splice immediately after sections are installed and aligned to prevent one section disconnecting from another when the gate is operated 9 Immediately before lowering the lift over the threaded portion of th...

Page 7: ...in tension Check the stem to be certain it is straight Tighten the nuts on the studs through the stem guide brackets center the stem guide collars around the stem and tighten the assembly bolts holding the collars in position on the brackets 8 Move the gate to its fully opened position and check the position of the stems If the stem is being deflected by the collars a stem alignment problem exists...

Page 8: ... lubricate the stem adjust the stop nuts etc as described in the preceding steps 1 9 in the section entitled Lift Installation and Adjustment of Stem Guides for gates not self contained Gate Adjustment This gate is equipped with low friction polyethylene UHMWPE seats and guides The seats rest on a neoprene rubber pad for cushioned gasketing to the frame Sealing at the side is accomplished by pinch...

Page 9: ...ion opposite of the Open indicator until the stop nut on the stem is 1 8 to 1 16 from the top of the lift see installation instructions When the top of the stem is equal in height to the bottom zero height indicator the gate is considered to be FULL CLOSED and should not be closed further Should the gate or stop nut require adjustment refer to the appropriate section of the Installation Operation ...

Page 10: ...pleted and becomes contaminated it should be cleaned and replenished When excess dried grease or other foreign material is carried into the threads of the lift nut extremely hard operation will result If serious binding occurs the only way to correct it is to remove the threaded stem from the lift nut and clean the thread interior If this foreign material is not cleaned from the interior threads o...

Page 11: ...ailable pipe thread sealants containing Teflon from us In those cases where equipment operation or downtime is critical and the gate is operated extremely often a spare lift nut may be pertinent to have on hand For potable water treatment plants we recommends using a vegetable based lubricant such as Lubriplate Super FML 2 Rocol Foodlube Multi Paste European product Petro Canada Purity FG Activity...

Page 12: ...ch at the center then one corner or the other has been pulled back considerably from the plane To repair this faulty installation it is necessary to loosen bolts push the frame out as required and align it before tightening or regrouting Dirty Seating Faces Excess leakage can also be caused by foreign material on seating faces of the gate frame or slide Check for drops of paint cement runs on seat...

Page 13: ...ations the stem will be installed in the vertical position A carpenter s level can be used to verify that it is in vertical plane in both directions Check for binding through individual stem guides Check the pedestal to ensure it is vertical in both directions and the a flat and level base for the gate above 5 Wall thimbles may be stored similar to above They may be stored with machined flange fac...

Page 14: ... Stainless Steel 4 16 3 8 x 1 1 4 F H Screw Stainless Steel 7 6 10 8 1 14 15 16 7 3 13 2 11 4 12 9 5 SPARE PARTS How To Order Replacement Or Spare Parts Parts may be ordered from your local Hydro Gate representative or direct from us Please have the following information 1 Hydro Gate sales information found on the blue anodized tag located on the gate lift or pedestal 2 The item and or tag number ...

Page 15: ...ng 2 3 Keeper 1 4 ID Tag 1 5 Zerk Fitting 1 6 Pedestal 1 7 11 5 8 x 2 1 2 Hex Head Screw 2 8 5 8 Flat Washer 2 9 5 8 Lock Washer 2 10 11 5 8 Hex Nut 2 11 18 Ø 24 Ø or 30 Ø Handwheel 1 12 13 1 2 Hex Nut 1 13 13 1 2 x 1 1 2 Square Head Screw 1 14 Stop Nut 1 15 16 3 8 x 3 8 Set Screw 2 16 Stem Cover 1 17 Stem Cap Cover 1 18 3 8 Flat Washer 2 19 16 3 8 Hex Nut 2 20 3 8 Ø U Bolt 1 ...

Page 16: ...ght 2019 Mueller Water Products Inc All Rights Reserved All Rights Reserved The trademarks logos and service marks displayed in this document are the property of Mueller Water Products Inc its affiliates or other third parties Products above marked with a section symbol are subject to patents or patent applications For details visit www mwppat com These products are intended for use in potable wat...

Reviews: