12
Remote Control Unit
Notes on using the remote control
unit
<
Even if the remote control is used within its effec-
tive operation range (5 m/16'), the unit might not
respond to the remote if there are any obstacles
between them.
<
The remote control might not function if sunlight
or other bright light shines directly on the remote
sensor of the unit.
<
The remote control might function incorrectly if it
is operated near other products that generate infra-
red rays or if other remote control devices that use
infrared rays are operated near the unit. Likewise,
the other products might also function incorrectly.
Before using the remote control
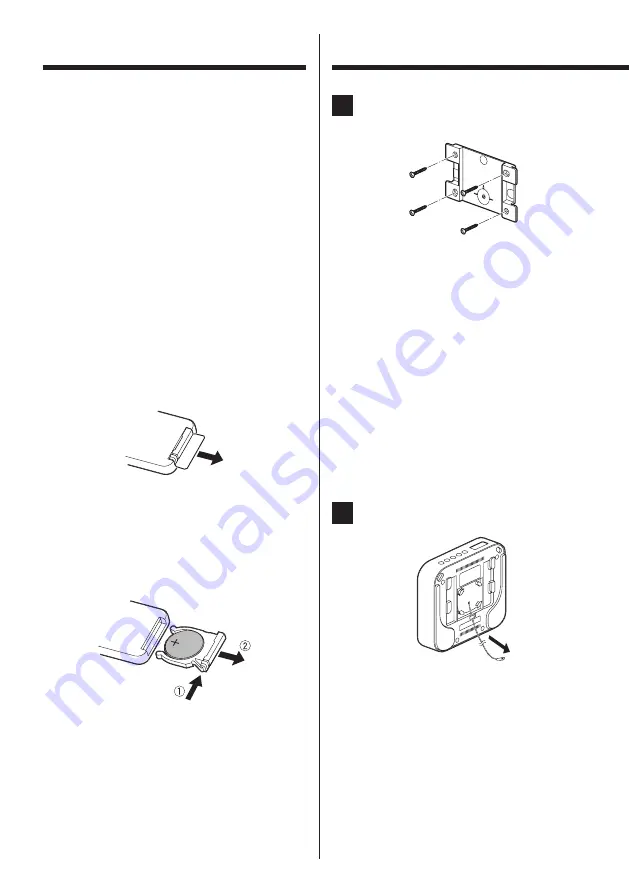
When you use the remote control for the first time,
pull out the insulation sheet from the rear.
Battery replacement
The battery has been installed in the remote control
unit when shipped from the factory.
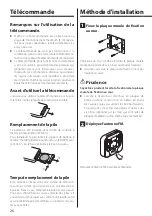
To replace the battery, pull out the battery tray from
the rear, put the lithium-ion battery (CR2025) in with
the “+” side facing up, and insert the tray again.
Battery replacement time
If the distance required between the remote control
unit and main unit decreases, or the remote control
unit's buttons don't work, the battery is exhausted. In
this case, replace the battery with a new one.
For information about the collection of batteries,
please contact your local municipality, your waste dis-
posal service or the place where you purchased them.
1
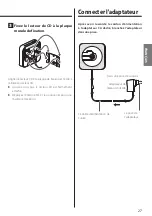
Attach the wall-fixing plate to the
wall.
Choose a sturdy wall, and install the wall-fixing plate
using the supplied screws or other fixings.
<
Make sure that the wall-fixing plate does not feel
shaky or loose.
Q
Caution
Be very careful when attaching the wall-fixing
plate to the wall.
<
When attaching to walls made of plasterboard or
concrete construction etc., please make sure that
you use proprietary fixings that are appropriate for
the wall. In particular, it is very hazardous to use
regular wood screws on walls that are made of
plasterboard or a similar type of material.
2
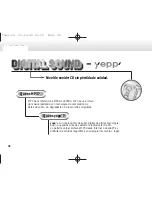
Extend the FM antenna.
Unwind the FM antenna on the rear, and extend it.
Installation Method


