background image


  INSTALLATION & OPERATING  

MANUAL 

                    FSFCA Universal Mount Fan Coil 
                             12,000-60,000 BTUH 


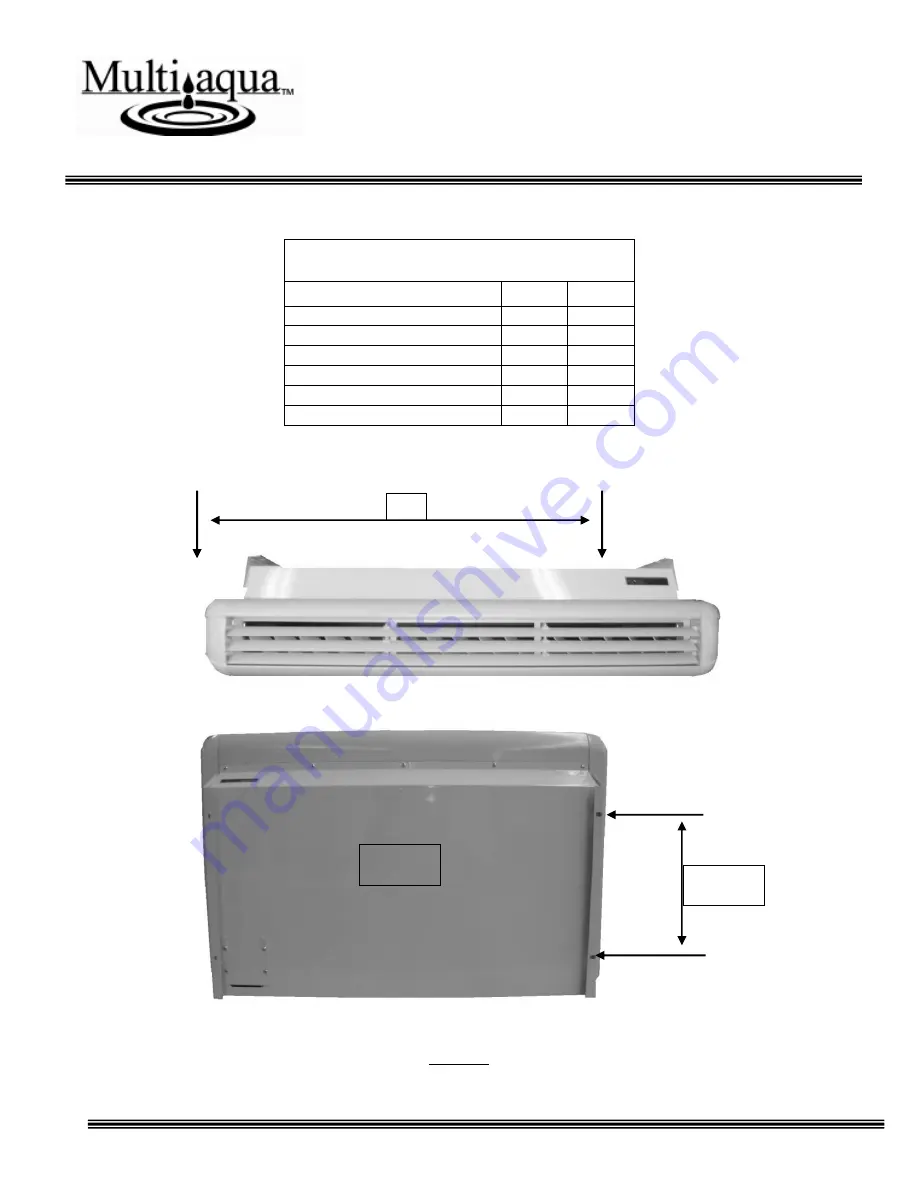
FSFCA  Mounting Bracket Dimensions 

(in.) 

Model Number 

FSFCA-04-1-U 

36.49 

13.00 

FSFCA-06-1-U 

36.49 

13.00 

FSFCA-08-1-U 

36.49 

13.00 

FSFCA-12-1-U 

48.30 

13.00 

FSFCA-16-1-U 

71.97 

13.00 

FSFCA-20-1-U 

71.97 

13.00 


Figure 2  

BACK 

Summary of Contents for FSFCA

Page 1: ...FSFCA Ductless Direct Expansion Fan Coil Rev 1 1 ...

Page 2: ...allation in accordance with national codes It is the installer s responsibility to install the product in accordance with national codes and or prevailing local codes and regulations Care must be taken to ensure the structural integrity of the supporting members clearances and provisions for servicing power supply coil connections and or condensate removal Before the installation ensure the struct...

Page 3: ...nt Fan Coil 12 000 60 000 BTUH FSFCA Mounting Bracket Dimensions in Model Number A B FSFCA 04 1 U 36 49 13 00 FSFCA 06 1 U 36 49 13 00 FSFCA 08 1 U 36 49 13 00 FSFCA 12 1 U 48 30 13 00 FSFCA 16 1 U 71 97 13 00 FSFCA 20 1 U 71 97 13 00 Figure 2 A B BACK ...

Page 4: ...the right hand side bottom and right side rear Figure 4 5 See next page for access hole dimensions Figures 4 and 5 3 Remove mounting brackets from both sides of unit Figure 6 4 Prepare mounting bolts for mounting unit under ceiling or on a wall at the distances provided in Figure 2 Page 3 5 Select a location that permits even air flow throughout the room 6 Select a location that has enough service...

Page 5: ...5 INSTALLATION OPERATING MANUAL FSFCA Universal Mount Fan Coil 12 000 60 000 BTUH Piping Locations ...

Page 6: ...n line with each other before tightening nut to allow concentric seating of tube onto flare nut as to prevent leakage Ensure the unit s flared connection is supported with a backup wrench when removing or tightening any flair nuts 10 If installing a TXV at the condenser ensure that the liquid line is properly insulated all the way to the evaporator 11 Connect the field drain line to the clear drai...

Reviews: