45
Chapter 5 - Client Setup
16
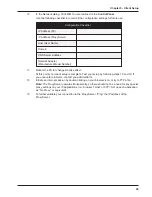
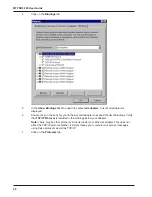
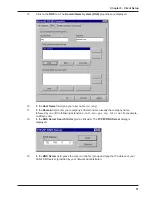
In the Network dialog, Click OK. You are returned to the Control Panel.
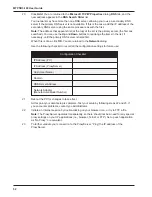
Use the following checklist to record all the configuration settings for future use:
IP Address (PC)
IP Address (ProxyServer)
Host (User Name)
Domain
DNS Server Address
Network Adapter
(Manufacturer/Model Number)
Configuration Checklist
. . .
. . .
. . .
17
Reboot the PC for changes to take effect.
At this point your client setup is complete. Test your setup by following steps 18 and 19. If
you encounter problems, contact you administrator.
18
Initiate an Internet session by double-clicking on your browser icon, or try to FTP a file.
Note: The ProxyServer operates transparently, so there should not be a need for any special
proxy settings on your IP applications (i.e., browser, Telnet, or FTP). Set up each application
as “No Proxy” or equivalent.
19
To further validate your connection to the ProxyServer, “Ping” the IP address of the
ProxyServer.
Summary of Contents for ProxyServer MTPSR3-100
Page 1: ...Internet Access for LAN Based Users Model MTPSR3 100 User Guide ...
Page 5: ...Chapter 1 Introduction and Description ...
Page 13: ...Chapter 2 Installation ...
Page 16: ...16 MTPSR3 100 User Guide ...
Page 17: ...Chapter 3 Software Loading and Configuration ...
Page 24: ...24 MTPSR3 100 User Guide ...
Page 25: ...Chapter 4 ProxyServer Software ...
Page 37: ...Chapter 5 Client Setup ...
Page 54: ...54 MTPSR3 100 User Guide ...
Page 55: ...Chapter 6 Warranty Service and Tech Support ...
Page 61: ...Appendixes ...
Page 67: ...Glossary of Terms ...


