Phone/IP Starter Config.
TalkAnytime Quick Start Instructions
32
Phone/IP Starter Configuration (continued)
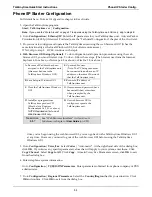
8. Go to
Configuration
|
Regional Parameters
. In the
Country Selection for Built-In Modem
field (drop-
down list), select the country that best fits your situation. (This may not be the same as your selection for
the
Country/Region
field. The selections in the
Country Selection for Built-In Modem
field entail more
detailed groupings of telephony parameters than do the
Country/Region
values.) Click
OK
.
9. Do you want the phone-call logs produced by the TalkAnytime to be sent out by email (to your
Administrator or someone else)?
If NO, skip to step 11.
If YES, continue with step 10.
10. Go to
Configuration
|
SMTP
.
SMTP lets you send phone-call log records to the TalkAnytime Administrator by email. Select
Enable
SMTP
.
You should have already obtained an email address for the TalkAnytime itself (this serves as the
origination email account for email logs that the TalkAnytime can email out automatically).
Enter this email address in the “Login Name” field.
Type the password for this email account. Click
OK
.
Enter the IP address of the email server where the TalkAnytime’s email account is located in the “Mail
Server IP Address” field.
Typically the email log reports are sent to the TalkAnytime Administrator but they can be sent to any
email address. Decide where you want the email logs sent and enter that email address in the “Recipient
Address” field.
Whenever email log messages are sent out, they must have a standard Subject line. Something like
“Phone Logs for TalkAnytime N” is useful. If you have more than one TalkAnytime unit in the building,
you’ll need a unique identifier for each one (select a useful name or number for “N”). In this “Subject”
field, enter a useful subject title for the log messages.
In the “Reply-To Address” field, enter the email address of your Administrator.
11. Go to
Configuration
|
Logs
.
Select “Enable Console Messages.”
To allow log reports by email (if desired), click
SMTP
. Click
OK
.
To do logging with a SysLog client program, click on “SysLog Server – Enable” in the
Logs
screen. To
implement this function, you must install a SysLog client program. For more info, see the “SysLog Server
Functions” section of the
Operation & Maintenance
chapter of the
User Guide
.
12. Go to
Save Setup
|
Save and Reboot
. Click OK. This will save the parameter values that you have just
entered.
The TalkAnytime unit’s “BOOT” LED will light up while the configuration file is being saved and loaded
into the TalkAnytime. Don’t do anything to the TalkAnytime until the “BOOT “LED is off (a loss of
power at this point could cause the TalkAnytime unit to lose the configuration settings you have made).
END OF PROCEDURE.
Summary of Contents for TalkAnytime TA2410
Page 6: ...6 Chapter 1 Overview ...
Page 20: ...20 Chapter 2 Quick Start Instructions ...
Page 48: ...48 Chapter 3 Mechanical Installation and Cabling ...
Page 56: ...56 Chapter 4 Software Installation ...
Page 65: ...65 Chapter 5 Technical Configuration ...
Page 116: ...Technical Configuration TalkAnytime User Guide 116 ...
Page 123: ...123 Chapter 6 Phonebook and URL Configuration ...
Page 143: ...143 ...
Page 144: ...144 Chapter 7 Operation and Maintenance ...
Page 205: ...205 Chapter 8 Warranty Service and Tech Support ...
Page 208: ...208 Chapter 9 Regulatory Information ...
Page 213: ...213 Appendix A Cable Pinouts ...
Page 217: ...217 Appendix B TCP UDP Port Assignments ...
Page 219: ...219 Appendix C Expansion Card Installation TA24 48 TA30 60 ...
Page 234: ......
Page 235: ...235 S000424A ...


