
2
g
f
1
PLEASE RETAIN THESE INSTRUCTIONS FOR FUTURE REFERENCE
IMPORTANT!
Please read these instructions fully before you use your steriliser.
WARNING! STRANGULATION HAZARD!
Keep out of reach of children. Do not use with extension cord.
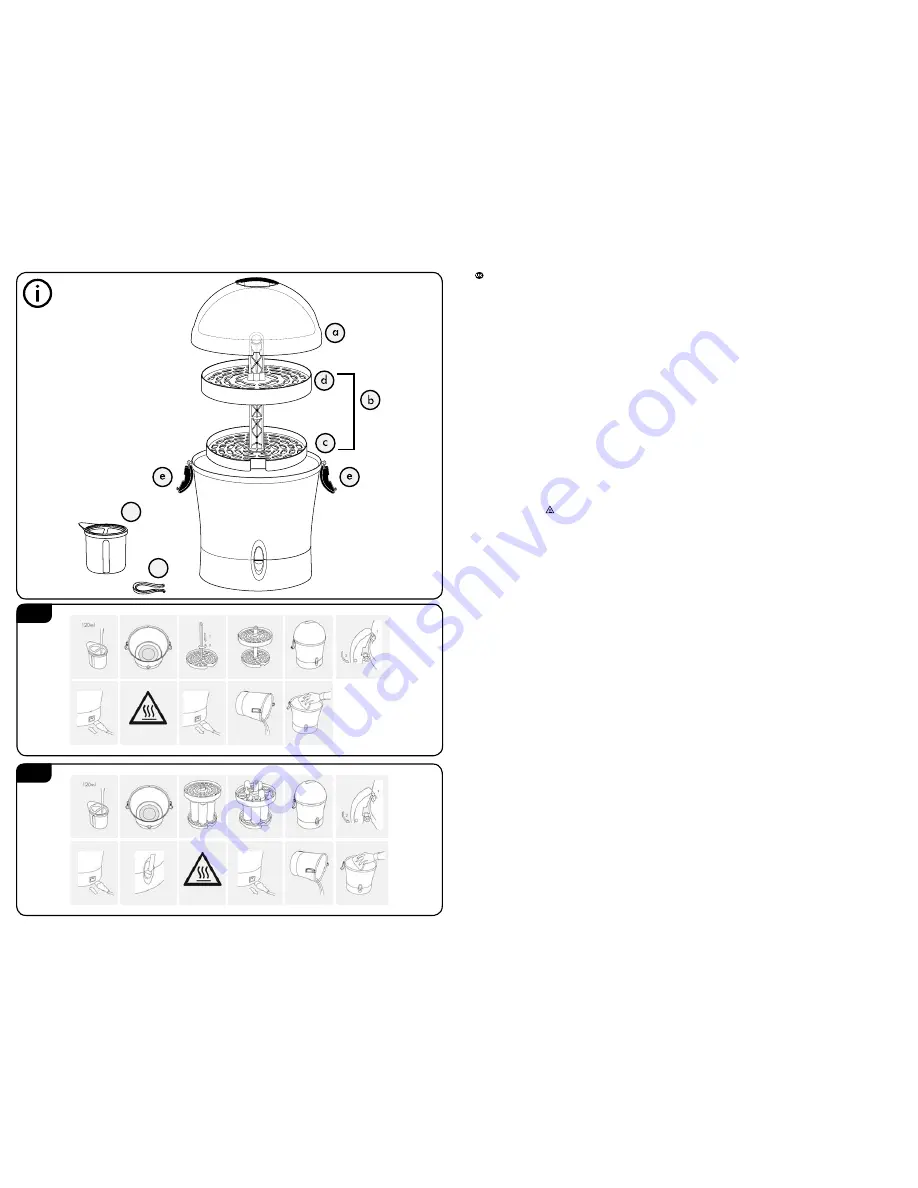
CONTENTS
a Transparent lid
b Bottle holder
c Accessory tray 1
d Accessory tray 2
e Side Handles
f Water measuring cup with filter
g Bottle tongs
SPEED
The Munchkin Rapid Electric Steriliser is a fast and efficient steriliser completing a full cycle in just 6 minutes.
It destroys harmful bacteria by surrounding your bottles and accessories with steam. Your steriliser will hold
up to 9 standard or 6 wide neck bottles along with their accessories.
SAFETY
The Munchkin Rapid Electric Steriliser comes with several safety features. The heat sensitive safety handle changes
colour and displays symbol to show that the lid is hot during use. The power switch will also illuminate when
the unit is in operation. As with all Munchkin products the Rapid Electric Steriliser has been tested to ensure strict
compliance with harmonised safety standards. The Munchkin Rapid Electric Steriliser will keep bottles sterile for
up to 6 hours providing that the lid is not removed and the handles remain locked.
LIME SCALE BUILD UP
To combat problems with hard water and lime scale build up we have added a water measuring cup with a lime scale
filter. A new easy clean stainless steel heating element ensures that the steriliser will continue to work efficiently for longer.
TRAVEL & STORAGE
A lockable lid and removable power cord are included for easy storage and convenient portability.
WARNING!
• The steriliser contains boiling water when in use.
• Steam escaping from the vents can burn.
•
WARNING!
The body and lid surface may be hot.
•
WARNING!
Take care when opening the lid, as the lid,
items and the steam will be hot.
• Do not attempt to open the unit when in use.
• If you do ever need to stop the steriliser mid-cyle,
switch it off at the mains (contents will not be sterile).
• This appliance is not intended for use by persons
(including children) with reduced physical, sensory or lack
of experience and knowledge unless they have been given
supervision or induction concerning the use of the appliance
by a person responsible for their safety. Children should
be supervised to ensure they do not play with the appliance.
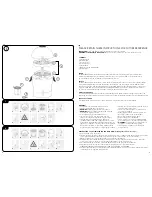
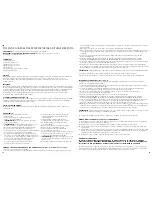
BEFORE USING YOUR STERILISER FOR THE FIRST TIME (sterilising the steriliser) (See fig.1)
1. Remove all items from the steriliser
2. Fill the measuring cup (A) up to the water level mark (120 ml / 4 fl. oz.) with fresh cold water and pour into the base
of the steriliser making sure the water is concentrated over the element in the centre of the unit (B).
NB If you splash too much water up the sides etc you will affect performance.
3. Assemble the 3 pieces that make up the bottle holder. The central rod fits into the Accessory tray 1 and twists
to lock into position (C). The Accessory tray 2 then slides down over the central rod (D).
4. Place the bottle holder in the unit, replace the lid (E) and lock closed using the side handles (F).
5. Plug the power cord into the rear of the steriliser before plugging it into your wall socket (G).
PLEASE ENSURE THAT THE CORD AND UNIT ARE OUT OF REACH OF CHILDREN.
6. The power light will come on automatically and the steriliser will begin its first cycle. The unit will switch itself off after
completing its cycle - approximately 6 minutes.
2
3
• Please make sure your steriliser is placed on a firm
and even surface when in use.
• Please ensure that the power cord and unit are
out of reach of children.
• Always unplug from the mains when not in use.
• Never place items on top of the steriliser.
• Never immerse the steriliser in water.
• Only use the power cord supplied.
• Please contact your retailer or suitably qualified
person if the power cord shows signs of damage.
•
WARNING!
To reduce the risk of electric shock
keep power cord dry and off the ground.
• This appliance is intended to be used in the
house hold only.
A
G
H
I
J
K
B
C
D
E
F
L
R
M
S
N
T
O
U
P
V
Q
W


