background image

1

© Munters Corporation, January 2020

QM1041r5

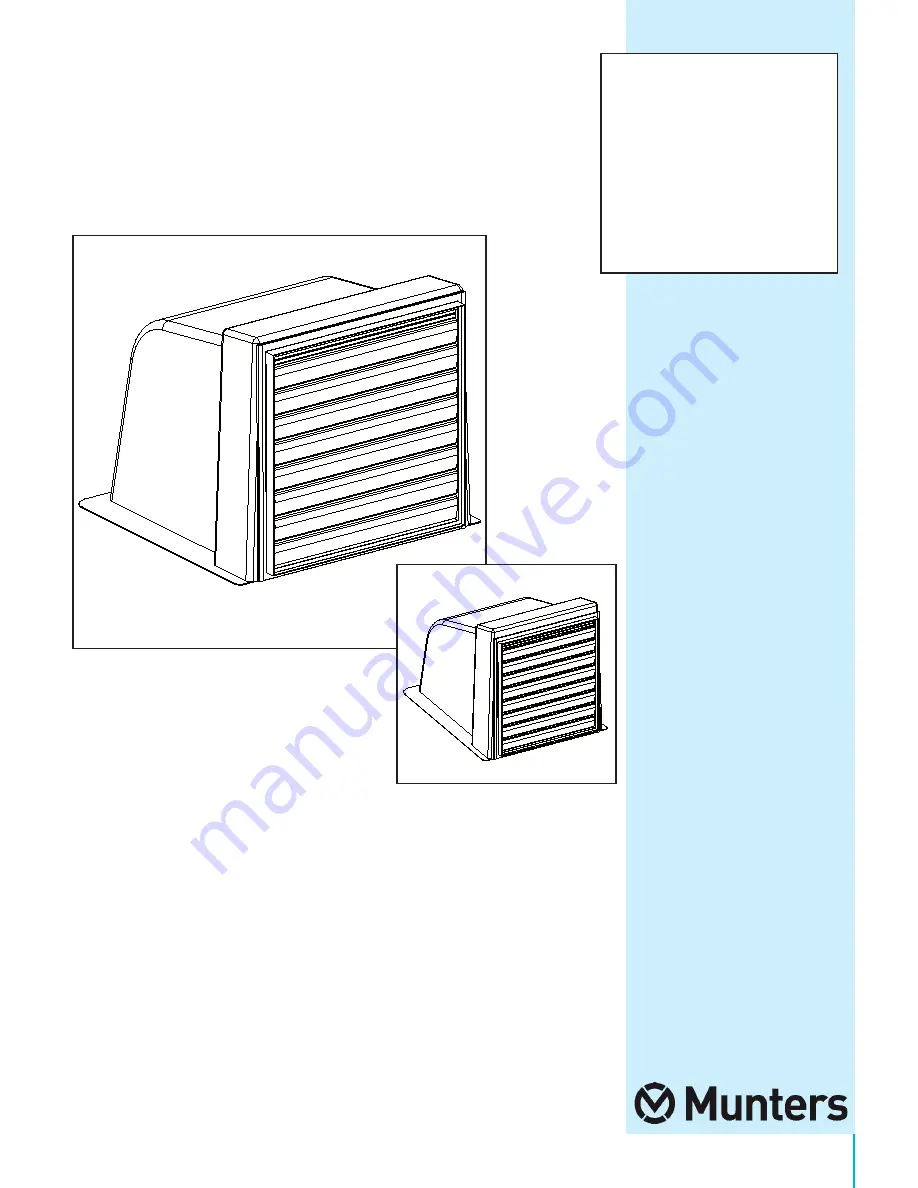
Instruction Manual 

Fiberglass Pit Transition Fan

Models: AT16FPT • AT16FPT-12 • AT18FPT • AT18FPT-12 • 

AT24FPT • AT24FPT-12 • AT24F3PT

Fiberglass Pit 

Transition Fan

ATxxFPT

ATxxFPT-12

Summary of Contents for AT16FPT

Page 1: ...ers Corporation January 2020 QM1041r5 Instruction Manual Fiberglass Pit Transition Fan Models AT16FPT AT16FPT 12 AT18FPT AT18FPT 12 AT24FPT AT24FPT 12 AT24F3PT Fiberglass Pit Transition Fan ATxxFPT ATxxFPT 12 ...

Page 2: ... Please read all instructions carefully before beginning installation Warranty For Warranty claims information see the Warranty Claims and Return Policy form QM1021 available from the Munters Corporation office at 1 800 227 2376 or by e mail at aghort info munters com Conditions and Limitations Products and Systems involved in a warranty claim under the Warranty Claims and Return Policy shall have...

Page 3: ...QM1041r5 Index Chapters Page 1 Unpacking the Equipment 4 1 1 Parts List 4 1 2 FPTR Dimensions 4 2 Installation Instructions 5 3 Electrical Wiring 7 4 Operation 9 5 Maintenance 10 6 Troubleshooting 11 7 Exploded View and Parts List 12 13 ...

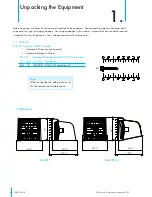
Page 4: ... is the customer s responsibility and should be reported immediately to your freight carrier Fan is shipped complete with all accessories 36 33 Each Pit Transition ATxxFPT includes 1 Fiberglass Pit Transition Fan Assembly 1 Hardware Package As Follows HP1201 Hardware Package for ATxxFPT Pit Transition Fan ID Qty Cat No Description A 8 KS2105 14 x 1 5 Lag Screw SS A 34 Note When wiring the fan allo...

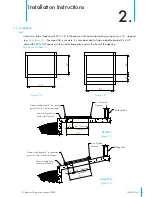
Page 5: ...4 x 32 opening with an extra frame piece across the front of the opening See Figure 1B and 1C 32 Concrete Pump Out or Horizontal Opening Figure 1A 2 x 4 Treated Framing 24 32 ATxxFPT 12 Figure 1C Figure 1B 32 24 8 8 24 Opening for airflow ATxxFPT Figure 1C Building Wall Frame out additional 8 for mounting purposes only Seal area air tight Concrete Pump Out or Horizontal Opening 2 x 4 Treated Framin...

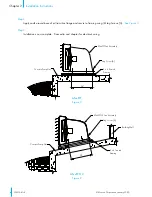
Page 6: ... flange and secure to framing using 8 Lag Screws A See Figure 2 Step 2 Installation is now complete Proceed to next chapter for electrical wiring 2 x 4 Treated Framing Lag Screw A Installation Instructions Chapter 2 ATxxFPT 12 Figure 2 ATxxFPT Figure 2 Lag Screw A ATxxFPT Fan Assembly Concrete Pump Out ATxxFPT 12 Fan Assembly Building Wall ...

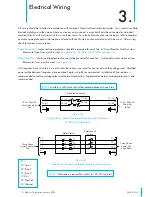
Page 7: ...ole motor starter or slow blow motor fuses must be used See Figure 3B If a frequency drive inverter is used confirm that motors are rated for inverter duty at the voltage used Shielded power cable between frequency drive and each motor is highly recommended Installation of line reactors is recommended to reduce voltage spikes and harmonic distortion Supplemental motor overload protection is also r...

Page 8: ...ntractors with overload protection by others As the power cable exits the back of motor form a drip loop and then run power cable down along leg of motor mount and Zip tie the cable to leg to prevent cable from getting tangled See Figure 4 Then run the cable out the side of FPT housing to the circuit breaker or control panel The hole where the power cable exits the FPT should be sealed tightly eit...

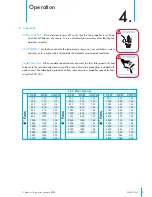
Page 9: ...below provides airflow rates at various propeller speeds for fans wired for 240 VAC WARNING Disconnect Power before servicing WARNING Moving parts disconnect power before servicing 4 1 Operation 0 05 Static Pressure CFM RPM VOLTS CFM RPM VOLTS CFM RPM VOLTS 16 Fans 150 740 108 18 Fans 300 650 134 24 Fans 850 500 144 200 775 110 500 700 137 1000 520 146 300 845 114 800 770 140 1250 550 149 400 915 ...

Page 10: ...erify that the motor is secure in its mount SHUTTER Clean any dust accumulations from shutter blades and frame so that shutter opens and closes freely A brush or cloth should be used 3 CHECK FASTENERS For safety all fasteners should be inspected 1 month after initial operation and yearly thereafter Tighten any loose connections 4 INSPECT FAN CONTROL With power disconnected inspect all electrical c...

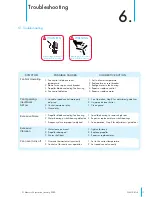
Page 11: ...g defective 3 Frequency drive improperly adjusted 1 Motor loose on mount 2 Propeller damaged 3 Motor shaft bent 1 Set to a lower temperature 2 Replace fuse or reset breaker 3 Realign motor in fan housing 4 Repair or replace control 5 Repair or replace motor 1 See Operation Step 2 for adjustment guidelines 2 Unjam and clean shutter 3 Clean guard 1 Sand fan housing to remove high spot 2 Repair or re...

Page 12: ... Munters Corporation January 2020 12 QM1041r5 Exploded View 7 ...

Page 13: ...24 Orifice Panel 24 FPT Fan with Labels FG 1 6 FP1038SS FP1038SS Propeller 16 DD 4 Blade Set Screws AL 1 FP1008SS FP1008SS Propeller 18 DD 5 Blade Set Screws AL 1 FP1033SS FP1033SS Propeller 24 DD 4 Blade Set Screws AL 1 7 FH1009 FH1009 16 18 Fan Motor Mount PVC Coated 1 FH1010 FH1010 24 Fan Motor Mount PVC Coated 1 8 FM1043 FM1043 16 DD Motor HP 1625 RPM 48 Fr 1 ph 115 230V 1 FM1009 FM1009 18 DD M...

Page 14: ...9 235 Italy Munters Italy S p A Chiusavecchia Phone 39 0183 52 11 Japan Munters K K Phone 81 3 5970 0021 Korea Munters Korea Co Ltd Phone 82 2 761 8701 Mexico Munters Mexico Phone 52 818 262 54 00 Russia Munters AB Phone 7 812 448 5740 Singapore Munters Pte Ltd Phone 65 744 6828 South Africa and Sub Sahara Countries Munters Pty Ltd Phone 27 11 997 2000 Spain Munters Spain S A Phone 34 91 640 09 02...

Reviews: