background image

Beyond the Basics

18

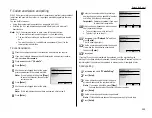
To enter the 

ITU

-

T

sub-address:

This is same procedure in step 9. Please refer to step 9.

19

To enter the 

ITU

-

T

password:

This is same procedure in step 10. Please refer to step 10.

20

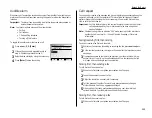
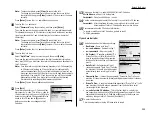
To set the Rx Protect:

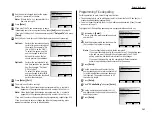
Select “Rx Protect” using the cursor key, and then press [Enter].

Then, select desired setting “On” or “Off”.
On: Do not open this box to receive documents from callers.
Off: Open this box to receive documents from callers.

Press [Enter] to save the box’s name and continue.

21

To set the Auto Print:

Note: This setting is available only when the reception protection (Rx pro-

tect) setting is set to off (see step 20).

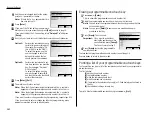
Select “Auto Print” using the cursor key, and then press [Enter].

Then, select desired setting “On” or “Off”.
On: Print the document automatically when the box receives it.

Off: Print the document manually, when you want to print it.

Press [Enter] to save the box’s name and continue.

22

To set the Overwrite Doc:

Note: This setting is available only when the reception protection (Rx pro-

tect) setting is set to off (see step 20).

Select “Overwrite Doc” using the cursor key, and then press [Enter].

Then, select desired setting “On” or “Off”.
On: When your machine receives a new document into this box, it will erase

any documents currently stored in it.

Off: When your machine receives a new document into this box, it will not

erase the documents stored in it. Your machine can store up to 30 
documents (each document can include one or more pages) in each box.

Press [Enter] to save the box’s name and continue.

23

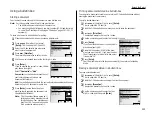
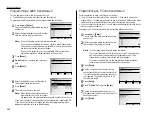
To set the Erase Tx Doc:

Select “Erase Tx Doc” using the cursor key, and then press [Enter].

Then, select desired setting “On” or “Off”.
On: Your machine erases the document from the box as soon as it sends it. If

you choose “On”, this box can be polled only once per document.

Off: Your machine does not erase a document from the box when it’s polled.

As long as your machine holds 

AC

power and you do not erase the docu-

ment from the box, the document is available indefinitely for polling.

24

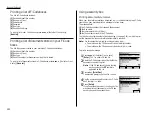
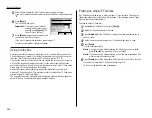
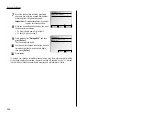
Press [Exit].
The machine asks for your F-Code box’s four-
digit security 

I

.

D

. code. This is the 

I

.

D

. code for

the box’s security, which you use to (1) print a
document any remote F-Code-compatible fax
sends to this F-Code box or (2) you enter
before you can make any changes to this F-
Code box.

25

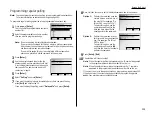
Decide on a four-digit 

I

.

D

. code (0001-9999) for this F-Code box.

Write it down, and put it in a safe place.

Important: Do not use 0000 as an 

I

.

D

. code.

26

Use the numeric keypad to enter the four-digit 

I

.

D

. code for this F-Code box.

Important: After completing this step, you must know this code to access

this F-Code box. Be sure to write it down.

27

Press 

ENTER

to save the F-Code box information.

To create or modify another F-Code box, go back to step 3.
To finish, press 

RESET

.

2.30

Summary of Contents for MFX-2500

Page 1: ...Muratec MFX 2500 Operating Instructions Fax Reference...

Page 2: ...i level Image experts Group the new ITU T stan dard image data compression method As JBIG compresses the data more efficiently than MMR it is especially effective when transmitting halftone grayscale...

Page 3: ...r parts on the LCD To press this key use the item select key Items that appear on the LCD BOLD WORDS Keys built into the machine s control panel LCD The Liquid Crystal Display It shows the machine s s...

Page 4: ...els or shades of gray refers to the many shades of gray your fax machine sees on a document it s sending It s likely most of your fax documents will be dark text on white paper However when you want t...

Page 5: ...yond the basics Autodialer 2 1 Autodialer basics 2 1 Using one touch numbers 2 2 Using speed dial numbers 2 4 Using call group 2 7 EasyDial directory dialing 2 8 Broadcasting 2 9 Broadcasting basics 2...

Page 6: ...4 Security reception 2 44 Masking the PIN 2 45 Setting security transmission 2 47 Setting for use with a closed network 2 48 Setting Block Junk Fax 2 48 Using department codes 2 49 Entering settings f...

Page 7: ...v This page intentionally blank...

Page 8: ...Getting started ControlControl panel 1 1 Panel display Liquid Crystal Display 1 3 Some guidelines 1 5 Sending a fax 1 8 Receiving faxes 1 12...

Page 9: ...keys on a regular tone dialling phone Use these to dial phone and fax numbers and to enter numbers when you re setting up the machine 9 SPEED DIAL TEL INDEX Starts a speed dialling operation which yo...

Page 10: ...ll request feature Soft key 4 MEMORY TRANSMISSION Selects which transmission mode your fax machine uses whether from memory or from the document feeder 15 START Press to begin a fax transmission or re...

Page 11: ...tion you are using Redial See page 1 11 Enlarge Tx See page 2 20 of Pages See page 2 21 Group See page 2 7 Scan Size See page 1 7 Broadcast See page 2 9 TTI See page 1 7 Panel display Liquid Crystal D...

Page 12: ...sics beginning on page 2 1 we ll explain these functions Fax setting menu display To access the fax setting menu press MENU Fax Set In Beyond the basics beginning on page 2 1 we ll explain these funct...

Page 13: ...Sticky notes or documents with sticky notes attached Cardboard newspaper or fabric Pages with duplicating carbon on either side Credit cards or any small thick items How to set the document When sett...

Page 14: ...the suitable setting according to the document density Note You can set the primary mode of the resolution and contrast See Page 3 1 Mixing resolution and contrast in a multiple page When you send th...

Page 15: ...end or store your document usually the machine automatically detects the size of your document when it is placed on the ADF or FBS glass However if you wish to override this and select scanning size m...

Page 16: ...p memory more quickly than others They include documents with many pages and those with many dark areas When the machine s memory is full it can transmit only through the document feeder Note When you...

Page 17: ...Note If the call fails see Redialling page 1 11 Sending a fax from the FBS glass Set your document that cannot be placed in the ADF on the FBS glass one page at a time Note The machine gives priority...

Page 18: ...use the FBS glass 2 Adjust resolution and contrast if necessary 3 Obtain a dial tone either by Pressing MONITOR CALL or Lifting the optional handset In either case the LCD shows see right 4 Enter the...

Page 19: ...2 Press MONITOR CALL or lift the optional handset to get a dial tone 3 Press Redial 4 When you hear fax tones from the remote unit press START Note If a person answers the phone use the optional hand...

Page 20: ...pick up the optional handset Then press START After you press START hang up both the fax machine s handset and the second telephone s handset Because remote fax machines will wait several seconds to...

Page 21: ...to your fax machine In this mode An answering machine connected to your fax machine answers each call If a voice call comes in the answering machine begins to record the incoming message If your fax m...

Page 22: ...todialer 2 1 Broadcasting 2 9 Delayed transmission 2 10 Batch transmission 2 12 Special features 2 15 F Code communication 2 27 Programmable one touch keys 2 37 Security features 2 44 Beyond the basic...

Page 23: ...ptive names just as if you were using a phone book We ll explain how to store the numbers and location IDs in the next few pages The EasyDial directory is discussed in detail on page 2 8 Special Diall...

Page 24: ...is as you want it press Enter to store it 6 Next the LCD now displays see right You can also program the following three items Location ID The destination name If you enter the name you can use the E...

Page 25: ...to enter another one touch number go back to step 2 If you do not want to enter any more one touch numbers press RESET to fin ish Use the autodialer labels in your fax s packaging to write down the st...

Page 26: ...a speed dial number 1 Press MENU B Enter The LCD shows the speed dial number list 2 Select the speed dial number in which you want to store a number or change a previ ously stored number Note You can...

Page 27: ...ng character on page 1 14 in General refer ence A number s Location ID may be up to 24 characters in length 9 Press Enter to save the setting and continue 10 To enter the Alternative number Select the...

Page 28: ...number To print a list of speed dial numbers press MENU B List Fax dialling via speed dial To dial a fax call using a speed dial number 1 Place the document and select the resolution and contrast you...

Page 29: ...n also enter the other location using either one touch key speed dial number or numeric keypad 4 Press START Printing a group directory Your machine can also print a call group directory This lists al...

Page 30: ...ursor key Note To quickly search press capital letter of Location I D using one touch key 5 When the LCD shows the name Location ID you want to dial press START If there is a document on the ADF or FB...

Page 31: ...ters by mistake press Clear to erase them Or press or of the cursor key to select the number then press Clear 5 Press START Your fax machine scans the document into memory and then sends it to each nu...

Page 32: ...ime are entered press Enter to save the delayed trans mission The LCD shows 6 Enter the fax number for the delayed trans mission document You can either press a one touch key enter a speed dial number...

Page 33: ...fax num bers 2 Using the cursor key to scroll through currently stored commands 3 If you want to cancel the command select command and then press Erase 4 To return your machine to standby mode press...

Page 34: ...those 26 scroll the cursor by using the cursor key Note If you want to erase characters press Clear to erase to the left If you want to change just one character in the number move the cur sor by usi...

Page 35: ...ther batch box repeat steps 2 4 To finish press RESET Storing a document for batch transmission Your fax machine can store up to 40 documents each document can include one page or many pages in each b...

Page 36: ...e number 01 40 5 Press PrintDoc Your fax machine prints the document then returns to standby mode Erasing a document stored in a batch box To erase a document stored in a batch box 1 Press MENU M Ente...

Page 37: ...ee page 2 21 Confirmation report see page 2 19 Flash Lets you quickly disconnect a call and go right to the next one without having to hang up the handset Note And instead of just turning the function...

Page 38: ...ed in F Code boxes pages 2 32 Stored polling documents pages 2 23 Delayed commands documents pages 2 11 Security receive documents pages 2 45 Batch transmission documents pages 2 14 F Code Box bulleti...

Page 39: ...erations in the Macro key before the machine do it press No here 9 The machine now asks you to name this job Enter the name of this job A job s name may be up to 130 characters in length If you do not...

Page 40: ...ignifies an ECM communication see page 3 1 Any special operations For example a fax call made using an optional handset will appear as Manual Your fax machine will print the activity journal automatic...

Page 41: ...ells you the remote location which was called the error code and error message see pages 4 1 4 5 RCR The RCR lists the following information for each communication Date and time Remote location called...

Page 42: ...sions Note Quick Memory transmission see page 3 2 and the Fax Copy function cannot be used at the same time If both are turned on Quick Memory will not work Note When using the Fax Copy feature the Im...

Page 43: ...the left If you want to change just one character in the number move the cur sor by using cursor key and press Clear to erase it Then re enter the number correctly Then re enter the message correctly...

Page 44: ...hour format when your machine should perform the delayed regular polling 7 Press Enter 8 Press START When your machine polls for documents it dials the number and upon making con tact with the other...

Page 45: ...s MENU D Enter EraseDoc EraseDoc Limiting polling access to your fax machine Your machine s closed network setting see page 2 48 works for polling also If a calling fax doesn t present the proper pass...

Page 46: ...pad If you do not wish to set up the day and time enter Erase Note To change only one digit move the cursor by using the cursor key to that digit Then overwrite the correct digit 12 Press Enter to sav...

Page 47: ...lso have an optional handset attached Note Communicating this way disables V 34 mode causing the fax machine to handle the call in normal ITU T Group 3 fashion See page AI 1 for more information Faxin...

Page 48: ...ear a brief series of fax tones 2 Shortly the line will open and the person at the other end of the line will answer You and the other person now can have a normal phone conversation The power of mult...

Page 49: ...ing F Code 1 To use ITU T sub addressing you must create F Code boxes in your machine 2 Your machine holds up to 50 of these boxes 3 Your machine stores up to 30 documents into each F Code box each do...

Page 50: ...16 If you chose Relay skip to step 28 If you chose Security 7 The security box has the following settings Box Name You can enter the name for this F Code box ITU T sub adrress This is the numerical id...

Page 51: ...ecurity I D code This is the I D code for the box s security which you use to 1 print a document any remote F Code compatible fax sends to this F Code box or 2 you enter before you can make any change...

Page 52: ...eives a new document into this box it will not erase the documents stored in it Your machine can store up to 30 documents each document can include one or more pages in each box Press Enter to save th...

Page 53: ...number You can specify up to 300 numbers for a remote unit Press Enter to save the box s name and continue 33 To set the TTI Type Select TTI Type using the cursor key and then press Enter Then select...

Page 54: ...lists 1 the F Code box number that received the document 2 the Box name 3 the remote machine s TTI if any 4 the file numbers stored in the F Code box You then have a certain number of days see step 1...

Page 55: ...ected bulletin box Note The file number shown above as 1 tells you how many documents are in this bulletin box Your machine num bers files 1 30 You need to know the file s number to erase or print it...

Page 56: ...relay broadcast initiation the document to another hub machine s F Code box and get that machine to relay it to others See F Code trans mission on page 2 35 for more detail The hub performs a relay br...

Page 57: ...6 Press Enter 7 Use the numeric keypad to enter the pass word Note If this sub address does not have a password skip to step 8 8 Press Enter 9 Enter the fax number either by pressing a one touch key...

Page 58: ...t begin now skip to step 11 To delay it go on to step 9 9 Press MENU select Delayed Tx and then press Enter The LCD shows see right 10 Use the numeric keypad to enter the day and time when the transmi...

Page 59: ...nt to assign this key to a completely different operation overwrite a previously stored command to the new one 3 Press Enter 4 Use the numeric keypad to enter the fax number exactly as your machine sh...

Page 60: ...digit identifier To enter a call group press Group and the group s identifier number If Group is not appeared on the LCD press NEXT until it appears Note If you enter characters by mistake press Clear...

Page 61: ...7 If you want the polling to begin immediately every time you press the key press Exit and skip to step 10 If you want to delay the polling select Delayed Tx and press Enter 8 Next tell your fax to ca...

Page 62: ...ESET Your machine returns to standby mode Programming an F Code transmission For this operation to work two things must be true You must know how the remote fax is using each F Code box to which you r...

Page 63: ...er or change another key s programming repeat steps 2 14 If you do not want to enter or change any other key s programming press RESET Your machine returns to standby mode Programming F Code polling F...

Page 64: ...one touch number list on the LCD If you want to enter or change another key s programming repeat steps 2 14 If you do not want to enter or change any other key s programming press RESET Your machine r...

Page 65: ...tion and contrast you require 2 Press the programmable one touch key in which you ve stored the fax commu nication command Your fax will perform the operation now or at whatever time you programmed No...

Page 66: ...ll received faxes in memory but not print them Then you can print them out later at your convenience For example you could use this if you re concerned about workers reading documents intended for you...

Page 67: ...nce calls some office telephone systems require you to enter a personal identification number PIN whenever you dial long distance Your fax s PIN mask feature helps you keep that PIN number private Wit...

Page 68: ...er Mode 1 or Mode 2 and will be using batch transmission you must store the PIN access code for the remote unit within the appropri ate batch box See Performing batch transmission while using the PIN...

Page 69: ...PIN the fax machine beeps indicates No PIN Number on the LCD and then returns you to step 2 4 Continue with the steps for creating or modifying a batch box page 2 12 Now you can perform batch transmi...

Page 70: ...works to determine if it s right for you There are four possible set tings for Block Junk Fax Off The feature isn t activated Mode1 Your fax machine checks whether the last four digits of any phone n...

Page 71: ...efore sending or polling a document The Activity Journal then keeps track of fax transactions by department After you turn on this setting assign specific code numbers to your office s fax users and t...

Page 72: ...4 Otherwise go on to step 3 3 Press START 4 Use the numeric keypad to enter the appro priate four digit department code 5 Press Enter Printing the department time list The department time list includ...

Page 73: ...Beyond the Basics This page intentionally blank 2 51...

Page 74: ...Entering settings for your machine Settings for transmission 3 1 Settings for reception 3 4 Settings for dialling 3 6 Settings for operation 3 7...

Page 75: ...on and contrast settings before sending a document Press RESOLUTION to change the resolution Press CONTRAST to change the contrast Once your document is transmitted your machine returns to its default...

Page 76: ...include documents with many pages and those with many dark areas When the machine s memory is full it can transmit only through the document feeder Note When you use the flatbed scanner the machine al...

Page 77: ...return to the standby mode Setting the confirmation stamp Default setting OFF You can set your fax machine so that it will automatically place a small blue ink stamp mark on the front of each origina...

Page 78: ...ction margin Your fax machine s reduction margin is measured in millimeters mm We ll define reduction margin by explaining how it s used When a fax message enters your machine s electronic brain the m...

Page 79: ...g a call can easily disrupt the flow of data from one fax machine to another That s why your fax machine gives you the option of using Error Correction Mode ECM When two fax machines communicate while...

Page 80: ...ial settings Default setting Number of redial 2 times Redial interval 3 minute It s up to you how many times the fax redials a number and how long it waits between redials that length of time between...

Page 81: ...FF Alarm Key Volume This setting can be effective if you set the Alarm Silent or Key Buzzer Silent to OFF You can adjust the volume for the alarm and key tones Also when you set the Silent Mode to OFF...

Page 82: ...save the setting Adjust the monitor speaker s volume Default setting Medium You can set the volume of the monitor speaker assuring that on hook dialling will be as loud or as soft as you require 1 Pre...

Page 83: ...might change the settings With this list you can quickly confirm that all of your settings are correct without having to go back and check them on the machine Or if you do need to undo someone else s...

Page 84: ...Trouble Shooting Troubleshooting 4 1 Common questions 4 6...

Page 85: ...ages 2 23 2 24 What you see on the LCD What it means What to do 30 locations or less You tried to enter too many numbers for broad cast through the numeric keypad You can enter up to 230 numbers for b...

Page 86: ...can maintain 32 call groups numbered 1 32 call group 0 covers all the groups Determine the correct call group identifier number and enter it instead What you see on the LCD What it means What to do H...

Page 87: ...ra tion Printing The command you re trying to enter requires the use of the printer which is already in use Wait for the fax to finish printing then try again Scanner in use The command you re trying...

Page 88: ...espond to your fax machine This can hap pen if someone dials a wrong number or if the remote machine restricts access through use of a passcode R 1 2 The two fax machines were incompatible Your fax ma...

Page 89: ...and your machine detects an error it pro duces an error printout headed by the words Check Message This printout lists the following information about the transmission The resulting error code A comm...

Page 90: ...by using these tones that fax machines are able to send faxes over ordinary phone lines So next time you hear the tones press START and if you re using an optional handset hang up to send a fax Q I ju...

Page 91: ...long as it hasn t stored more than 99 delayed commands counting automatic redials your machine should still accept commands from you If it has exceeded this quantity and will accept no more commands t...

Page 92: ...the more likely it is that the remote fax machine will proceed with the transmission Please create an outgoing message on your answering machine that s no longer than 10 seconds see page 1 13 for a su...

Page 93: ...Trouble Shooting This page intentionally blank 4 9...

Page 94: ...Appendix and index Glossary AI 1 Index AI 5...

Page 95: ...ce of margins spaces between words spaces between lines and paragraphs and even spaces within letters However drawings and photographs have a much higher black density sometimes approaching 100 The hi...

Page 96: ...stores for a batch F Code or polling operation Fine resolution 203H 196V lpi Also shown as G3F Group 3 fine on some fax units Grayscale Not a level of resolution but a method of scanning and transmit...

Page 97: ...be fed safely through a fax machine Override To change existing settings Paper sizes All are width length Letter sized 8 5 11 0 216 279 mm Legal sized 8 5 14 0 216 356 mm A5 5 8 8 3 148 210 mm B5 7 2...

Page 98: ...o retrieve specific files from polling memory Subscriber ID A fax machine s telephone number as identified by a user setting See TTI Super Group 3 An extension of Group 3 fax technology standards allo...

Page 99: ...wing or cancelling delayed commands 2 11 Department codes 2 49 2 51 Dialling pause 1 6 Dialling pause Changing the dialling pause length 3 6 Document guide lines 1 5 E EasyDial 2 8 ECM 3 1 3 5 Electro...

Page 100: ...39 2 42 Protection passcode 2 44 Q Quick Memory transmission 3 2 R RCR 2 19 Reception modes 1 12 Ans Fax Ready mode 1 13 Fax Ready mode 1 12 Fax Tel Ready mode 1 13 Tel Ready mode 1 12 Tel Fax Ready m...

Page 101: ...This page intentionally blank Appendix and index AI 7...

Page 102: ...This page intentionally blank Appendix and index AI 8...

Page 103: ...Muratec UK Ltd No 1 Stoke Road Guildford Surrey GU1 4HW Tel 01483 302100 Fax 01483 301900 http www muratec co uk Copyright 2000 by Murata Muratec all rights reserved Printed in Japan D84 90330 60...

Reviews: