background image


Issue 2:  14

th

 April 2005


kW SACD 

Instructions for use 

Page 9 of 17


ons shown below enable SACD player functions to be operated from a 

onvenient distance.  Remaining buttons on this handset are for use with other, specific, Musical 

 no eff

quivalent buttons on the remote control have the sa

o

et uses an invisible infrared light beam, 

e receiver window at the front of the player, withou

y decreases, r

s. 

ired, size AAA, LR03 or SUM-4. 

REMOTE


CONTROL 


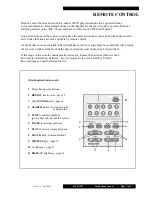
Remote control butt
c
Fidelity products in the “kW” range, and have
 

ect on the kW SACD player. 

me functions as those on the front panel of the 

ntrol. 

the front edge must be pointed directly toward

t visual obstruction between them. 

eplace the batteries with new one

E
unit.  Some functions are only available by remote c
 
As the hands
th
 
If the range of the remote control greatl
Do not mix old and new batteries - two are requ
Do not dispose of used batteries in a fire. 


 (Disc function buttons only) 


 1

  Direct track access buttons 


 2


REPEAT

 track or disc -page 13 


 3

 Scan 

INTRO

duction - page 14 


 4


SEARCH

 buttons to scan forwards 


  or 

backwards 


ack 


(press either end, but not the centre) 


 5


STOP

 to end disc playb


 6


PAUSE

 to interrupt playback 


 7


PLAY

 to start or resume playback 


 8


TRACK

 back / forwards buttons 


 9


SHUFFLE

 play - page 13 


10  A - B

 repeat - page 13 


11 DISPLAY

 brightness - page 14 


Summary of Contents for kW SACD

Page 1: ...logy and jitter reduction techniques to achieve both an excellent technical specification and unparalleled sound quality Aesthetically the kW SACD is a perfect match for the kW 750 Power Amplifier kW Hybrid Line Preamplifier and kW Phono Together these components form one of the finest hi fi systems available Dust regularly with a soft duster or soft brush but be careful when using cleaning or pol...

Page 2: ... Cleaning Installation Audio connection 8 Facilities and Connections Illustrations front and rear panels 9 Remote Control Operation and illustration 10 Connections and Output connection Power Control Mains power connection Power operation 11 Basic Operation 1 Loading and playing discs Pause function Stop 12 Basic Operation 2 Track selection Search Displaying playback time 13 Advanced Features 1 Re...

Page 3: ...n the plug which is m rked with the tter een ol The wire which is col t be connect s marked with the letter L The wire which s col be connected marked with the letter N o If onnecting to S1 fuse mus e W ANY MODIFICATIONS TO THIS PRODUCT NOT EXPRESSLY APPROVED BY MU A S THE P NSIBLE FOR CE COULD HORITY TO ENT s the colours of the wires of the mai appliance may not co oloured markings identifying th...

Page 4: ...zardous radiation during norm because invisible radiation emitted inside this product is completely confined within the protective housing However you must observe the following important warnings CAUTION THIS DISC PLAYE LE LASER LIGHT WHEN THE PL NOT REMOVE THE PROTECTIVE ENTS OR PERFORMANCE OF PR IN HAZARDOUS RADIATION EX O IF ELOPS A FAULT PLEASE CONTACT YOUR AUTH F ENT DO NOT ATTEMPT TO SERVIC...

Page 5: ... installed This equipment uses and accordance with the instructions may cause interference to radio communications However it is designed to radiate minimal levels of RFI and accordingly been tested to Nor American standards FCC regulations limits for a class B digital device pursuant to part 15 rules These requirements are intended to provide reasona Conversely the product has also been checked t...

Page 6: ...all socket and inform your dealer who should then check the unit before further use Entry of liquid into the player is dangerous and may cause electric shock or fire hazard Do not place the unit near direct heat sources such as radiators direct sunlight or other equipment Do not remove any covers or try to gain access to the inside There are no internal adjustments or fuses you can replace yoursel...

Page 7: ... corrections become impossible andle it will cut out This is not indicative player just a reaction to being fed y discs Unfortunately with the cessation of enforcement of the Philips Red ook standard for CDs non standard and non compliant discs are becoming more In the unlikely event that your beautiful new r so layer at fault but regrettably the disc ay hold discs by the edges and make sure th p ...

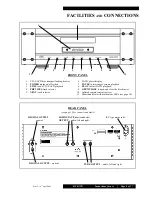
Page 8: ...switch STOP to end CD SACD playback PREVIOUS track selector NEXT track selector 6 SACD player display 7 PAUSE to interrupt or resume playback 8 PLAY to start SACD playback 9 OPEN CLOSE to open and close the disc drawer 10 Infrared remote control receiver REAR PANEL see page 10 for connection details D coaxial SOLID STATE semiconductor OUTPUT audio left and right IEC type mains inlet IGITAL OUTPUT ...

Page 9: ...those on the front panel of the ntrol the front edge must be pointed directly toward t visual obstruction between them eplace the batteries with new one E unit Some functions are only available by remote c As the hands th If the range of the remote control greatl Do not mix old and new batteries two are requ Do not dispose of used batteries in a fire Disc function buttons only 1 Direct track acces...

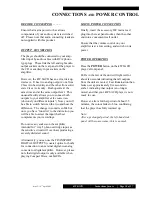
Page 10: ... r or digital amplifier However please ital output is only available when pla g Compact Discs not SACDs ER CONNECTION MAINS POW Finally insert the accessory IEC mains lead plug into the rear panel socket then the other end into a convenient wall outlet Ensure that the volume control on your amplifier is at a low setting and switch on its power P N POWER O ERATIO audio cable h panel of the pl the C...

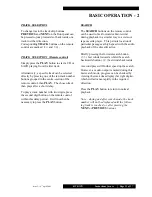
Page 11: ... starts to play and the dis CDDA or SACD For CDs the del s lly 20 to 25 seconds whereas for SA t after several seconds delay UNK Press PLAY to begin playback Current track and elapsed track time will be displayed similar to the following example k 1 rack number 01 in the centre and elapsed time on the right splay shows STOP and total number of tracks on the disc 13 in this example The unit will be...

Page 12: ...te contro within this delay period It will not then be necessary to press the PLAY button SEARCH The SEARCH buttons on the remote control can be used to fast forward or fast rewind during playback in a similar way to a video or pe cassette player This permits location of e audio riefly pressing the forward search button whilst the search st winds backwards tput is muted during this st search mode ...

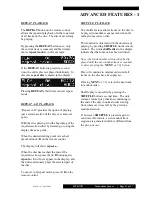
Page 13: ... button A B on the remote control The display will show repeat a W required sectio epeat a b w r the unit continuously plays the selected part of the disc o cancel A B repeat mode T re press A B on the HUFFLE PLAYBACK he shuffle feature allows tracks on the disc to e played in random sequence rather than the T b n This function is obtained with the unit already N rack number will not then be dis p...

Page 14: ...ssion ress INTRO again to cancel scan introduction tr If however the unit is already playing when INTRO is pressed only the remaining tracks on the disc will be scanned P mode DISPLAY BRIGHTNESS kW SACD display brightness can be controlled in three levels by pressing the DISPLAY button on the remote control When first powered on the display has maximum brightness Pressing the DISPLAY button once d...

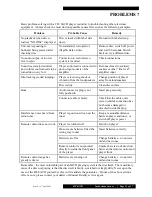
Page 15: ...away from loudspeakers Disc is dirty lean disc surface C Hum Audio connec fully pushed in tor plug is not Insert plug securely Connector cable is as ached inside the plug faulty Check that the cable outer screen shield connection h not become damaged or det Interference noise heard from radio tuner Player is posi tuner tioned too near the Keep a reasonable distance between player and tuner or swit...

Page 16: ...ve tube output 1 pair RCA connectors for solid state output 1 optical Toslink 1 S PDIF Sony Philips Digital Interface Format RCA connector Power requirements 100 115 230V AC 50 60Hz factory preset 50 Watts 483mm 19 inches wide 167mm 6 6 inches high including feet bs in shipping over carton 443mm 17 5 inches deep including rear terminals and on off button Standard accessories Remote control handset...

Page 17: ...Issue 2 14th April 2005 kW SACD Instructions for use Page 17 of 17 REVISION HISTORY RELEASE DATE CHANGES Issue 1 March 2005 Issue 2 14th April 2005 Added revision history ...

Reviews: