background image

17/16 HAMMERED DULCIMER KIT

Assembly Instructions

1 assembly instructions  
1 tuning chart on transparency

66 tuning pins
33 rh 1” screws for top (square drive)
2 black delrin rods (24” each)
2 brass tubes, 3/8” dia (21” each)
1 tuning wrench
4 walnut plugs, 3/8” dia
4 wood screws, 1-1/4”
1 drill bit, 3/16” 
1 drill bit, 9/64”
1 square drive #2 bit for top screws

Music wire:

4 ea. - .032” dia. loop-end wound strings
8 ea. - .024” dia. loop-end wound strings
20 ft of    .016” dia. music wire
50 ft of   .018”  dia. music wire  
50 ft of   .020”  dia. music wire
75 ft of   .022”  dia. music wire

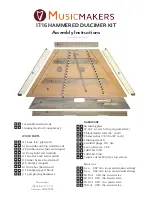
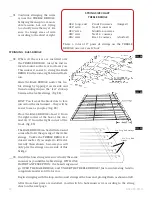
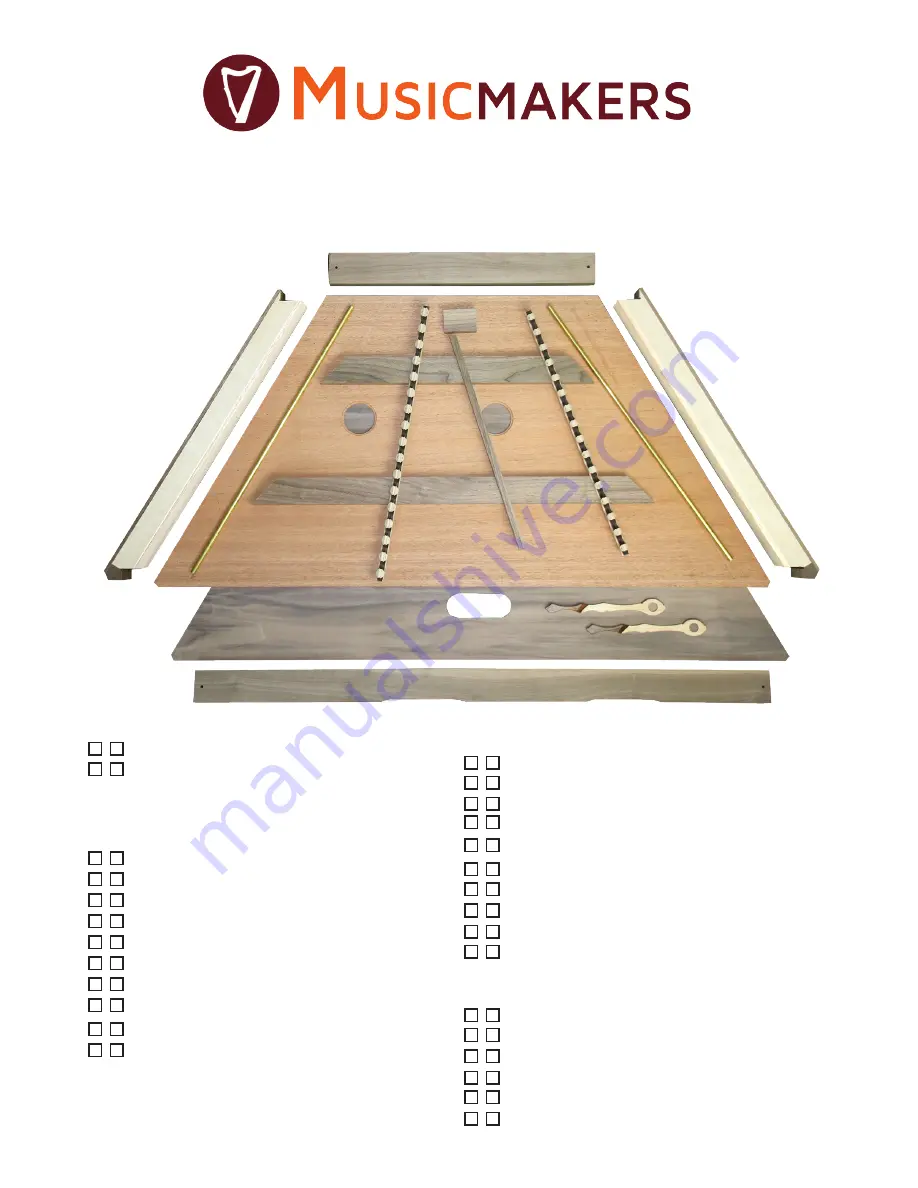
a)  1 back (1/4” plywood)
b)  1 soundboard/top (solid wood)
c)  2 pinblocks (walnut and maple)
d)  1 long front rail (walnut)
e)  1 shorter back rail (walnut)
f)  2 inner braces (hardwood)
g)  2 bridges  (maple)
h)  1 tone bar (hardwood)
i)   1 bridge support block
j)   1 pair playing hammers

WOOD PARTS

HARDWARE

Musicmakers

14525 61st ST CT N

Stillwater, MN 55082

A

D

F

G

H

I

J

G

F

E

B

C

C

Updated November 2019

Summary of Contents for 17/16 Hammered Dulcimer Kit

Page 1: ...4 ea 032 dia loop end wound strings 8 ea 024 dia loop end wound strings 20 ft of 016 dia music wire 50 ft of 018 dia music wire 50 ft of 020 dia music wire 75 ft of 022 dia music wire a 1 back 1 4 plywood b 1 soundboard top solid wood c 2 pinblocks walnut and maple d 1 long front rail walnut e 1 shorter back rail walnut f 2 inner braces hardwood g 2 bridges maple h 1 tone bar hardwood i 1 bridge s...

Page 2: ...ssy Always keep a damp rag handy for quick cleanup as necessary It is especially helpful to keep your fingers clean while gluing because gluey fingerprints have the embarrassing tendency to appear on the finished product in prominent places ASSEMBLE THE FRAME ____1 Test fit the four frame parts together two PIN BLOCKS and long and short RAILS without glue to see how they fit Position the frame pie...

Page 3: ...cal and fits properly on the BACK Force the joints into symmetry if necessary before the glue dries p p THE BACK Find yourself a good collection of c clamps or heavy weights cement blocks or bricks It pays to be prepared the strength of your hammered dulcimer depends on how firmly you glue it together The back forms a critical part of the structure of this instrument so take care to clamp it well ...

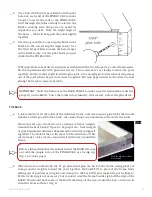
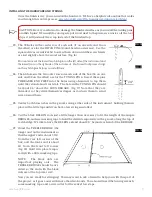
Page 4: ... you can glue it down accurately with weights or clamps holding it until dry One more BRIDGE SUPPORT BLOCK is needed for the internal bracing We like to chamfer the bottom corner of this block just to make sure we can glue it firmly to both the back panel and the rear rail without any interference from dried glue residue along the inside corner of the box fig 5 Glue the BRIDGE SUPPORT BLOCK to the...

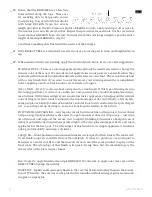
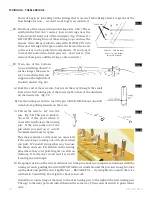
Page 5: ...he nails out when done The holes will be drilled larger later for tuning pins or hitch pins so you don t need to worry about filling them When satisfied with the fit glue the SOUNDBOARD to the frame and the TONE BAR using plenty of clamps and or weights to ensure complete contact all the way around the instrument Read the hints below before you start and then look for glue squeezing out around the...

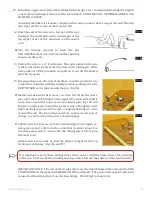
Page 6: ...lean up the box p ____14 ____15 ____16 ____17 Plug the countersunk screw holes in the front and rear RAILSbygluingthefourwalnutplugsintotheholes fig 11 Sand the plugs flush with the surface of the RAILS so that you remove all ridges and all glue residue on the surface Round over all sharp edges of the dulcimer box so they feel smooth to your hand fig 12 A router with a 1 4 round ing over bit makes...

Page 7: ...ire from jumping off the pin as you tighten the tuning pins c If you happen to chip the soundboard a little with your drill bit the head of the screw helps hide your boo boo If you decide you d rather have plain HITCH PINS then check the pin diameter before selecting the drill bit and make sure to tilt your drill about 10 15 degrees away from the center of the instrument so the strings won t be so...

Page 8: ...instru ment in tune Oil finishes will give your wood a low luster appearance bringing out the natural color of the grain but it tends to soak into the wood and appear dry and thirsty after awhile Some people are fond of a beeswax finish for a natural look but it can show water spots if it gets wet so you may end up needing to re wax or touch up the surface in the future POLYURETHANE VARNISH Any re...

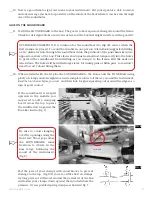
Page 9: ...FIRST into the holes using a hammer to tap them until they stand about 1 inch tall The hole in the TUNING PIN should be about 1 4 above the SOUNDBOARD fig 17 Note that they are threaded so they drive themselves deeper as you turn them to wind wire around them Center both brass tubes in the grooves along either side of the instrument holding them in place with a little tape until you have a few str...

Page 10: ... the first tuning pin at the lower right corner of the dulcimer on the inside row fig 21 Use the tuning wrench to turn the pin CLOCKWISE about one half turn before putting tension on the wire Pull on the wire to set it in the pin fig 22 This puts a kink in the wire at the point where it enters the tiny hole in the tuning pin If the wire pulls out of the pin when you pull on it cut off the kinked e...

Page 11: ...e around the top wood screw hitch pin figs 25 and 26 Just a single pass around the screw is fine although it won t hurt anything if you want to wind a complete 360 degree circle around the pin The final tension will be equal on each pair of strings so you don t need to worry about slippage Keeping tension on the wire at all times turn the pin about two complete revolutions with the tuning wrench g...

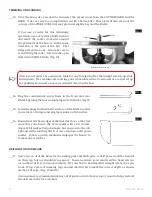
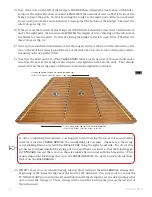
Page 12: ...he treble strings fig 28 FIG 28 FIG 29 FIG 30 024 Loop End Strings 032 Loop End Strings HINT You ll want the black dots to face inward on the instrument they will be easier to see as you play fig 28 Place the BASS BRIDGE about 4 from the right corner of the box at the rear and 11 1 2 from the right corner at the front fig 29 TheBASSBRIDGEcanbeshiftedaround somewhat to fit the spacing of the treble...

Page 13: ... the other to achieve this proper place ment You may make careful measurements and calculations to verify its location or you may verify it by ear which is perhaps the better approach since your ear is what will complain if the thing is out of tune Here s how to go about it Pluck the lowest string at the front of the instrument on the right side of the TREBLE BRIDGE If the string is so loose that ...

Page 14: ...ned up in a straight line between the ends That should ensure that all the strings give a fifth interval from the right side to the left If after completing this exercise you happen to find a string that does not sound a fifth interval across the TREBLE BRIDGE then something else is amiss Chances are the string is not making firm contact with the BRASS TUBE along the right hand side To correct thi...

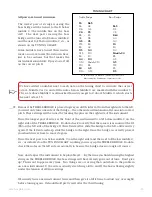
Page 15: ...at bridge the other side will automatically come into correct pitch These strings will be tuned by turning the pins on the right side of the instrument Tune the longest pair of wires at the front of the instrument to a G below middle C on the right side of the TREBLE BRIDGE Double check to verify that the same wires sound at the D Eb on the left side of the bridge If the left side is flat slide th...

Page 16: ...clean Musicmakers stocks liquid Pin Tite for swelling the wood fibers and if that is not sufficient we keep a few oversize tuning pins for that situation Check our catalog hardware page or web site for details CLEANING WOOD SURFACES The main challenge will be to clean the dust from under the strings Not that a little dust hurts anything but when you decide enough is enough you can try to push a ra...

Reviews: