background image

6

MPTP-L46UA-0001

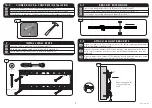
Hook top of bracket over the top of wall mount then lower down and tilt toward wall.  

You will hear a click when the mechanism locks in place. 

Parte superior del gancho de soporte sobre la parte superior del soporte de pared a continu-

ación, más abajo y la inclinación hacia la pared.  Oirá un clic cuando el mecanismo de cierre 

es en su lugar.
Accrocher le haut du support sur le support mural, puis plus bas et l’inclinaison vers le mur. 

Vous entendrez un déclic lorsque le mécanisme de verrouillage en place.

4

HANG TV

4-2

4-1

3-3

Spacer

R or S

3-4

!

If screws bottom out use washers (not included) to eliminate slack.

Si los tornillos tocó fondo a continuación, utilizar arandelas (no incluidos) para elimi-

nar la holgura.

Si les vis touché le fond, puis utiliser des rondelles (non inclus) afin d’éliminer mou.

ATTACH MOUNT BRACKETS

3-4

Use spacers (R / S) between TV and mount if needed.

Utilice espaciadores (R / S) entre la televisión y montar si es necesario.

Utiliser des entretoises (R / S) entre le téléviseur et le support métallique si nécessaire.

3-3

ATTACH MOUNT BRACKETS

Summary of Contents for MPTP-L46UA

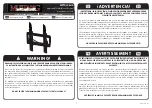
Page 1: ...de la instalación contacte con Mustang AV o llame a un operario cualificado Mustang AV no es responsable de daños o lesiones causados por el montaje ensamblaje o uso incorrectos El ferretería que incluye este producto es exclusivamente destinado a ser instalado en las pare des de madera maciza hormigón bloques de concreto o columnas de madera sólida con un máximo de 16 mm de drywall Para las pared...

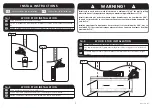
Page 2: ...ry bit 11mm 7 16 Socket wrench 13mm Hammer if necessary Madera poco 6mm 7 32 poco mampostería 11 mm 7 16 Toma llave de 13 mm Hammer si es necesario Bois peu 6mm 7 32 peu maçonnerie 11mm 7 16 13mm Clé à douille Marteau si nécessaire C 1 D 2 M5 x 10mm T 8 M4 M5 Spacer R 4 M6 M8 Spacer S 4 M8 x 40mm P 4 M8 x 16mm N 4 M8 x 20mm O 4 8mm x 65mm A 6 B 6 M4 x 12mm F 4 M5 x 30mm I 4 M6 x 12mm J 4 M6 x 20mm...

Page 3: ...OOD STUD INSTALLATION 1a 3 Using level draw a vertical line at stud center Con un nivel trace una línea vertical en el centro de postes de madera Utilisez un niveau et tracez une ligne verticale au centre du montant WOOD STUD INSTALLATION 1a 2 Install only to wood studs or wood joists that are a minimum of 2 x4 the wall or ceiling where the mount is being attached may have a maximum drywall thickn...

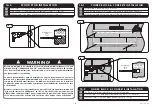
Page 4: ...s are designed to be installed to a concrete wall with a minimum thickness of 8 and minimum density of 2000psi and 8 x8 x16 cinder block which meets ASTM C 90 specifica tions Do not drill into mortar joints Do not install to a concrete wall or cinder block that has any type drywall or other finishing Se monta están diseñados para ser instalados en un muro de hormigón con un espesor mínimo de 8 y l...

Page 5: ...TS 3 2 Screws F P If necessary add bracket extensions D and secure with screws T Si es necesario añadir extensiones de soporte D y fijar con tornillos T Si nécessaire ajouter des extensions à l appui D et la vis T BRACKET EXTENSIONS 3 1 Fasten wall plate to wall using screw A and washer U Fije la placa de pared a pared con el tornillo A y la arandela U Fixer la plaque murale au mur avec la vis A e...

Page 6: ...son vers le mur Vous entendrez un déclic lorsque le mécanisme de verrouillage en place 4 HANG TV 4 2 4 1 3 3 Spacer R or S 3 4 If screws bottom out use washers not included to eliminate slack Si los tornillos tocó fondo a continuación utilizar arandelas no incluidos para elimi nar la holgura Si les vis touché le fond puis utiliser des rondelles non inclus afin d éliminer mou ATTACH MOUNT BRACKETS ...

Page 7: ...nación a la posición deseada y gire la inclinación hacia la derecha para apretar y seguro Régler l inclinaison à la position désirée et tourner inclinaison vers la droite pour serrer et sécurisé 6 ADJUST TILT 6 0 5 10 Note Use locking pin Z optional accessory to eliminate potential tilt sag from heavier TVs and secure into permanent tilt position After installation use adjustment screws to level T...

Page 8: ...ncidental or conse quential damages This includes but is not limited to any labor charges for the repair of Mustang AV products performed by anyone other than Mustang AV Specifications are subject to change without prior notice Felicitaciones por su compra de este producto Mustang AV Ahora tiene en su poder un producto fabricado con materiales resistentes basado en un diseño muy bien meditado Por ...

Page 9: ...ur quelque dommage accessoire ou indirect Ceci s applique notamment aux frais de main d oeuvre pour la réparation de produits Mustang AV par une personne ne travaillant pas pour Mustang AV Les spécifications sont sujettes à changement sans préavis GARANTIE NOTICE TO CUSTOMERS OUTSIDE THE UNITED STATES MUSTANG PRODUCT WARRANTY APPLIES ONLY TO PRODUCTS PURCHASED IN THE UNITED STATES FOR PURCHASES OU...

Reviews: