background image

User’s Guide Kona / Kona apparel cutting plotter

Maintenance

174

AP-75370 - Revision 1.1

8.1.3 

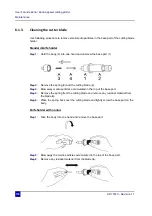
Cleaning the cutter blade

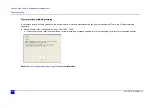
Use following procedure to remove small media particles in the base part of the cutting blade 
holder.

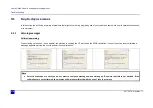
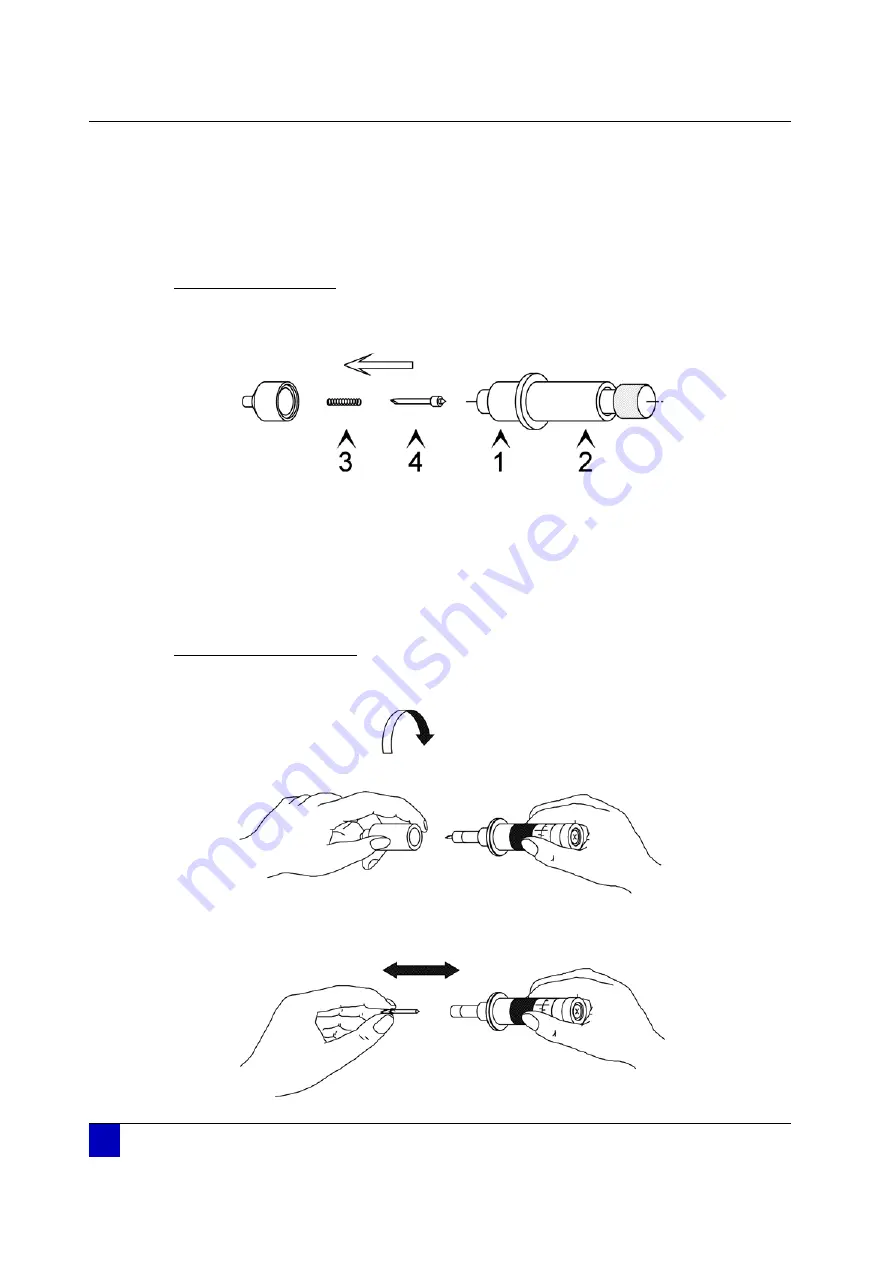
Standard knife holder

Step 1: 

Hold the body (2) into one hand and unscrew the base part (1) 

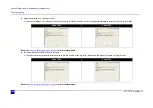
Step 2: 

Remove the spring (3) and the cutting blade (4). 

Step 3: 

Blow away media particles accumulated in the top of the base part.

Step 4: 

Remove the spring from the cutting blade and remove any residual material from 
the blade tip

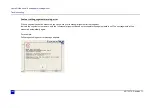
Step 5: 

Place the spring back over the cutting blade and tightly screw the base part on the 
body. 

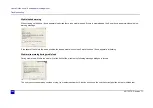
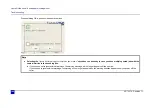
Knife holder with nonius

Step 1: 

Take the body into one hand and remove the base part.

Step 2: 

Blow away the media particles accumulated in the top of the base part.

Step 3: 

Remove any residual material from the blade tip.

Summary of Contents for Kona 1400

Page 1: ...User s Guide...

Page 2: ......

Page 3: ...ocument to support the Kona Kona apparel cutting plotter series In consideration of the furnishing of the information contained in this document the party to whom it is given assumes its custody and c...

Page 4: ...User s Guide Kona Kona apparel cutting plotter 4 AP 75370 Revision 1 1...

Page 5: ...bels 14 Chapter 2 Product overview 17 2 1 Dimensions machine 18 2 2 Installation environment requirements 18 Power supply 18 Ambient conditions 18 Room conditions 19 2 3 Part names and functions 20 Ch...

Page 6: ...nius 49 3 6 Handling and storing media 50 Handling media 50 Precautions on storing media 50 3 7 Loading media 51 Media width 51 Pressure roller positioning 51 Loading sheet media 55 Loading a roll of...

Page 7: ...ntour cutting 145 6 1 Introduction 146 6 2 Different alignment methods 147 6 3 Which alignment method to use 148 Automatic alignment method 148 Manual alignment method 150 6 4 Bounding box details 152...

Page 8: ...1 Day to day use issues 179 Warning messages 179 Beeping codes My Kona Kona apparel is making a beeping sound once in a while 189 The USB connection disappears 189 The power ON but the cutter does not...

Page 9: ...ter AP 75370 Revision 1 1 9 Chapter 10 Consumables 209 10 1 Knife holder and blades 209 Knife Holder without Depth Change Indication 209 Knife Holder with Depth Change Indication 210 10 2 Pens 210 10...

Page 10: ...User s Guide Kona Kona apparel cutting plotter 10 AP 75370 Revision 1 1...

Page 11: ...cutting plotter Regulations and safety information AP 75370 Revision 1 1 11 Chapter 1 Regulations and safety information Warnings cautions and notes 12 Compliance with the following regulations 12 Imp...

Page 12: ...e conformity with the essential health and safety requirements set out in European Directives By affixing the CE marking the manufacturer his authorized representative or the person placing the produc...

Page 13: ...y aspects Mechanical electrical Choice of components Choice of materials flammability Connectors cables Fire enclosure This means the product is safe for users service personnel and production personn...

Page 14: ...e rollers and grit rollers when loading media for example Be careful not to get stuck between the following moving parts Cutting head Grit rollers This label only appears on the Kona Apparel It indica...

Page 15: ...P 75370 Revision 1 1 15 1 This label only appears on the Kona Apparel Label indicating how to insert the tool correctly in the second location Refer to On the second location Kona apparel only on page...

Page 16: ...ons and safety information 16 AP 75370 Revision 1 1 Kona Kona apparel Serial number label providing you the following information Serial number Unit name Power supply requirements Regularisations Clas...

Page 17: ...1 1 17 Chapter 2 Product overview Dimensions machine 18 Installation environment requirements 18 Power supply 18 Ambient conditions 18 Operation environment 18 Recommended environment dark area 18 Var...

Page 18: ...perature 16 C 32 C Humidity 35 70 non condensing Variation rate Temperature 2 C per hour Humidity 5 per hour Storage environment Temperature 0 C 50 C Kona 760 Kona 1400 or Kona apparel 1400 Kona 1650...

Page 19: ...t issues It is best to keep your machine away from open windows and air conditioners See to it that there is an adequate space around the cutter so that ventilation is not obstructed Avoid unnecessary...

Page 20: ...nel touch screen To make various settings before and during cutting 6 Cutting head Assembly of cutting knife sheet off knife and EPOS sensor On the Kona apparel an extra tool mounting position is fixe...

Page 21: ...3 Normal procedure 33 Recovery procedure 35 Reinstalling the FW via the PC 35 Recovery procedure via the CutServer 37 Installing and replacing tools 40 Installing tools 40 On the first location head a...

Page 22: ...ossibility 2 52 Possibility 3 53 Possibility 4 54 Loading sheet media 55 Configuration to start from 55 Media loading procedure 55 Loading a roll of media using the media support rollers 59 Configurat...

Page 23: ...stall the driver Refer to Uninstall update USB drivers on page 31 3 1 1 Install USB drivers Step 1 Download the latest drivers from Mutoh s member Site window drivers Step 2 Unpack the driver package...

Page 24: ...User s Guide Kona Kona apparel cutting plotter Basics 24 AP 75370 Revision 1 1 Step 6 In the control panel s device manager select Other devices Kona...

Page 25: ...User s Guide Kona Kona apparel cutting plotter Basics AP 75370 Revision 1 1 25 3 Step 7 Right click and choose Update Driver Software Step 8 When prompted choose Install this driver software anyway...

Page 26: ...User s Guide Kona Kona apparel cutting plotter Basics 26 AP 75370 Revision 1 1 Step 9 The USB driver is now installed Step 10 A new error is shown briefly about the virtual comport...

Page 27: ...User s Guide Kona Kona apparel cutting plotter Basics AP 75370 Revision 1 1 27 3 Step 11 In the control panel s device manager select Other devices USB Serial Port...

Page 28: ...User s Guide Kona Kona apparel cutting plotter Basics 28 AP 75370 Revision 1 1 Step 12 Right click and choose Update Driver Software Step 13 When prompted choose Install this driver software anyway...

Page 29: ...installed 3 1 2 Check COM port used For Windows XP users Step 1 Open the windows control panel Step 2 Double click on the system icon Step 3 Click on the hardware tab Step 4 Click on device manager S...

Page 30: ...sion 1 1 For Windows Vista and 7 users Step 1 Click on the start button Step 2 Type device manager in the search window Step 3 Click on device manager Step 4 Unfold the Ports COM LPT menu and check wh...

Page 31: ...your device Virtual serial port USB device Step 3 Uninstall the serial PORT Double click on the USB serial port item and select the driver TAB When you want to install a new version of the driver pre...

Page 32: ...a loaded Step 2 Switch ON the power button Step 3 The home screen will appear 3 2 2 Powering OFF Step 1 Verify the cutter is not operating Step 2 Switch OFF the power button Note In could happen that...

Page 33: ...Be sure that the USB driver is already installed Refer to Uninstall update USB drivers on page 31 Step 3 Power ON the cutter and computer Step 4 Be sure that the pressure rollers are raised Step 5 Dow...

Page 34: ...omatically as soon as the firmware has been installed Step 14 The new firmware has been installed properly when you hear a beep Note After updating the new firmware take a parameter backup A new firmw...

Page 35: ...d when powering on blink 4 error leds available when removing the right hand cover There are 2 possibilities to perform a recovery Reinstalling the FW via the PC To use the recovery mode proceed as fo...

Page 36: ...k COM port used on page 29 Step 8 The PC will send and program the new firmware to the cutter Step 9 The Kona Kona apparel cutting plotter restarts automatically as soon as the firmware is installed S...

Page 37: ...Basics AP 75370 Revision 1 1 37 3 Recovery procedure via the CutServer Step 1 Start the CutServer Step 2 In the CutServer click the Extra tab and select Activate Firmware Recovery Mode Step 3 A new sc...

Page 38: ...1 Step 4 In the status bar a recover connection becomes available Step 5 Select this recover connection Step 6 The recovery button appears next to the checkbox As soon as selecting this button a confi...

Page 39: ...User s Guide Kona Kona apparel cutting plotter Basics AP 75370 Revision 1 1 39 3 Step 7 The firmware is being recovered Step 8 After the recovery restart the CutServer or restart the cutter...

Page 40: ...re the pressure rollers are up Step 3 Manually move the cutter head to the left Step 4 Open the screw 1 to unlock the tool head mounting bracket Step 5 Hold back the clip 3 of the tool head and slide...

Page 41: ...arel only Step 1 Position the pen with its collar underneath the collar of the tool mounting assembly Step 2 Carefully push the pen tool into the holder Note Be aware that only pen tools can be mounte...

Page 42: ...lease follow the procedure below Standard knife holder Step 1 Hold the body 2 into one hand and unscrew the base part 1 Step 2 Remove the spring 3 and the cutting blade 4 Step 3 Slide the spring over...

Page 43: ...Basics AP 75370 Revision 1 1 43 3 Knife holder with nonius Step 1 Take the body into one hand and remove the base part Step 2 Pull out the old blade and insert a new one Step 3 Place the base part on...

Page 44: ...2 Remove the protection plate and sheet off blade Step 3 Replace the sheet off blade or rotate it 4 cutting sides and reinstall all the parts Step 4 Tighten the screw firmly and verify that the assemb...

Page 45: ...e platen with isopropanol Step 3 Install the new cutting mat in the same position as the old one Step 4 If you notice cutting errors after replacing the cutting mat it might be necessary to contact an...

Page 46: ...knife depth is a very important parameter when it comes to making high quality outputs 3 5 1 Contour cutting knife depth Make sure that the knife blade sticks out enough of the knife holder but not t...

Page 47: ...too much The knife top should come through the backing Note Be aware that a lower force is necessary when working with the Kona apparel in combination with marking paper 1 2 3 4 1 1 N Description 1 K...

Page 48: ...the base part in your left hand and twist the ring slightly Take the base part and the ring in your left hand and twist the shaft until the knife point sticks out about 0 2 mm 0 008 out of the base p...

Page 49: ...change the depth of the cutting blade For those applications Mutoh can provide you with a knife holder featuring a nonius vernier which makes it possible to adjust the depth of the knife in increment...

Page 50: ...have it match to the temperature of the working area Cutting before the media was able to accommodate to the cutting environment may cause media jams due to slippage tracking problems or creases This...

Page 51: ...low you find a schematic overview of the cutter You can divide the picture in different blocks Please keep below picture in mind to know which item we discuss Type Cutting range Kona 760 Min 104 mm Ma...

Page 52: ...10 11 12 13 Schematic overview Kona Kona apparel 1650 Position pressure roller 2 Position pressure roller 3 Kona Kona apparel 1400 2 4 5 7 Kona Kona apparel 1650 2 5 6 8 Note The third pressure rolle...

Page 53: ...anted to leave any pressure roller marks it is possible to disable the middle pressure roller on a Kona or to change the pressure of all pressure rollers on a Kona apparel Kona Move the middle pressur...

Page 54: ...1 2 3 4 5 6 7 8 9 10 11 12 13 Schematic overview Kona Kona apparel 1650 Position pressure roller 2 Position pressure roller 3 Kona Kona apparel 1400 Disabled 5 7 Kona Kona apparel 1650 Disabled 6 8 No...

Page 55: ...ction bag when the cutting job is larger than 4m Remove the media support rollers Media loading procedure Step 1 Guide the media under the pressure rollers at the front of the cutter Step 2 Position t...

Page 56: ...roller marks it is possible to disable the middle pressure roller on a Kona or to change the pressure of all pressure rollers on a Kona apparel Kona Move the middle pressure roller to the docking sta...

Page 57: ...edia straight To help you rulers are drilled in the front platen Step 6 Make sure that the media is cut off straight at the front to avoid media initialization mismatches Step 7 Lower the pressure rol...

Page 58: ...e ready to cut Note In some cases the cutter gives a warning screen for example if there is no tool installed the media is too thick Select ignore in case you want to proceed with an undetected tool I...

Page 59: ...The rear media collection bag is open and empty The front media collection bag is open when the cutting job is smaller than 4m The front media collection bag closed when the cutting job is larger than...

Page 60: ...through the rolls when the roll is almost empty Step 2 Guide the media under the pressure rollers at the front of the cutter Step 3 Position the pressure rollers 1 so that every pressure roller faces...

Page 61: ...e roller marks it is possible to disable the middle pressure roller on a Kona or to change the pressure of all pressure rollers on a Kona apparel Kona Move the middle pressure roller to the docking st...

Page 62: ...holes will help you monitoring if the media is not meandering too much Step 5 Verify the media is cut off straight at the front to avoid media initialization mismatches Step 6 Select the media measure...

Page 63: ...ars The usable width of media is displayed Step 10 The media is now properly loaded and you are ready to cut Note In case there is no tool installed the cutter gives a warning screen Select ignore in...

Page 64: ...ction bag is open and empty The front media collection bag is open when the cutting job is smaller than 4m The front media collection bag closed when the cutting job is larger than 4m Note The media r...

Page 65: ...edia holders by fixing the thumb screws Step 2 Guide the media as shown below Step 3 Position the pressure rollers 1 so that every pressure roller faces a grit roll 2 Each pressure roller has a tactil...

Page 66: ...roller marks it is possible to disable the middle pressure roller on a Kona or to change the pressure of all pressure rollers on a Kona apparel Kona Move the middle pressure roller to the docking sta...

Page 67: ...he drilled holes to align a roll of media Rolls can only be correctly installed using the equal tension method The holes will help you monitoring if the media is not meandering too much Step 6 Make su...

Page 68: ...width of media is displayed Step 10 The media is now properly loaded and you are ready to cut Step 11 You are ready to cut Note In case there is no tool installed the cutter gives a warning screen Sel...

Page 69: ...using the media support rollers Refer to Configuration to start from on page 64 when loading a roll of pre printed media using the roll off system Refer to Bounding box specifications on page 153 Ste...

Page 70: ...roller marks it is possible to disable the middle pressure roller on a Kona or to change the pressure of all pressure rollers on a Kona apparel Kona Move the middle pressure roller to the docking sta...

Page 71: ...drilled in the front platen Step 6 Verify the media is cut off straight at the front to avoid media initialization mismatches Step 7 Rise the lever Step 8 The cutter will measure the paper and display...

Page 72: ...you are ready to cut Note In some cases the cutter gives a warning screen for example if there is no tool installed the media is too thick Select ignore in case you want to proceed with an undetected...

Page 73: ...5370 Revision 1 1 73 3 3 9 Pausing the current job It is possible to pause a job by pressing the pause button Once the button is pushed all actions stop and the resume button appears Click the resume...

Page 74: ...and executing vectors As long as the processing of data takes place the remaining time may increase Once the processing stops the remaining vectors will be executed and the remaining time will start...

Page 75: ...Adjust value menu 79 Menu overview 80 Settings 1 3 83 Tool 83 Epos 98 Load mode 104 Load length 106 Sheetoff 107 Cut through 108 Settings 2 3 110 Smoothing 110 Resolution 111 Job focus 112 Auto shuffl...

Page 76: ...User s Guide Kona Kona apparel cutting plotter Operation panel 76 AP 75370 Revision 1 1 Contour cut 124 Tool load 132 Sheetoff 133 Actions 2 2 137 Copies 137 EPOS read 138...

Page 77: ...Open the settings menu Refer to Settings 1 3 on page 83 2 Actions button Open the actions menu Refer to Actions 1 2 on page 120 3 USB indication This icon will appear if the Kona Kona apparel is conne...

Page 78: ...utton Go back to the home menu the menu shown above 2 Settings button Open the settings menu 3 Actions button Open the actions menu 4 Back cancel button Go back to the previous menu in the hierarchy 5...

Page 79: ...nge 5 Numeric keyboard Type the requested set value 6 comma button In some screens this comma button appears in case a comma might be necessary 7 Save button Save the new value 8 Reset button Resets t...

Page 80: ...1 100 cm s page 97 Up Height 1 mm 2 mm 15 mm page 97 Epos Epos align Automatic page 98 Manual position Manual color Optimize Distance X Distance Y Color On OFF Accuracy High Low Middle Load mode With...

Page 81: ...2 page 114 Settings 3 3 Protocol Emulation MGL page 115 VS SF AS Accept Ignore Language English Nederlands Francais Deutsch Espanol Italiano Portugues Polski Greek Czech Russian Turkish page 116 Diagn...

Page 82: ...ntour cut Automatic MultiFrame Jobs page 124 ShtOff btw ShtOff aft Single Frame Jobs ShtOff btw ShtOff aft Manual MultiFrame Barcode Direction ShtOff aft SingleFrame Barcode Direction ShtOff aft Manua...

Page 83: ...ge 90 Management on page 91 Up velocity on page 97 Up Height on page 97 Type of tool Set the type of the active tool Depending on the installed tool an offset needs to be taken into account Refer to O...

Page 84: ...ool The speed can be set as well on the cutter panel as in the cut software When the speed is set in the software the panel speed is overruled when the function VS ZF AS is enabled by default Refer to...

Page 85: ...the cutter applies on the knife pen We merely want to point out that you have to cut your design with the lowest possible pressure that gives no trouble to weed Some media require only 20 grams to be...

Page 86: ...ttons in order Settings Tool Force 2x Step 2 Change the value to the desired force and confirm with or cancel with Follow the procedure below to test the actual settings Step 1 Press the following but...

Page 87: ...urate measurement of the used offset is very difficult and requires specialized equipment You should therefore adjust the offset 1 by checking real cutting results on the media you will use Mutoh help...

Page 88: ...nel 88 AP 75370 Revision 1 1 Step 1 Press the following buttons in order Settings Tool Offset Test Step 2 Select Yes to perform the test Step 3 The machine cuts a series of squares each with a differe...

Page 89: ...o show the test pattern once more The offset value is larger than the optimum knife offset The offset value is smaller than the op timum knife offset In this case a square corner is cut as follows The...

Page 90: ...p alert Make your preferred choice On If a tool change is requested in a plot file you will hear a beep and a message is shown which tool to insert and on which location Off If a tool change is reques...

Page 91: ...e of different type and can have their own specific settings A maximum of 9 tools can be used of which their are 3 standard tools pre defined Press the following buttons in order to open the tool mana...

Page 92: ...the head To change the settings of the tool Refer to Changing the tool settings on page 93 Duplicate a tool in the tool list The settings of the selected tool are copied in a new tool Refer to Duplic...

Page 93: ...l settings Step 1 Click on the tool to select the tool of which you want to change the settings Step 2 Press the settings button Tool management help window Icon Icon information Navigates to the firs...

Page 94: ...on you will switch between Small characters Large characters Numbers Language depended small characters Large characters Language depended signs Switch between a Qwerty and an Azerty keyboard Reset an...

Page 95: ...nge some settings of this tool refer to Changing the tool settings on page 93 Mechanical restriction of the machine cause that a dragknife can not be used on the second location Be aware never to load...

Page 96: ...ol In case you want to delete a tool from the management library proceed as follows Step 1 Click on the tool to select the tool you want to delete Step 2 Press the Delete tool button A confirmation wi...

Page 97: ...hat there is also a throughcut speed This speed can be set in the separate Cut Through menu Up Height This setting gives you the opportunity to set the tool height above the media during operation For...

Page 98: ...fe Refer to Installing tools on page 40 Step 3 Install a dark black media Check with the EPOS readout function if it is dark enough as described in If no media is loaded on page 138 Note It is advised...

Page 99: ...nual Position Manual colour Step 5 Select automatic Select manual position Select Manual color Step 6 Press the start key Press the start key Press the start key Step 7 Following message is displayed...

Page 100: ...cuted following screen is shown Step 12 The cutter automatically measures the 4 sides of the box to know the distance between the EPOS sensor and the knife tip The EPOS laser activates and moves to th...

Page 101: ...these values are correct but in rare cases a shift could happen To delete this shift you can optimize the offset distances between the pen and the laser These distances are counted up with the calibra...

Page 102: ...alibration it is not longer necessary that the machine performs an automatic color detection Therefore you can switch this setting off Change the EPOS color setting as follows Settings Epos Color Swit...

Page 103: ...ange the EPOS accuracy setting as follows Settings Epos Accuracy Change the setting to High Middle or Low and confirm by pressing Important The lower the selected accuracy the lower the expected cur a...

Page 104: ...ent before lowering the pressure rolls Follow the procedure below to set the media measurement method Step 1 Press the following buttons in order Settings Load Mode Step 2 Select the media measurement...

Page 105: ...media In case the front backside of the media is slightly curled select this option Compared to the setting With Front the cutter will feed the media forward move the head over the media and determine...

Page 106: ...and forth through the cutter ensuring the pressure rollers have a discrete path while the user has the time to verify if the media transports well Your Kona Kona apparel cutter is equipped with an au...

Page 107: ...tance the media is fed before sheeting off and confirm the new value with Step 4 Click Velocity Set the velocity of the sheet off operation and confirm the new value with Note Performing a sheet off a...

Page 108: ...akness suffers not radically from the multiple cut through samples accomplished Therefore a perfect harmony between your tool down force and tool up distance needs to be synchronised Via this menu you...

Page 109: ...gh cutting settings Step 4 Set the values for the tool up and tool down distance Go to the next sub page Select Up Dist and or Down Dist Step 5 Enter the desired values and confirm with Step 6 Press t...

Page 110: ...is larger than the smoothing angle the cutter will slow down and cut a sharp corner 1 If the angle is smaller the cutter will maintain its speed and cut a rounded corner 2 The optimum smoothing angle...

Page 111: ...5 mm corresponds with 40 steps per mm and a program step of 0 010 mm with 100 steps per mm Contour cutting supports only 0 010 mm program step Set the resolution as follows Step 1 Press the following...

Page 112: ...ge Job Focus Step 2 Choose between accuracy and speed and confirm with Auto shuffle After an automatic sheet off it is possible to let the cutter shuffle the set load length or to hold until further a...

Page 113: ...Settings Next page Origin Step 3 Select the origin position and confirm with Center Lower right default Note Be aware that this is the standard Origin setting There is also the possibility to customi...

Page 114: ...If the PAGE command PGn is sent the number mentioned after the PG command is interpreted differently depending on the page mode you have chosen Page Mode 0 The number after the page command is ignore...

Page 115: ...Choose between accept and ignore and confirm with Several cutting software packages enable the user to send speed force and acceleration commands to the cutter The cutter can be set up to accept or i...

Page 116: ...Language Step 2 Choose your preferred languages and confirm with Diagnostics This section is intended for service technicians only Note In case of entering the diagnostics mode and changing settings t...

Page 117: ...f the LCD screen After changing it confirm with Brightness change the value to change the brightness of the LCD screen After changing it confirm with Animation Wait time Set the time the Kona Kona app...

Page 118: ...t is handy to know which firmware serial number revision the machine has Open the information screen as follows Step 1 Press the following buttons in order Settings 2x Next page Information Click Firm...

Page 119: ...ngs before performing this action For more information on how to make a backup refer to the User s Guide of the CutServer Open the User window as follows Step 1 Press the following buttons in order Se...

Page 120: ...move the head faster Item Information Move the head to the left Move the head to the right Feed the media forwards Feed the media backwards Position of the knife top The X coordinate is the difference...

Page 121: ...ed Origin setting There is also a standard origin For more information concerning the standard origin refer to Origin on page 113 Item Information Move the head to the left Move the head to the right...

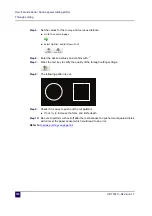
Page 122: ...th or select the correct tool in the tool manager Refer to Cut through depth on page 47 Refer to Tool on page 83 Step 3 Make your personal settings regarding the cut through feature Tool Velocity Forc...

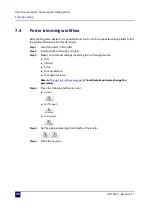
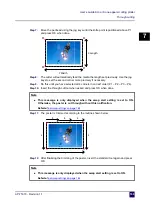
Page 123: ...all 4 corners in correct order P1 P2 P3 P4 Step 10 Insert the user selected tool when asked and press OK when done Step 11 The poster is trimmed according to the routine shown below Step 12 After fina...

Page 124: ...to know which alignment method to choose and the bounding box specifications Automatic When performing a single or multi frame contour cut job start the job via the Go button on Mutoh s CutServer It...

Page 125: ...lti frame contour cut Step 3 Set the number of jobs to perform Press Jobs Fill in the number of jobs Step 4 Press Step 5 Press the Sheet off between button Decide if you want to perform a sheet off ac...

Page 126: ...he corresponding job is launched from the Mutoh CutServer Manual When you want to start a contour cut job of which for example the bounding box is not printed clearly the automatic alignment option wi...

Page 127: ...Operation panel AP 75370 Revision 1 1 127 4 Step 3 Fill in the bar code number Press Barcode Fill in the barcode Step 4 Press Step 5 Fill in how the job is loaded Press Direction Set whether the media...

Page 128: ...s necessary once the job is done Press ShtOff Aft Select Yes or NO Step 8 Press start The Kona Kona apparel will now look in the CutServer queue for the correct file Once the file is received the cutt...

Page 129: ...ns in order Actions Contour Cut Manual Manual Step 2 Set the exact length and width of the bounding box Step 3 Set the roll direction Non reverse When standing in front of the cutter the data sent sho...

Page 130: ...would like to cut Step 1 Press the following buttons in order Actions Contour Cut BC read The Kona Kona apparel shows following message Position the laser at the left side of the bar code and press O...

Page 131: ...ing plotter Operation panel AP 75370 Revision 1 1 131 4 Mirrored means the cut job is inserted upside down The bar code looks as follows Step 2 In case the bar code is not read out properly following...

Page 132: ...box According the Swap Alert setting or the differences between the current and new tool the user can be notified to replace the tool or mount the tool on its locations in case of Kona apparel Step 1...

Page 133: ...AP 75370 Revision 1 1 133 4 A confirmation window appears Click yes if you want to change the tool Sheetoff If media is loaded Via this menu you can sheet off the media Perform a sheet off as follows...

Page 134: ...you are loading it For example you have manually cut a piece of media This means that the edge of the media will not be completely straight To trim the front side of the media proceed as follows Step...

Page 135: ...de Kona Kona apparel cutting plotter Operation panel AP 75370 Revision 1 1 135 4 Step 3 The cutter displays following message Step 4 Verify the media is loaded as described above and lower the pressur...

Page 136: ...ing on the settings made in the sheet off parameter menu one of the following screens is displayed Refer to Sheetoff on page 107 Step 6 Press Yes to proceed the sheet off routine The cutter automatica...

Page 137: ...is function will replot the last set of data which was sent to the cutting plotter That is all data that was sent since the last INITIALISATION command IN Set the number of copies as follows Step 1 Pr...

Page 138: ...can see if the sensor is able to detect a contrast between the media and bounding box Perform the test as follows Step 1 Press the following buttons in order Actions next page EPOS read Step 2 The EP...

Page 139: ...libration 141 Knife settings 141 EPOS test cuts 142 EPOS alignment verification 142 EPOS alignment test 142 EPOS readout 143 XY distance accuracy 143 In order to help you to obtain perfect quality our...

Page 140: ...c cutting media Cutting blade 1 Standard type Cutting blade 2 Used for thick media e g Sandblast Cutting blade 3 Used for thin media e g Film Top angle a 45 red cap 30 yellow cap 60 blue cap Typical o...

Page 141: ...ute a demanding cutting job The knife depth for as well kiss cutting contour cutting as through cutting Refer to Setting the correct knife depth on page 46 to know how to set and test this parameter T...

Page 142: ...ic Positioning System for full automatic contour cutting Verify the EPOS alignment as follows Step 1 Print the test sheet on media observing the original size of the sheet scale of 100 Step 2 Start th...

Page 143: ...ox Refer to EPOS read on page 138 5 2 3 XY distance accuracy The XY Distance Accuracy tests are developed to check the actual X Y cutting distance with the sent vector data Please follow the procedure...

Page 144: ...User s Guide Kona Kona apparel cutting plotter Finetuning your cutter 144 AP 75370 Revision 1 1 Step 10 If entering the correct values the following message will appear and the test is done...

Page 145: ...148 Single frame alignment method 148 Multi frame alignment method 148 Manual alignment method 150 Single frame alignment method 150 Multi frame alignment method 150 Manual alignment method 150 Boundi...

Page 146: ...r cutting 146 AP 75370 Revision 1 1 6 1 Introduction Contour cutting is a very popular feature of the Mutoh cutters This feature is made to cut pre printed signs on media for sticker production as sho...

Page 147: ...hod N Description Info 1 Manual Manual alignment method Manually set the size of the paper and 4 corners of the box 2 Single Frame Alignment with barcode and single frame Only 1 bounding box 3 Multi F...

Page 148: ...or the Kona Kona apparel to auto detect if the image is loaded upside down or correctly There is no need for you to search the plot file for each image the Kona Kona apparel and the Mutoh CutServer wi...

Page 149: ...cutting plotter Contour cutting AP 75370 Revision 1 1 149 6 Note When working with EasySign check the corners to see if you are using a Single frame or multi frame alignment box Single Frame alignment...

Page 150: ...orkflow Multi frame alignment method Is the same as the single frame alignment method but for multi frame jobs This method should be used in combination with Mutoh s CutServer With this method it is p...

Page 151: ...cutting plotter Contour cutting AP 75370 Revision 1 1 151 6 Note When working with EasySign check the corners to see if you are using a Single frame or multi frame alignment box Single Frame alignment...

Page 152: ...thin the margins of the maximum cutting width of your cutting plotter On a Kona apparel the maximum width is marked by the 2 extra holes at both the left and right side of the platform Be sure that th...

Page 153: ...t Bounding box Pressure roller N Description Minimum Maximum 1 White edge at the rear side Sheet Between 2 boxes Add extra space 50mm when working with curled media 75 mm 50 mm 1200 mm 2 White edge at...

Page 154: ...t Between 2 boxes Add extra space 50 mm when working with curled media 75 mm 50 mm 250 mm 250 mm 2 White edge at the front side Add extra space 50 mm when working with curled media 20 mm 300 mm 3 boun...

Page 155: ...code height 20 mm 20 mm 10 Bar code width 246 mm 11 Distance between pressure roller and bounding box 1 mm Note Upper and lower postnet barcodes do have an identical margin setup Make sure to respect...

Page 156: ...when working with curled media 75 mm 50 mm 250 mm 250 mm 2 White edge at the front side Add extra space 50mm when working with curled media 20 mm 300 mm 3 bounding box thickness 3 mm 20 mm 4 In betwee...

Page 157: ...code height 20 mm 20 mm 12 Bar code width 246 mm 13 Distance between pressure roller and bounding box 1 mm Note Upper and lower postnet barcodes do have an identical margin setup Make sure to respect...

Page 158: ...to recognize the difference between background and box during the scanning procedure 2 A diagonal scan is executed at the set cutting speed in the firmware user controlled 3 A horizontal scan is execu...

Page 159: ...on the panel and a cross is cut in the lower right corner Refer to Contourcutting errors and warnings ID 6201 6271 on page 197 Situation 2 Both sides detected 4 points Situation 3 1st scan both sides...

Page 160: ...User s Guide Kona Kona apparel cutting plotter Contour cutting 160 AP 75370 Revision 1 1...

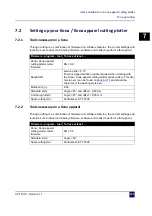
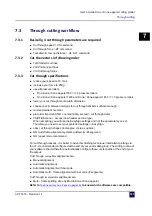
Page 161: ...up your Kona Kona apparel cutting plotter 163 Tools necessary on a Kona 163 Tools necessary on a Kona apparel 163 Toolswap settings 164 Through cut settings 165 Through cutting workflow 167 Basically...

Page 162: ...working with the Kona When the contour of your file is completed single sticker samples basic shapes are often to be isolated E g if making 100 stickers you want to be able to get out every sticker se...

Page 163: ...ve the following firmware software and tool s to perform a through cut Firmware program tool To have at least Kona Kona apparel cutting plotter cutter firmware KN 1 0 0 EasySIGN service pack v 5 12 Th...

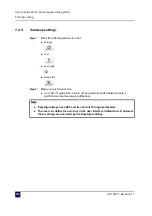
Page 164: ...next page Swap alert Step 2 Make your preferred choice On or Off if swap alerts is set to off an automatic switch between tools is performed without tool swap notifications Note EasySign always uses...

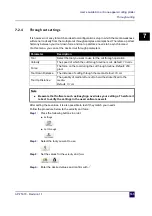
Page 165: ...and force Step 1 Press the following buttons in order Settings Cut through Step 2 Select the tool you want to use Step 3 Set the values for the velocity and force Step 4 Enter the desired values and c...

Page 166: ...lues and confirm with Step 7 Press the test key to verify the quality of the through cutting settings Step 8 The following pattern is cut Step 9 Check if it is easy to push out the cut patterns If not...

Page 167: ...ontour data second cut through data VS ZF AS menu accept new header per line type When accepting you will use the EasySign settings and not the parameters you set Therefore you need to set your prefer...

Page 168: ...Step 1 Load the poster in the cutter Step 2 Install a knife at through cut depth Step 3 Make your personal settings regarding the cut through feature Tool Velocity Force Tool up distance Tool down dis...

Page 169: ...rs in correct order P1 P2 P3 P4 Step 10 Insert the through cut tool when asked and press OK when done Step 11 The poster is trimmed according to the routine shown below Step 12 After finalizing the tr...

Page 170: ...User s Guide Kona Kona apparel cutting plotter Through cutting 170 AP 75370 Revision 1 1 Step 13 Gently push out the poster...

Page 171: ...e AP 75370 Revision 1 1 171 Chapter 8 Maintenance Cleaning and daily maintenance 172 Cleaning the grit roll 172 Cleaning the cutting plotter 173 Cleaning the cutter blade 174 Standard knife holder 174...

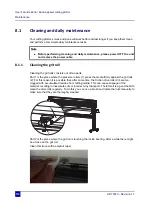
Page 172: ...possible that after some time the friction drive rolls 2 become clogged with accumulated residue from cutting media This can cause slippage of the material resulting in inaccurate cuts or incorrect vi...

Page 173: ...Cleaning the cutting plotter Use a soft cloth to clean paper dust and particles off the platen the grit cover the cutting mat and the carriage cover Use a cotton swab to clean the media sensors and E...

Page 174: ...e spring 3 and the cutting blade 4 Step 3 Blow away media particles accumulated in the top of the base part Step 4 Remove the spring from the cutting blade and remove any residual material from the bl...

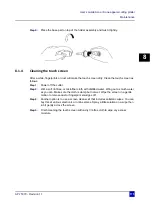
Page 175: ...Step 2 Wet a soft lint free or microfiber cloth with distilled water Wring out as much water as you can Make sure the cloth is damp but not wet Wipe the screen in a gentle motion to remove dust or fin...

Page 176: ...User s Guide Kona Kona apparel cutting plotter Maintenance 176 AP 75370 Revision 1 1...

Page 177: ...Chapter 9 Troubleshooting Day to day use issues 179 Warning messages 179 Calibration warning 179 Media loaded warning 180 Media raise warning during media load 180 Media lost detection 181 EPOS warni...

Page 178: ...90 Media is loaded but the cutter does not operate 190 Data is sent from the computer but the cutter does not react 190 Data is sent from the computer but errors occur on the cutter s side 190 Some pa...

Page 179: ...9 1 1 Warning messages Calibration warning When starting up the Kona Kona apparel the machine is verifying the YZ profile and the EPOS calibration If one of these two is not calibrated a message appea...

Page 180: ...ll show below warning message If the sheet off knife is in the down position the loaded media is sheeted off while the Kona Kona apparel is initializing Media raise warning during media load During me...

Page 181: ...ifted during cutting and the front and rear media sensors are uncovered a message is shown If selecting YES you can you can continue cutting without checking This can be helpful for cut through reason...

Page 182: ...on is added to ignore similar warnings for this job For example A Multi Frame job is done and in the first segment a warning is encountered If you choose not to ignore similar warnings the warning mes...

Page 183: ...the Kona will show a warning message during the media measurement There are 3 types of warning messages Move pressure roller Can appear on Kona 760 1400 1650 In case the pressure roller is not positi...

Page 184: ...he suggested pressure rollers on the centre grit roller Refer to Pressure roller positioning on page 51 for more information Too many pressure rollers on centre grit roller There are too many pressure...

Page 185: ...error When a segment cannot be measured you can switch over to manual alignment for that segment Indicate the segment corner points as in the full manual alignment Based on these points the segment da...

Page 186: ...s until machine power down checkbox can be handy in case you have multiple printed jobs with the same distortion in the bounding box If you choose not to ignore similar warnings the warning message wi...

Page 187: ...automatic alignment is cancelled but you can continue the manual alignment When selecting Yes the navigate windows are shown to indicate the segment corner points Refer to Automatic alignment method o...

Page 188: ...s found you can navigate to a position near the box and restart the automatic alignment again by pressing OK Note It is recommended to navigate to a position at the right side before the box this beca...

Page 189: ...starts Never ending beeping tune Happens when an error occurs In case of a fatal error the tune can be stopped by pressing the screen Restart the machine to continue working Short beep key tune Happen...

Page 190: ...sunlight which could disorder the media sensors 9 1 6 Data is sent from the computer but the cutter does not react Is there a proper interface cable connected Do the interface conditions on the host c...

Page 191: ...damaged or broken Perform the offset adjustment routine to check cutting quality Perform the test cut and check its quality Perform the EPOS alignment test 9 1 9 The output is 2 5 x too large or 2 5 x...

Page 192: ...rs the cutter will make a beeping sound It is possible to switch off this sound by simply touching the screen Error Cause Solution Refer to EPOS calibration error RETRY EPOS sensor goes in error durin...

Page 193: ...cur also Try again or reboot and try again Contact an authorized Mutoh technician if the error remains EPOS problem No EPOS reference found It might be possible that the bounding box cannot be found T...

Page 194: ...Y fuse error Power supply problem Y fuse is broken Y motor problem Contact an authorized Mutoh technician Fatal error 1045 No Z encoder Z encoder or flatcable is broken Contact an authorized Mutoh tec...

Page 195: ...e recognized by the EPOS sensor Refer to EPOS read on page 138 The media has not been weed out when asked on the display before the EPOS alignment measurement The laser is broken Warning 6099 EPOS mea...

Page 196: ...the bump and remove them Warning 6105 X measurement problem Reload media The rear media sensor is uncovered during a media measurement routine Is the media loaded correctly Refer to Loading media on...

Page 197: ...r right corner All codes are unique and the cross has a predefined angle and size to know of which nature the error is Pre defined crosses Single frame calibration points Multi frame calibration point...

Page 198: ...OS alignment aborted Alignment procedure has been aborted by the user 6206 Movement failed Movement failed during EPOS routine moveabsc Error 6207 Movement failed Movement failed during EPOS routine d...

Page 199: ...e cannot be found a next job 6223 No EPOS reference found During search with EPOS laser no edge was found colour white Refer to EPOS read on page 138 If this does not help change the load mode This pr...

Page 200: ...age 152 Warning 6228 Print distortion print stretch Stretch detected on top of frame P5 P8 have identical thickness P6 P7 have identical thickness But thickness of P5 P8 and P6 P7 differ too much from...

Page 201: ...ckness varies too much from other bottom points This will influence the accuracy of the cutting 6234 Thickness problem frame bottom Invalid thickness of P3 bottom left side of frame bottom Thickness v...

Page 202: ...Thickness varies too much from other top points This will influence the accuracy of the cutting 6244 Thickness problem frame top Invalid thickness of P7 top left side of frame top Thickness varies too...

Page 203: ...ch from P10 This will influence the accuracy of the cutting 6253 Thickness problem frame centre Invalid thickness of P10 left centre point Thickness varies too much from P9 This will influence the acc...

Page 204: ...oo varying frame height 20cm frame width 10cm frame angle 5 Refer to Bounding box details on page 152 Error 6262 No valid frame found Only 1 frame point found during diagonal scan 6263 No valid frame...

Page 205: ...on media Pinches and grits clean Warning 6290 Invalid file received Single frame job but Multi Frame file received Start Multi frame measurement Check if a Single Frame measurement has been started Wa...

Page 206: ...pparel which is not correct an error and sub error number is displayed Please find below a list with explanations of these sub numbers Sub number Description 0 No parameters allowed 1 No parameter cas...

Page 207: ...na Kona apparel cutting plotter Troubleshooting 8 Error in MGL command definition 9 Label out of limit error other Unknown MGL error Note Be aware that when one of the above errors occurs no beeping s...

Page 208: ...208 AP 75370 Revision 1 1 User s Guide Kona Kona apparel cutting plotter Troubleshooting...

Page 209: ...nit or spare part price list for the most recent prices of these consumables 10 1 Knife holder and blades 10 1 1 Knife Holder without Depth Change Indication Picture part number Description ZMY 10050B...

Page 210: ...10034B Knife Holder with Depth Change Indication Including one blade 45 angle 0 5 mm offset Blades for Knife Holder with Depth Change Indication 0 5 mm offset ZME 10034A Cutting Knife Blades 30 angle...

Page 211: ...sion 1 1 211 10 10 3 Sheet off blades 10 4 Cutting mat Picture part number Description KY 15134 Set of Sheet Off Blades 10 pieces Picture part number Description KY 15305 Cutting mat 5 pieces The colo...

Page 212: ...User s Guide Kona Kona apparel cutting plotter Consumables 212 AP 75370 Revision 1 1...

Page 213: ...s 93 Check COM port used 29 Cleaning daily maintenance 172 the cutter blade 174 the grit rolls 172 the touch screen 175 Color 102 Consumables 209 Contour cutting 124 145 errors and warnings 197 knife...

Page 214: ...40 firmware 33 tools 40 USB drivers 23 Introduction 146 J Job focus 112 Jogging 120 K Knife depth adjustment 48 settings 141 types 140 Knife holder and blades 209 with Depth Change Indication 210 with...

Page 215: ...y information 11 Reinstalling the FW via the PC 35 Replace cutter blade 42 cutting mat 45 sheet off blade 44 Resolution 111 Room conditions 19 S Safety labels 14 Scanning routing of bounding box 158 S...

Page 216: ...Kona apparel cutting plotter U Uninstalling USB drivers 23 Up height 97 Up velocity 97 User 119 V Variation rate 18 Velocity 84 W Warning messages 179 Warnings cautions and notes 12 Which alignment m...

Page 217: ......
Page 218: ...7772 Fax 1 480 968 7990 E mail sales mutoh com http www mutoh com EMEA Headquarters MUTOH BELGIUM nv Tel 32 0 59 561400 Fax 32 0 59 807117 E mail mutoh mutoh be http www mutoh eu Regional Sales office...

Reviews:

Related manuals for Kona 1400