© MuxLab Inc.
HDMI 4x4 Matrix Switch Installation Guide
Page 30
be designated as “Blue-Ray DVD.” Each display port
name of every Matrix Switch must have a unique name
that represents the location of the display (e.g. “Dinner
Room, East Wall”). The name of every Matrix Switch
should also be unique and indicative of its location.
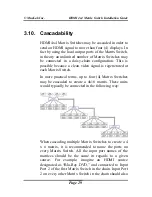
In terms of the actual physical connections required to
cascade multiple Matrix Switches, please follow the
steps below:
1.
Use an HDMI cable to connect HDMI Source 1 to
Input Port 1 of the first Matrix Switch in the chain
(“Matrix Switch 1”).
2.
Use an HDMI cable to connect HDMI Source 2 to
Input Port 2 of Matrix Switch 1
3.
Repeat Step 2 for more HDMI sources and the
remaining input ports of Matrix Switch 1. The
HDMI sources are now all connected to Matrix
Switch 1.
4.
Use STP/UTP cables to connect the Output Ports on
Matrix Switch 1 to the HDMI Receivers (500417 or
500407) located at the Remote Displays for Matrix
Switch 1. (This procedure is the same as when
connecting a Matrix Switch to Remote Displays in a
non-cascaded setup.)
Now to connect Matrix Switch 1 to the second Matrix
Switch in the chain (“Matrix Switch 2”).
5.
Use an HDMI cable to connect the Local Out 1 port
on Matrix Switch 1 to Input Port 1 of Matrix Switch
2. HDMI Source 1 can now transfer signals to
Matrix Switch 2.


