© MuxLab Inc. 2018
Installation
In order to install the HDMI 1X4 Splitter, please follow the steps below:
1.
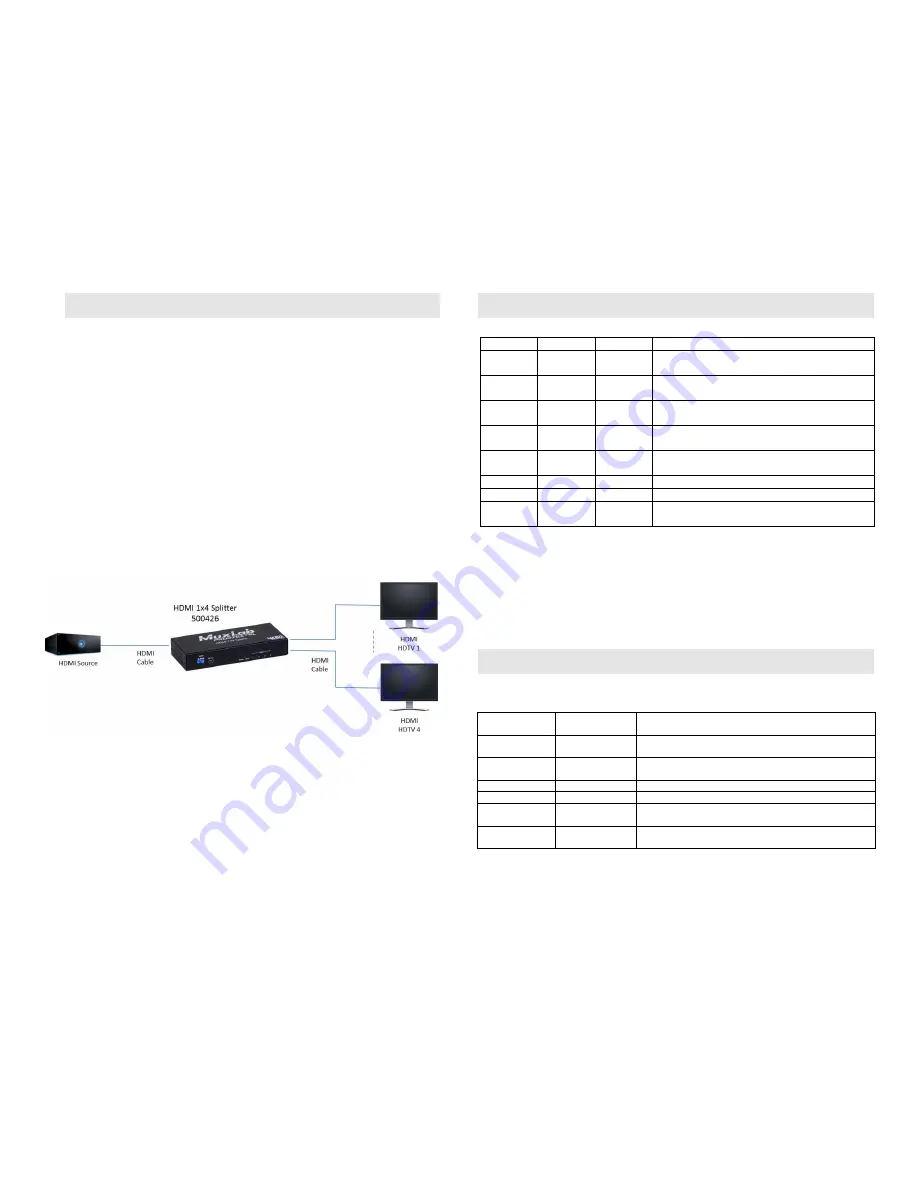
Connect the HDMI video source to the input HDMI connector of the splitter
with an appropriate HDMI cable.
2.
Connect the HDMI display equipment to the output HDMI connectors of the
splitter with appropriate HDMI cables.
3.
Use the Dip switch to select the EDID that will be sent to the HDMI source
device as indicated on the Dip switch table.
4.
Connect the 5 VDC power supply to the splitter first, and then plug the power
supply into an AC power outlet.
5.
Power on the HDMI equipment and verify the image quality.
6.
The following diagram shows the final configuration.
Mode Switch Selection
Use the Dip switch to select the EDID that will be sent to the HDMI source device.
Dip 2
Dip 3
Dip 4
Function
Off
Off
Off
EDID Ultra-HD (3840X2160@60Hz) – 7.1
Audio
On
Off
Off
EDID Ultra-HD (3840X2160@60Hz) – 2.0
Audio
Off
On
Off
EDID Ultra-HD (3840X2160@30Hz) – 7.1
Audio
On
On
Off
EDID Ultra-HD (3840x2160@30Hz) – 2.0
Audio
Off
Off
On
EDID Full-HD (1080p, 3D, 12bit) – 7.1
Audio
On
Off
On
EDID Full-HD (1080p, 8bit) – 2.0 Audio
Off
On
On
EDID 1080i – 7.1 Audio
On
On
On
Learn EDID of the device connected to
Output 1 and send it intact to the input port
Note: Dip 1 should be left in the default “Off” position for normal operation.
Firmware Updates:
Dip 1 should be set to “On” only when performing firmware
updates. In this case save the included update files from the MuxLab website (firmware
“Bin” file & installer software) in the same folder of a PC connected to the 500426 USB
service port. Steps: Turn Dip 1 to “On”, connect the PC to the 500426 USB service port,
power on the 500426, and run the installer software. The update is performed
automatically. Once the update is completed, return Dip 1 to “Off” for normal operation.
Troubleshooting
The following table describes some of the symptoms, probable causes and possible solutions
in regard to the installation of the HDMI 1X4 Splitter.
Picture/
Sound
Probable Cause
Possible Solution
No Image
Wiring
Check continuity
Check correct wiring
No Image
Synchronization
Power off the source and displays, then power them back
on.
Flickering Image
Synchronization
Check HDMI cable length against industry standards.
Choppy Sound
Synchronization
Check HDMI cable length against industry standards.
Noise in image
Weak signal
Check HDMI cable length against industry standards.
Green or pink
hue
HDMI cables
Check HDMI cables and replace as needed.
If you still cannot diagnose the problem, please call MuxLab Customer Technical Support at
877-689-5228 (toll-free in North America) or (+1) 514-905-0588 (International).


