25
EN
M1.3.BT200-BT200M.NLFREN 13112018
.1211 . V201301
- 5
–
Lock the Hexagonal Vertical Mounting Arm, put the tyre on the rim, let
the Rocker Arm back to place as demounting the tyre. And let one side of
tyre down bead above the rear section of the Mounting/demounting head, the
other side under the front section of the Mounting/demounting head.
Suppress the trye with hands or help arm, and then spin the turntable for
mounting the tyre down bead.
Repeat the above operation for mounting the tyre up bead.
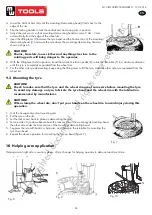
(Fig 7)
10. Helping arm application:
Helping arm at right side is auxiliary device of tyre changer for helping operator to demount and mount tyre.
10.1 098 Help Arm Components
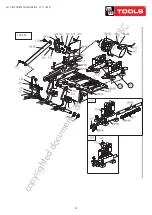
Each components of helping arm device are introduced as follows:
A- Swing arm B- Small helping arm
C- Roller C D- Raise-fall roller handle
F- Locking switch for right helping arm
G- Roller G
The function of helping arm control handle is as follows:
Roller lifting handle (D, Fig 8) is for lifting and lowering roller C
、
G so as to adjust
tyre demounting / mounting vertical height. Operate handle
(
D, Fig 8 ) up, then roller
C
、
G goes up
;
Operate handle
(
D, Fig 8 )down
,
then roller C
、
G goes down.
10.2 098 Help Arm Operation
It is difficult to demount and mount big and flat profile tyre. If operation is proper, it is very easy to use helping arm
device to demount and mount tyre from rim. The helping arm device may also be used
when demounting and mounting normal tyre with resistance.
a.
Clamp rim
Firstly, press both side tyre loose as per operation instruction in user’s manual. Force
of demounting and mounting is big when helping arm device is used. And rim may be
damaged easily. It is recommended that to clamp rim from outside
(
jaw protector may be
installed on jaws
)
. Tread relevant pedal to make jaws open to clamp edge of rim, move
helping arm’s rotary arm to far
-end. Put on tyre, tread relevant pedal to make jaws close
and to approach rim
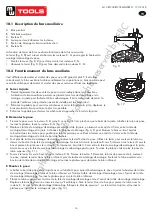
Fig 11
Fig 8
Fig 9
Fig 10
F
Fig 12
1
Fig 7
Fig. 11
.1211 . V201301
- 5
–
Lock the Hexagonal Vertical Mounting Arm, put the tyre on the rim, let
the Rocker Arm back to place as demounting the tyre. And let one side of
tyre down bead above the rear section of the Mounting/demounting head, the
other side under the front section of the Mounting/demounting head.
Suppress the trye with hands or help arm, and then spin the turntable for
mounting the tyre down bead.
Repeat the above operation for mounting the tyre up bead.
(Fig 7)
10. Helping arm application:
Helping arm at right side is auxiliary device of tyre changer for helping operator to demount and mount tyre.
10.1 098 Help Arm Components
Each components of helping arm device are introduced as follows:
A- Swing arm B- Small helping arm
C- Roller C D- Raise-fall roller handle
F- Locking switch for right helping arm
G- Roller G
The function of helping arm control handle is as follows:
Roller lifting handle (D, Fig 8) is for lifting and lowering roller C
、
G so as to adjust
tyre demounting / mounting vertical height. Operate handle
(
D, Fig 8 ) up, then roller
C
、
G goes up
;
Operate handle
(
D, Fig 8 )down
,
then roller C
、
G goes down.
10.2 098 Help Arm Operation
It is difficult to demount and mount big and flat profile tyre. If operation is proper, it is very easy to use helping arm
device to demount and mount tyre from rim. The helping arm device may also be used
when demounting and mounting normal tyre with resistance.
a.
Clamp rim
Firstly, press both side tyre loose as per operation instruction in user’s manual. Force
of demounting and mounting is big when helping arm device is used. And rim may be
damaged easily. It is recommended that to clamp rim from outside
(
jaw protector may be
installed on jaws
)
. Tread relevant pedal to make jaws open to clamp edge of rim, move
helping arm’s rotary arm to far
-end. Put on tyre, tread relevant pedal to make jaws close
and to approach rim
Fig 11
Fig 8
Fig 9
Fig 10
F
Fig 12
1
Fig 7
Fig. 12
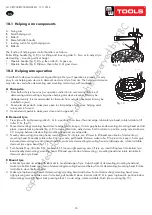
10.1 Helping arm components
A. Swing arm
B. Small helping arm
C.
Roller C
D.
Raise-fall roller handle
F. Locking switch for right helping arm
G.
Roller G
The function of helping arm control handle is as follows:
Roller lifting handle (fig. 8, D) is for lifting and lowering roller C, G so as to adjust tyre
demounting / mounting vertical height.
•
Operate handle (fig. 8, D) up, then roller C, G goes up.
•
Operate handle (fig. 8, D)down, then roller C, G goes down.
10.2 Helping arm operation
It is difficult to demount and mount big and flat profile tyre. If operation is proper, it is very
easy to use helping arm device to demount and mount tyre from rim. The helping arm device
may also be used when demounting and mounting normal tyre with resistance.
A Clamp rim
1. Press both side tyre loose as per operation instruction in user’s manual. Force of
demounting and mounting is big when helping arm device is used. Rim may be
damaged easily. It is recommended to clamp rim from outside (jaw protector may be
installed on jaws).
2.
Tread relevant pedal to make jaws open to clamp edge of rim, move helping arm’s
rotary arm to far-end.
3. Tread relevant pedal to make jaws close and to approach rim.
B Demount tyre
1.
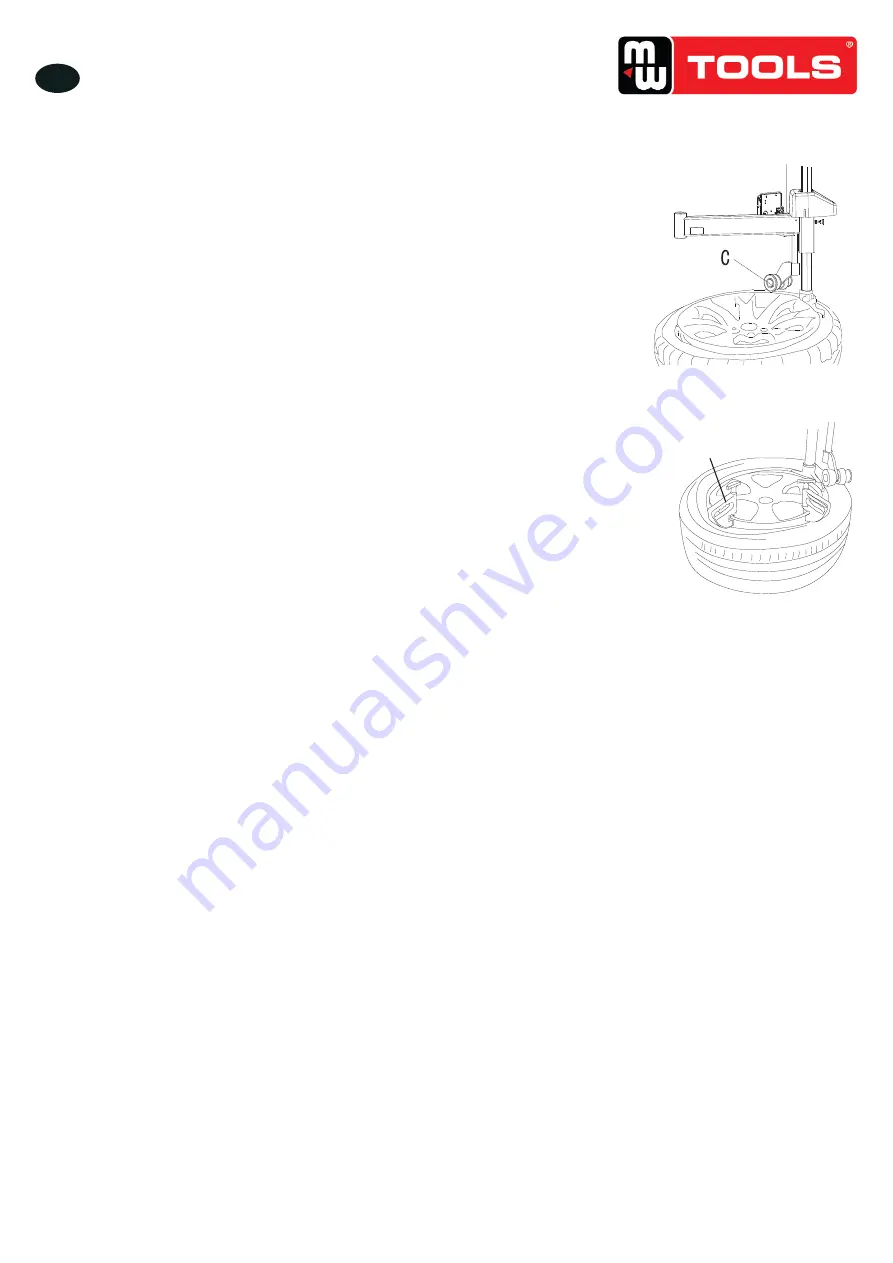
Press tyre with right pressing roller C, G to a position 3 cm lower than rim edge, lubricate tyre bead, rotate turntable, lift
roller C, G. (fig 9).
2.
Move demounting/mounting head close to edge of rim, keep a 2-3 mm gap between demounting/mounting head and rim
plane, operate locking handle (fig. 4, K) to lock vertical arm, adjust screw bolt in column to position swing arm, make sure
2-3 mm gap between demounting/mounting head and rim edge side.
3.
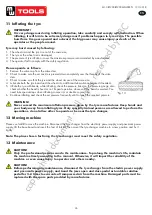
Nearby demounting/mounting head, insert lift lever N into tyre, use lift lever to lift bead upon knob of demounting /
mounting head. Manually rotate roller C to inner side, pull handle D down, make roller C to press rim, keep 3-5 mm gap
between demounting/mounting head and rim, make sure demounting/mounting head not damage rim, rotate turntable,
demount tyre upper bead (fig 11).
4.
Push handle D up, lift roller C,G, press switch F, loosen right pressing arm, lift tyre up, insert lifting level into bottom tyre
bead nearby demounting/mounting head, lift bead upon knob of demounting / mounting head and rotate turntable to
demount down tyre bead.
C Mount tyre
1. Lubricate tyre and rim edge with lubricant to avoid damage of tyre. Adjust height of demounting/mounting head and
make tyre bottom bead upon rear of demounting/mounting head and below front of demounting/mounting head. Rotate
turntable to mount bottom bead.
2.
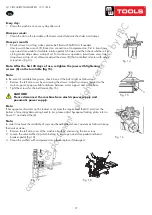
Make tyre top bead upon rear of demounting/mounting head and below front of demounting/mounting head, move
right pressing arm and make sure it is locked, pull handle D down to make roller C,G to press top bead to position below
demounting/mounting head. Lock pressing block 1 on rim edge, rotate turntable, finish tyre mounting (fig 12).
copyrighted
document
- all
rights
reserved
by
FBC


