13
M1.2.ME15W-ME20W.NLFREN 30032018
EN
MACH
4 Operation
4.1 Before beginning work
Only use the bench grinder if the following conditions are fulfilled:
• The bench grinder is in perfect technical condition.
• The bench grinder is installed in a suitable place.
• All the safety devices are in place and active.
• You’ve read and understood the operating manual.
Choice of the grinding wheel
Choose the right grinding wheel. For example, a rough grinding wheel first and a fine wheel for the finishing.
Check the state of grinding wheels. If they are dirty or muddied, they must be scraped clean or replaced.
Workpiece bearing plate
For certain grinding operations, the workpiece bearing plate can be inclined. Use the washers to level the difference of height.
Please note the inclination may reduce the loading absorption of the workpiece bearing plate.
Apply only a light pressure on the piece.
4.2 Operation
1. Before beginning work, always check that the piece is free of oil, grease or remains of paint. This will ensure that the
grinding wheel do not become blocked or dirty.
2. Adjust the eye shields to allow the operator a clear view of the work through the shields.
3.
The appropriate adjustment of the workpiece bearing plates will provide the correct working angle for efficient grinding. As
the diameter of the grinding wheel is subject to wear, it is necessary to re-adjust the plates position to maintain the correct
gap of less than 1/6’’ (1.6 mm) with the edge of the grinding wheel.
4. After switching the grinder on, allow it to reach full speed before commencing grinding operation.
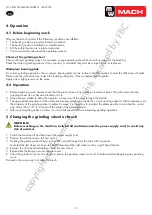
5 Changing the grinding wheel or brush
WARNING!
Before working on the machine, switch it off and disconnect the power supply cord, to avoid any
risk of accident.
1. Switch the machine off and disconnect the power supply cord.
2.
Remove the outside covers, left and right.
3.
Holding the grinding wheel firmly, remove the nut and flange from the shaft with a spanner.
Note that the left wheel nut has a left hand thread and the right wheel nut has a right hand thread.
4.
Remove the old wheel and replace it with the new wheel.
5.
Reassemble the flange, nut and outside covers.
6. Allow the grinder to run for one minute to ensure the grinding wheel is not out of balance before beginning any grinding
work.
Proceed in the same way to change the brush.
copyrighted
document
- all
rights
reserved
by
FBC


