8. FITTING THE MIXER VALVE
IMPORTANT: Ensure that you have read through section 7. IMPORTANT INSTALLATION INFORMATION before
starting to fit the mixer valve.
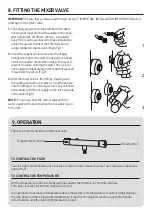
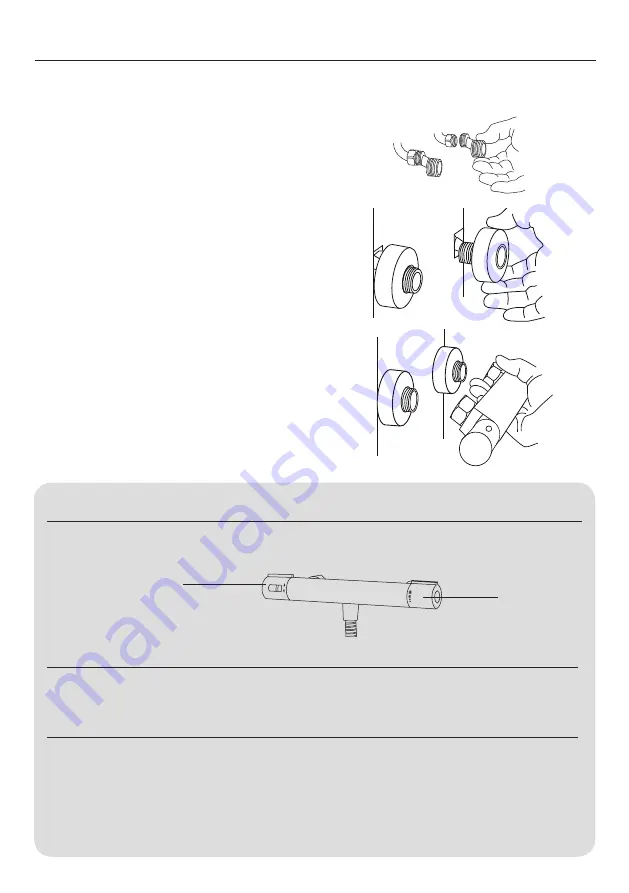
1. The supply pipework can be plumbed from above
or below but must finish with suitable connections,
which should be at 150mm centres. A standard
Easy Fit Kit can be purchased to make installation
easier if required. Connect the 15mm pipework
using standard compression fittings (Fig 1).
2. Screw the supplied nut covers onto the dogleg
fittings until tight to the wall. If required put a bead
of silicone sealant around the inside of the cover to
prevent moisture entering the wall. The nut cover
can be adjusted depending on the length of exposed
thread from the elbow (Fig 2).
3. Offer the mixer valve to the fittings, making sure
the sealing washers are in place, screw the unions
onto the fittings. The mixer valve must be positioned
horizontally with the hot supply on the left hand side
of the outlet (Fig 3).
NOTE: Ensure you have the correct valve with the
water outlet on the bottom when the hot water inlet is
to the left.
1
2
3
9. OPERATION
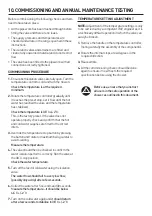
There are 2 control handles on the mixer valve.
TO CONTROL THE FLOW
Turn the right control handle anti-clockwise to turn on and increase the flow. Turn clockwise to decrease
and turn off.
TO CONTROL THE TEMPERATURE
On the temperature control a numbered dial indicates the direction for hot and cold flow.
Turn anti-clockwise for hot and clockwise for cold.
If in operation an increase in temperature above the factory set temperature is required, simply depress
the stop button on the temperature handle when it reaches the stop and continue to turn the handle
anti-clockwise until the desired temperature is found.
38
• Flow Control
Temperature Control •


