background image

Summary of Contents for Xstream 7

Page 1: ...ties in the water are concentrated in the reject stream and flushed to drain Your newly purchased Reverse Osmosis System is capable of removing between 90 to 96 of the total dissolved solids TDS organics and bacteria Important We suggest you read and become familiar with all instructions processes and parts prior to proceeding with the installation Please see back page for information on protectio...

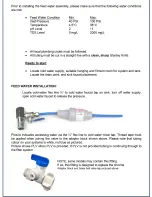
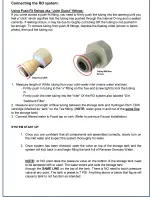
Page 2: ...faucet placement FEED WATER INSTALLATION Locate cold water flex line V2 to cold water faucet tap on sink turn off water supply open cold water faucet to release the pressure Picture indicates accessing water via the 4 flex line to cold water mixer tap Thread tape must be applied when joining the valve to the adaptor block shown above Please note that tubing colour on your systems is white not blue...

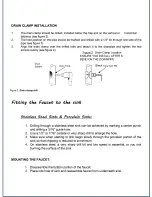
Page 3: ...be Black Tube from RO HQ Figure 3 Drain clamp drill Fitting the Faucet to the sink Stainless Steel Sinks Porcelain Sinks 1 Drilling through a stainless steel sink can be achieved by marking a center punch and drilling a 3 16 guide hole 2 Use a 1 2 or 7 16 carbide or very sharp drill to enlarge the hole 3 Make sure when starting to drill begin slowly through the porcelain portion of the sink so tha...

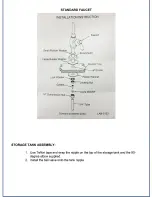
Page 4: ...erTop q 12 Hole o Lock Washer Plastic Washer Locking Nut Gasket Cone Washer 1 4 Compression Nut 1 4 Tube Connect to filtered water LAB 0133 STORAGE TANK ASSEMBLY 1 Use Teflon tape and wrap the nipple on the top of the storage tank and the 90 degree elbow supplied 2 Install the ball valve onto the tank nipple ...

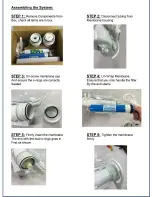
Page 5: ... from Membrane housing f r STEP 3 Un screw membrane cap And ensure the o rings are correctly Seated O STEP 4 Un Wrap Membrane Ensure that you only handle the filter By the end stems m _ ni STEP 5 Firmly insert the membrane The end with the dual o rings goes in First as shown J STEP 6 Tighten the membrane firmly ...

Page 6: ...in an upright position ensure Filters line up correctly with housing 1 STEP 9 Firmly tighten housings Using the provided spanner The housings must be tight to avoid Leaks STEP 10 The labels may not always Line up with the front of the system so ensure the system is sufficiently Tightened as shown FT You are now ready for installation ...

Page 7: ...t Sediment Filter 2 Measure and cut length of Blue tubing between the storage tank and Hydrogen Rich T300 cartridge Marked as tank on the Tee fitting NOTE water goes in and out of the same line to the storage tank 3 Connect filtered water to Facet tap on sink Refer to previous Faucet Installation SYSTEM START UP 1 Once you are confident that all components are assembled correctly slowly turn on th...

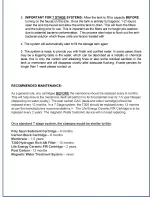
Page 8: ...anitizer in the tank or membrane and will disappear shortly after adequate flushing If taste persists for longer than 1 week please contact us RECOMMENDED MAINTENANCE As a general rule any cartridges BEFORE the membrane should be replaced every 6 months This will help ensure the membrane itself will perform to its full potential over its 1 5 year lifespan depending on water quality The post carbon...

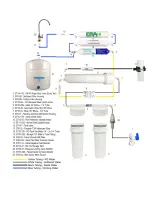
Page 9: ...Clamp 12 GT14 7 Tank Valve 13 GT6 32 Puretron T300 Hydrogen Filter 14 GT10 125 RO Tank Tee Male 1 4 2x 1 4 Tube 15 GT10 22G Straight 1 4 Male to Tube Fitting 16 GT6 10 Inline Infrared FAR Filter 17 GT6 21S Inline Post Filter Coconut Carbon 18 GT31 14 Inline Negative Fluid Reactor 19 GT13 47 RO 12L Storage Tank 20 GT18 13 Pressure Limiting Valve 500kPa 21 GT10 34G Faucet Quick Connect Adaptor 22 GT...

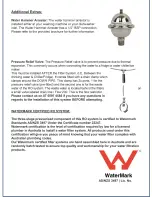
Page 10: ...ystem The waste water is located behind the filters a small valve labeled drain line Flow 200 This is the flow restrictor Please contact us on 07 5597 4585 if you have any questions in regards to the installation of this system BEFORE attempting WATERMARK CERTIFIED RO SYSTEM I 0 on The three stage pressurised component of this RO system is certified to Watermark Standards AS NZS 3497 Under the Cer...

Page 11: ...ect for leaks Under no circumstances should a thread sealant be used on water filtration housings Thread tap ONLY is permitted If thread sealants are used all warranty is void Pressure Gauge Fittings When installing pressure gauges you must apply 6 8 Rounds of standard white thread tape for an adequate seal Systems that come without optional pressure gauges will be supplied with hole cap fittings ...

Reviews: