background image


  IDEAL 4850-95 EP;   IDEAL 5221-95 EP;   IDEAL 6550-95 EP 


7


01-01-23    B5221G1A doc 


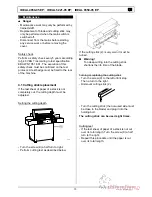
3.2 Start machine 


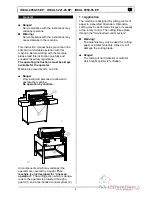
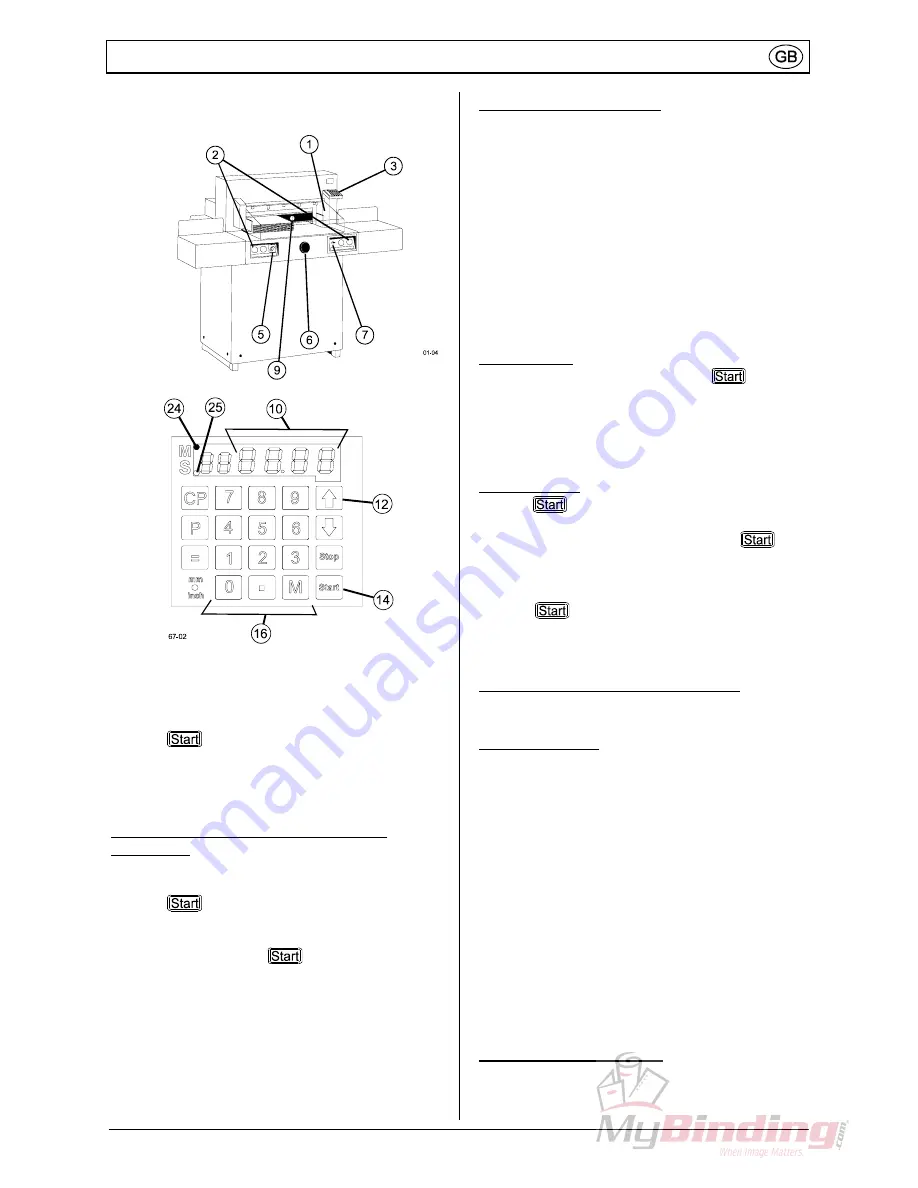
-  Main switch (5) to position “1”. 
-  Insert the key (7) for the control panel and 

turn it to the right. 

-  Open the safety guard (1). 
- Press 

 key (14).

Þ

 Backgauge (9) moves 

to the rear and searches for the reference 
position, (10) measurement appears on the 
display. 

 
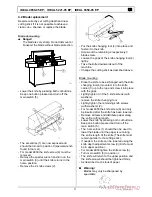
Dimensions control - cutting to specified 
dimensions 

-  Enter dimension at the numerical keypad (16) 

Þ

 LED "S" (25) appears. 

- Press 

 key 

Þ

 dimension is approached, 

LED "S" disappears. 
Dimensions below 9


cm can only be 

approached with the 

 key held pressed. 

-  Insert the paper and push it with the knocking 

up device to the backgauge. 

-  Release the cut. 
 
Programming is described under point 3.3 
“programming”. 


Cut according to markings 

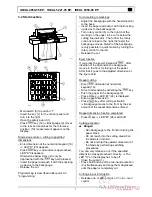
-  Adjust the backgauge with the hand-wheel (6) 

to the back. 

-  Insert the paper and push it with the knocking 

up device to the backauge (9). 

-  Turn rotary control (6) to the right until the 

marking on the paper to be cut is below the 
cutting line indicator.  The further the rotary 
control is turned to the right, the faster the 
backgauge moves. Return of the backgauge 
is only possible in quick motion by turning the 
rotary control to the left.  

-  Release the cut. 
 
Eject function 

If you press the key 

¢

 instead of 

 , after 

insertion of the dimension the backgauge 
moves to the front for taking out the paper. 
After that it goes to the adjusted dimension of 
the figure field. 
 
Repeat cutting 

- Enter 

 dimension at numerical  

keypad (16). 

-  Drive to dimension by activating the 

 key. 

-  Push the paper to the backgauge (9). 
- Press 

M

 key 

Þ

 LED „M“ (24) is displayed. 

-  Enter repeat dimension. 
- Press 

 key after cutting activation  

Þ

 Backgauge moves to the front by the set 

amount of the repeat dimension entered. 

 
Repeat dimension function completed 

- Press 

M

 key 

Þ

 LED "M" (24) switch off. 

 
Cutting activation 

Danger!


-  Run backgauge to the front for turning the 

paper stack. 

-  Do not reach into the cutting area when 

the blade is in motion. 

-  Do not interrupt the upward movement of 

the blade by performing switching 
procedures. 

You can only release a cut, if the specified 
dimension was approached correctly. 

Þ

 The 

LED "S" on the display has to be off. 
-  Close the guard (1). 
-  Press both buttons of the two-hand activation 

(2) simultaneously and keep them depressed 
until the paper is completely cut. 

 
Cutting stop or interruption 

-  Release one or both buttons of the two-hand 

control. 


Summary of Contents for IDEAL 4850-95 EP

Page 1: ...Provided By http www MyBinding com http www MyBindingBlog com IDEAL 4850 95 EP 5221 95 EP 6550 95 EP Guillotine Instruction Manual...

Page 2: ...IDEAL 4850 95 EP IDEAL 5221 95 EP IDEAL 6550 95 EP Betriebsanleitung l Operating Instructions Mode d emploi Gebruiksaanwijzing Manuale d istruzione Instrucciones para el uso...

Page 3: ......

Page 4: ...ering a program 8 Eject function 8 Programming of repeat cut dimension 8 Cancel a program 8 Working with programs 9 General 9 Escape the program mode 9 Program keys and 9 Display in cm or inch 9 Adjus...

Page 5: ...tructed persons are allowed to operate the machine No operation by children All components which may endanger the operator are covered by a quard This machine is only designed for one man operation Th...

Page 6: ...overs Remove machine from the base 4 screws The machine can be transported on its side Mount the machine on the base Fix the side covers 2 1 Preparing for installation IDEAL 5221 The machine will be d...

Page 7: ...of the two handed control system are pressed exactly at the same time Guard didn t closed itself otherwise replace the gasspring It is recommended to keep a check handbook 3 1 Operating elements 1 Gua...

Page 8: ...s Return of the backgauge is only possible in quick motion by turning the rotary control to the left Release the cut Eject function If you press the key instead of after insertion of the dimension the...

Page 9: ...backgauge to the desired measurement with the rotary control store the dimension next program step appears 1 9 Enter the next dimension store the dimension P Escape the program mode Eject function Pre...

Page 10: ...ED S is off the actual dimension appears In the program mode the ejection of paper is not possible The ejection of the paper has to be programmed After each cut pressing the key the backgauge moves to...

Page 11: ...cement If the last sheet of paper of a stack is not completely cut the cutting depth must be adjusted Setting the cutting depth Turn the screw 9 a half turn to right Perform cutting test as described...

Page 12: ...e Change the cutting stick as described above Blade mounting Place the knife to be exchanged with the knife changing tool 4 mounted into the knife carrier 3 up to the top and screw it into place with...

Page 13: ...cycle all 6 months Turn main switch to position 0 Remove the upper housing and the wooden front panel or the front housing Remove paper debris Lubricate all grease nipples Check the linkage parts 2 3...

Page 14: ...he guard Remedy Open and close the guard c Cause Measurement below 9 00 cm Remedy Press until the backgauge has reached the position d Cause Backgauge not in the right position CUT CUT CUT CUT on Disp...

Page 15: ...on the machine Guard Interlock the control system Space between hood and table 20mm 7 Accessories l Important Only fit accessories recommended by the manufacturer Knocking up device 9000 521 IDEAL 522...

Page 16: ......

Page 17: ...entes suivantes satisface las disposiciones pertinentes siguientes conforme alle seguenti disposizioni pertinenti voldoet aan de eisen van de in het vervolg genoemde bepalingen est em conformidade com...

Page 18: ...IDEAL Krug Priester 72336 Balingen Germany http www ideal de 01 2001 B5221G1A doc...

Reviews: