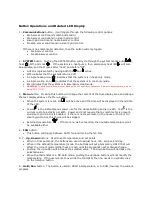
Button Operations and Related LCD Display
1 –
Communications
button. it will toggle through the following control options:
•
Web server control and smart-grid control
•
Web server control and no smart-grid control
•
smart-grid control and no Web server control
•
No Web server control and no smart-grid control.
If there is no smart-meter detected, then the button will only toggle:
•
Web server control
•
No Web server control.
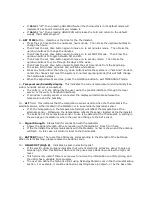
2 –
SYSTEM
button. Pushing the SYSTEM button will cycle through the system modes auto(
),
heat ( ), Off, and cool (
). If the system is a heat pump, then emergency heat (EM ) will also
be available, and that comes after “heat” and before “Off”.
•
AUTO is represented by having both the
and active.
•
OFF indicates that the system is turned off.
•
A single heating icon (
) indicates that the system is in heat-only mode.
•
A single cooling icon (
) indicates that the system is in cool-only mode.
•
Em indicates that the system is in Emergency Heat mode.
•
CAUTION:
To avoid possible compressor damage, do not use Auto Changeover if the outside temperature drops
below 50°F (10°C).
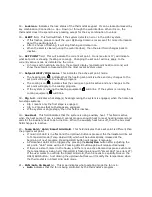
3 –
Menu
button. Pressing this button will change the content of the time display area and change
the text displayed above the Menu button.
•
When the system is reset, Clk
will be active and the time will be displayed in the middle
of the LCD.
•
Power
is the instantaneous power use for the whole building and is in kWh. Cost is the
current cost of electricity per kWh. Power and Cost require that a smart-meter is present,
and smart-grid control is enabled. If there is no smart-meter in the house or there is No
smart-grid control, this choice will be skipped.
•
External temperature
. If there is no web connection, then outside temperature won’t
be available either.
4 –
FAN
button.
•
This button will toggle between AUTO fan and forcing the fan ON.
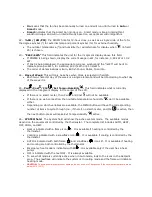
5, 7 –
Up, Down
Buttons. Used to set temperature and set points.
•
When in time set mode, the buttons are used to adjust hour, min, am/pm, and day.
•
When in the default (temperature) mode, the buttons will set a temporary HOLD that will
affect the current mode (either heat or cool) until the program’s next schedule change.
•
Pushing the up button will increase the selected value. The down button will decrease the
selected value.
•
When the thermostat is in DR Hold mode, pushing the up/down buttons will not modify the
temperature. If the user wants to override the DR HOLD, then he needs to explicitly click
on the hold/run button.
6 –
Hold/Run
button. The button is used to HOLD a temperature, or to RUN (resume) the current
program.


