MXD Users Manual
April 5, 2012
Page 11 of 26
Connect and verify that your MXD system is connected to an operating VoIP line as follows:
7.
Complete the initial installation steps described on Page 6, which are common to all
types of installations.
8.
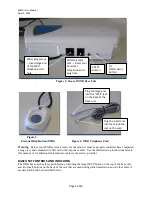
Find the telephone cord that was shipped with the MXD unit, with a larger modular plug
on one end and a smaller modular plug on the other end. Plug the smaller end into the
jack on the wall (or the jack on the VoIP modem if the house wiring is not used), and the
larger end into the jack on the back of the MXD unit marked “WALL”.
9.
Plug the telephone handset cord into the jack on the back of the MXD unit marked
“PHONE”. Lift the telephone handset receiver that has been connected to the back of
the MXD unit, and confirm that there is a dial tone to verify that the MXD telephone
cord and the telephone handset cord are properly connected.
10.
If no dial tone is present, check the connections again and correct any problems.
11.
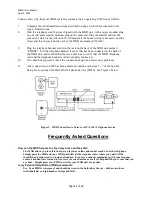
After connection to VoIP has been achieved, continue with steps 3 - 7 of the System
Setup for Locations with Plain Old Telephone Service (POTS). See Figure 9 below.
.
Figure 9. MXD Connection to Voice over IP (VoIP) Telephone Service
Frequently Asked Questions
How can the MXD help me to stay at my home and be safe?
The MXD allows you to call for help, even if you are alone and cannot reach or use the telephone.
Simply press the PHB and your MXD unit will call the response center where your unit will be
identified and connected to a trained attendant. Even if you cannot communicate with your response
center, attendants are trained to treat every received alarm as a call for help until they are sure that you
are okay. Simply press your PHB to activate your MXD unit at any time.
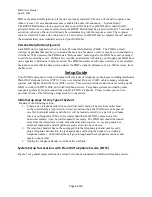
Is my Personal Help Button (PHB) waterproof?
Yes. Your PHB is waterproof, and should be worn in the bathtub or shower - both areas where
individuals have a high number of slips and falls.


