4 of 8
GT1505 Bump Out Convenience Window Installation Manual
www.NabcoEntrances.com
P/N C-00208
Rev 12-15-17
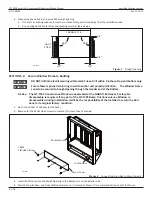
4. Clean away any debris in and around the rough opening.
a. If there is an existing window, it must be removed safely, and stored away from the installation area.
b. Any existing debris, metal chips and caulking must be cleared away.
LARGEUR O.B.
HAUT
EUR O.
90.0
°
90.0
°
1/4”
1/4”
1/4”
DN 1636
1/4”
Figure 1
Rough Opening
SECTION 5 .2: Secure Window Frame to Building
DO NOT drill into electrical wiring within Jamb Tubes . Drill within 3 inches at top and bottom only .
Ensure there is proper reinforcing in wall to anchor unit properly-Attention: The Window Frame
can also be secured to Rough Opening through the Header and at the Bottom .
Notice: The GT-1505 Convenience Window is assembled at the NABCO Entrances Factory. No
disassembly is required. If any part of the GT-1505 Bump Out Convenience Window is
disassembled during installation, it will be the responsibility of the Installer to return the Unit
back to its original factory condition.
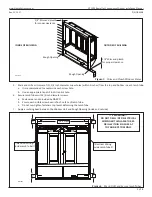
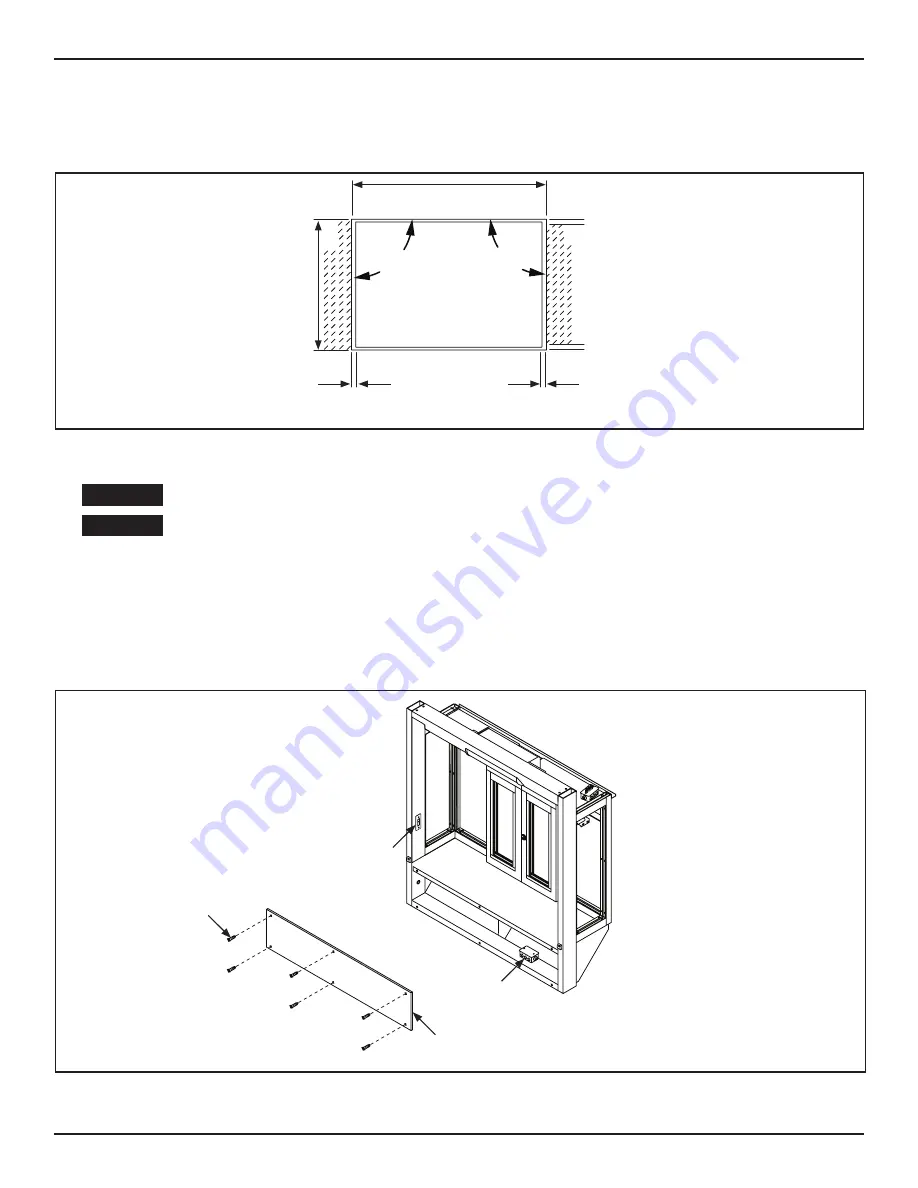
1. Go to the bottom of Window (at the back).
2. Remove (6) 10x24 Flat Head screws to remove (1) Access Cover. Set aside.
DN 1858
Rocker Switch
Junc on Box
10x24
Flat Head Screw
Access Cover
Figure 2
Connect Junction Box to Power Supply
3. Insert the Window into the Rough Opening so the Bumpout is on the Exterior side.
4. Shim the top, bottom, and sides of Window Frame so it is plumb and level. It is recommended to use a (4) foot Level.
WARNING
WARNING


