6 of 26
GT 710-8710 OPUS Low Energy Swing Doors Quick Set-Up and Parts Guide
www.NabcoEntrances.com
P/N C-00178
Rev 12-20-17
DN 1109
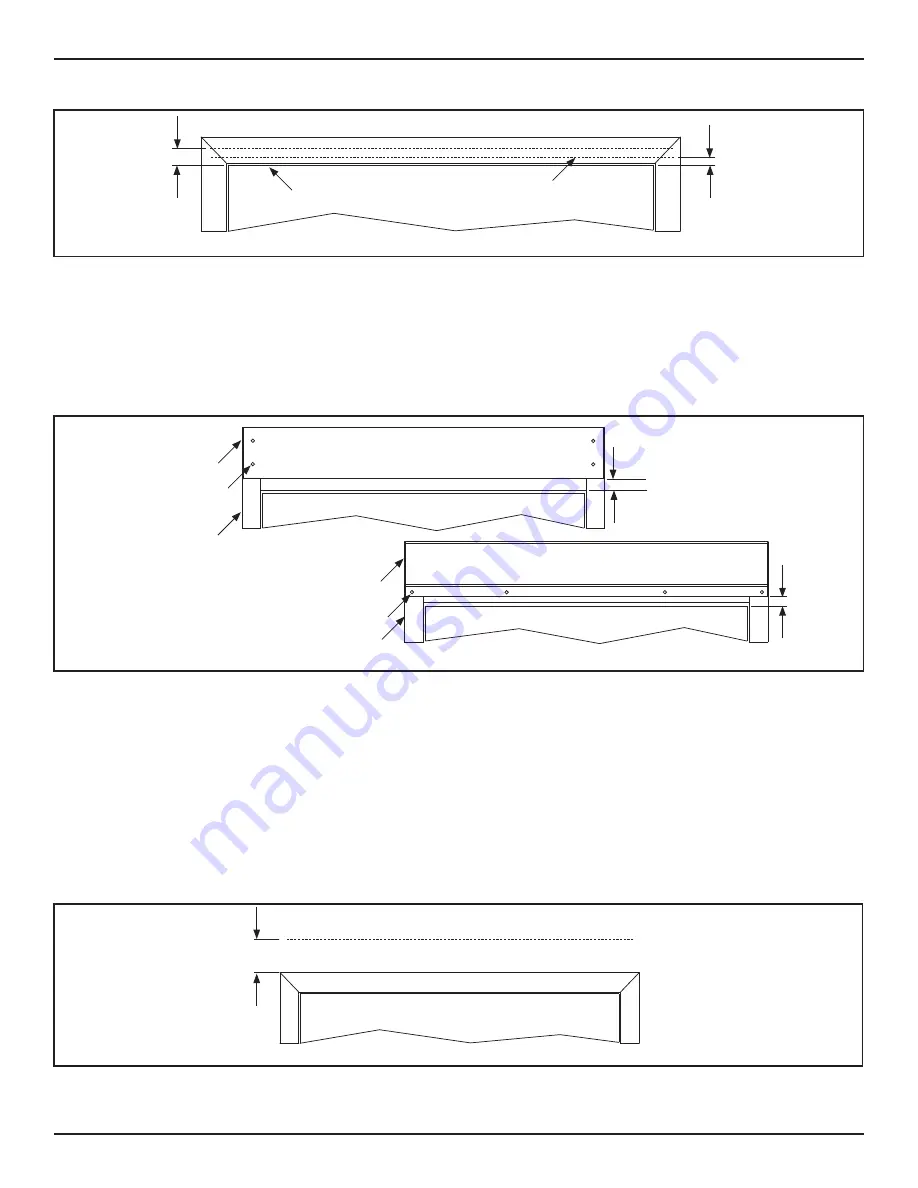
Mark Measurement
across Top door frame
1/8”
(GT 710)
Top of Door
1-1/8”
(GT 8710)
Figure 4
Measure from the Top of Swing door to the Top Door Frame
4. Lift the Header up against the Top door frame until the bottom edge of Header is butted up against the Horizontal Line, at
both ends.
5. To ensure proper operation of the Swing Arm:
X
For a Door Jamb that is 1-3/4 inches wide, position the Pivot side of Header so it is flush to the outside edge of the Pivot
Door Jamb.
X
For a Door Jamb that is wider than 1-3/4 inches, measure from the inner edge of the Pivot Door Jamb to the center.
Mark a vertical line at the 1-3/4 inch measurement. The Pivot side of Header must butt against the 1-3/4 inch mark.
DN 1116
Pivot side of Header
1/4” screw holes
1-1/8”
(GT 8710)
Pivot Door Jamb
1/8”
(GT 710)
Pivot side of Header
1/4” screw holes
Pivot Door Jamb
Figure 5
Position Header onto Door Frame
6. Ensure the Header is square and level. Use the Header as a template to mark screw holes onto the face of the door frame.
7. Remove the Header. Drill screw holes at each mark.
SECTION 4 .3: Install the Shim (Metal Door Frames)
1. Butt the Header up against the Horizontal line. Line up the screw holes and then ensure the Header is square and level.
2. Go to the top of Header. Mark a horizontal line along the top edge of Header onto the wall.
3. Measure the depth between the back side of the Header and the wall.
a. Write that measurement down and label it #1.
4. Measure the distance between the top of door frame and the horizontal line that was just drawn at the top of Header.
a. Write that measurement down and label it #2.
DN 1084
Measure between
Top of Door Frame
and Top of Header
Figure 6
Measure for Shim Dimension
5. Obtain (1) Shim to be the same depth as measurement #1; no higher than measurement #2; and about the same width as
the Header.


