Mono basin mixer
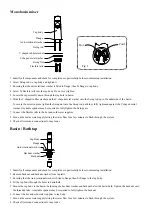
1. Identify all components and check for completeness, particularly before commencing installation.
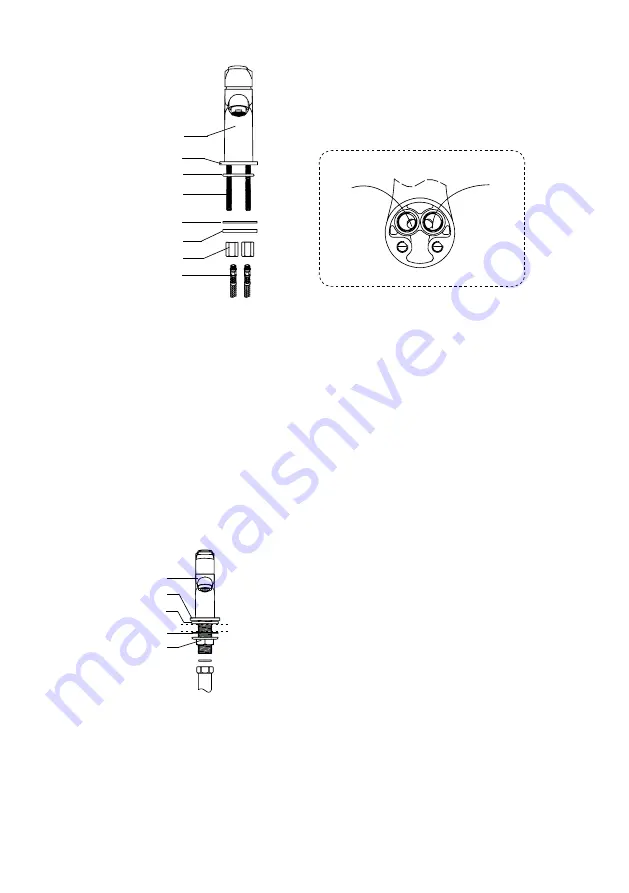
2. Screw fixing rods to tap body and tighten it.
3. Ensuring that the anti-rotational washer is fitted to flange, then fit flange to tap body.
4. Screw 2x flexible tails into the tap body. Do not over tighten.
5. Locate the tap assembly down through the tap hole in basin.
6. Slide the C shaped rubber washer and the C shaped metal washer onto the fixing rod up to the underside of the basin.
To secure the mixer in place tighten the fixing nut onto the fixing rod until they fully tightened against the C shaped metal
washer. A suitable spanner may be required to fully tighten the fixing nuts.
7. Connect the flexible tails to the hot and cold water supplies.
8. Turn on the mains water supply letting the water flow for a few minutes to flush through the system.
9. Check all joints and connections for any leaks.
Basin / Bath tap
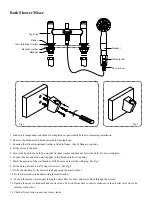
1. Identify all components and check for completeness, particularly before commencing installation.
2. Remove backnut and backnut washer from tap tails.
3. Ensuring that the Anti-rotational
washer is fitted to flange, then fit flange to the tap body.
4. Fit the tap body through the holes in basin/bath,
5. Secure the tap body to the basin / bath using the backnut washer and backnut below the basin/bath. Tighten the backnut onto
the threaded tails. A suitable spanner may be required to fully tighten the backnut.
6. Connect the hot and cold water supplies to tap body.
7. Turn on the mains water supply letting the water flow for a few minutes to flush through the system.
8. Check all joints and connections for any leaks.
Tap body
Anti-rotational washer
C shaped rubber washer
Fixing rod
Flange
Fixing Nut
Flexible tails
C shaped metal washer
Hot
Fig 1
Cold
Tap Body
Flange
Anti-rotational washer
Backnut
Backnut washer
Summary of Contents for Galene A05490
Page 7: ...Component Diagram ...


