AUDIO SETUP MENU
Each disc has a variety of audio output options. Set the M56’s AUDIO
options according to the type of audio system you use.
HDMI/SPDIF (DIGITAL AUDIO OUTPUT)
Select the audio output setting for HDMI OUT or DIGITAL AUDIO OUT port.
PCM Stereo:
Select when connected to a two-channel digital stereo
decoder.
PCM Multi-Ch (HDMI only):
Select when connected to a device with
multi-channel decoder. This is applicable to HDMI OUT only.
DTS Re-Encode:
Select when connected to a device with DTS
decoder.
Primary Pass-Thru:
Select when connected to a device with LPCM,
Dolby Digital, Dolby Digital Plus, Dolby TrueHD, DTS and DTS-HD
decoder.
Refer also to the “AUDIO OUTPUT SPECIFICATIONS” section of “REFERENCE
TABLES” under the “REFERENCE” main heading.
SAMPLE FREQ. (FREQUENCY)
Set the sampling frequency of the audio signal.
48KHz:
If your receiver or amplifier is not capable of handling 96 kHz
and 192 kHz signals, select 48 kHz. When this choice is made, this unit
automatically converts any 96 kHz and 192 kHz signals to 48 kHz so your
system can decode them.
96KHz:
If your receiver or amplifier is not capable of handling 192 kHz
signals, select 96 kHz. When this choice is made, this unit automatically
converts any 192 kHz signal to 96 kHz so your system can decode them.
192KHz:
If your receiver or amplifier is capable of handling 192 kHz
signals, select 192 kHz. When this choice is made, a 192 kHz signal
passes through without any further processing.
Check the documentation of your amplifier to verify its capabilities.
DRC (DYNAMIC RANGE CONTROL)
You can select the effective dynamic range (subjective range from soft to
loud) for playback of Dolby Digital or Dolby Digital Plus soundtracks. It
is useful when you watch your favorite action movie without disturbing
others at night.
On:
The “On” setting is for late-night sessions or other times when you
wish to retain maximum dialog intelligibility while minimizing overall
volume levels.
Off:
To maintain full dynamic range, set to “Off”.
NOTE
DRC setting can be changed only at STOP mode or when there is no disc
loaded.
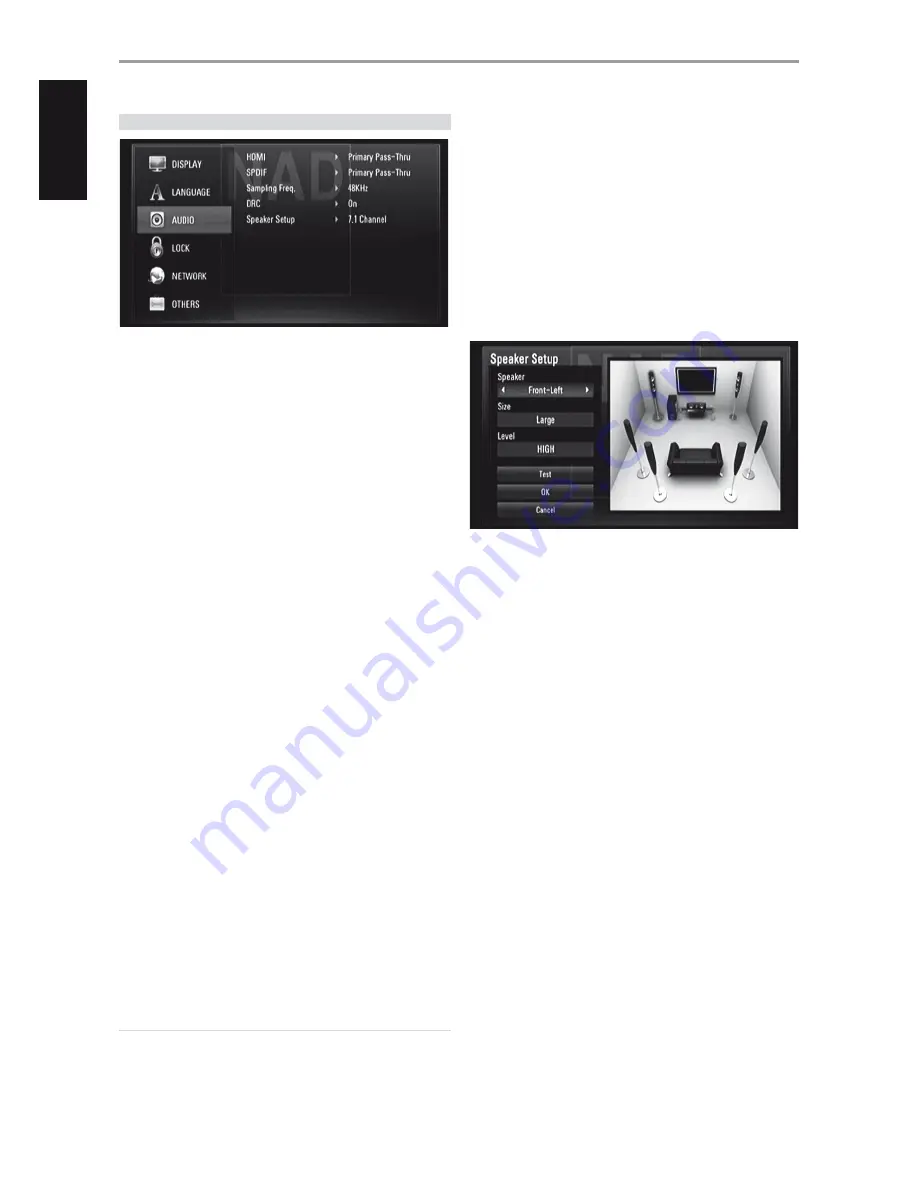
SPEAKER SETUP
Set the speaker size and sound level of your amplifier’s connected speakers
in order to obtain the best possible sound via the M56’s 7.1 CH AUDIO
OUTPUT.
2.1 Channel:
Select if only the FRONT L, FRONT R and SUBW audio
output are connected to your amplifier.
5.1 Channel:
Select if only the FRONT L, FRONT R, CENTER, SURR L,
SURR R and SW audio output are connected to your amplifier.
7.1 Channel:
Select if all 7.1 CH AUDIO OUTPUT (FRONT L, FRONT R,
CENTER, SURR L, SURR R, SURR BL, SURR BR and SUBW) are connected
to your amplifier.
Upon selecting any of the above options, a sample Speaker Setup menu as
below appears
Speaker:
Select a speaker to set up in the speaker field.
Size:
Set up the speaker size of your amplifier’s connected speakers – Large,
Small or None.
Large:
Select when your amplifier’s connected speakers are capable of
reproducing 100Hz or below.
Small:
Select when your amplifier’s connected speakers are not
capable of reproducing 100Hz or below.
Level:
Setup the volume levels of the individual speakers – HIGH, LOW or
MIDDLE.
Test:
Emit test tone from each speaker in sequence. If properly selected
and set up, the absence of a test tone in a particular speaker connotes a
connection or speaker setup problem.
OK:
Select to confirm selected Speaker Setup settings.
Cancel:
Select to cancel selected Speaker Setup settings.
OPERATION
USING THE M56
14
EN
G
LIS
H
FR
A
N
Ç
A
IS
ES
PA
Ñ
O
L
IT
A
LIA
N
O
D
EU
TS
CH
N
ED
ER
LA
N
D
S
SV
EN
SK
A
РУ
СС
К
И
Й