Page 5
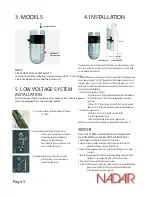
3. MODELS
4. INSTALLATION
NOTE
APPLICABLE TO ALL POWER UNITS:
In order to avoid overheating, we recommend that 12’’ (30cm) of
clearance be kept all around the power unit.
5. LOW VOLTAGE SYSTEM
INSTALLATION
Prior to connect the low voltage wires, make certain that the power
cord is unplugged from the electrical outlet.
1. First, strip the conductors of the low voltage wire for about
3/8`` (10mm).
2. Insert the conductors of the low voltage wire in the
terminals (live in the black terminal and neutral
in the red terminal) while simultaneously
pushing on their respective button.
Give a light pull to the wire to make certain that
it is well secured in the terminal.
3. To remove the conductors out of the terminals, lightly
push the button as you are simultaneously
gently pulling the wires out.
The power unit must be installaed in a well ventilated area, away from weathering, it must
be easilly accessible and away frrom any heat source. The power unit must be installed
near an adequate electrical outlet.
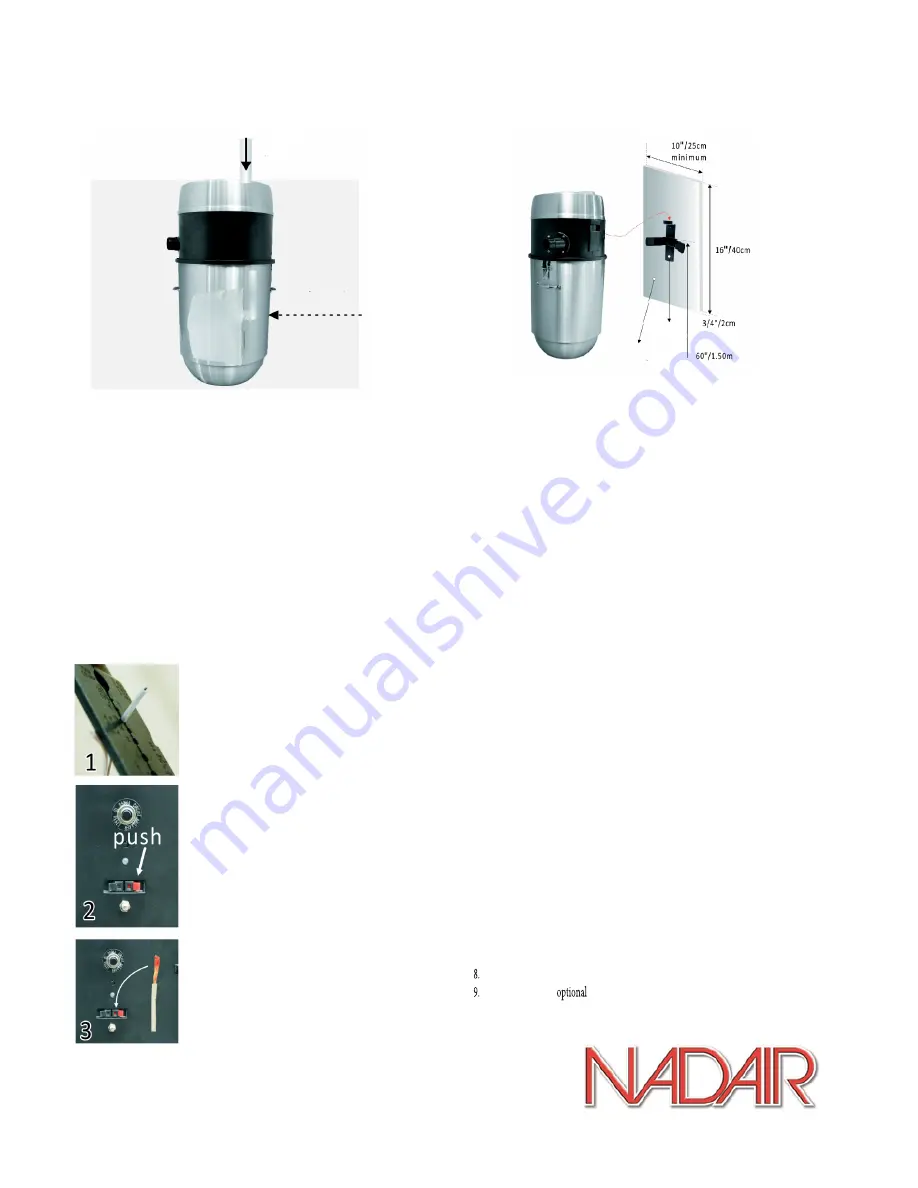
1. Determine the power unit location on the wall; we recommend that the power unit be
hung at approximately 60’’ (1,5m) off the ground so that the debris container is easilly
accessible. Allow at least 12’’ (30cm) of clearance all around the power unit. If at all
possible, you may mount the unit directly onto a concrete wall as to minimize the transmis-
sion of vibrations into the building.
2. Installation on a gypsum wall (Gyprock):
-Prepare the wall by installing a plywood mounting board (not provided) of
16’’ (40cm) high and 0,75’’ (2cm) thick wide enough to be screwed to at
least 2 studs.
-Drill three (3), 3/8’’ (10mm) holes with a wood drill bit. Insert the supplied
rubber inserts. Fasten the steel mounting bracket with the supplied screws.
3. Installation on a concrete wall:
- Drill three (3), 3/8’’ (10mm) holes with a concrete drill bit.
- Insert the supplied rubber inserts.
- Fasten the steel mounting bracket with the supplied screws.
NOTE: You may also elect to install a plywood mounting board on the concrete wall.
IMPORTANT
Always use the supplied screws and rubber inserts or the appropriate
ones for the material you are working with ( Wood, Steel, Brick etc.).
4. Mount the power unit onto the installed wall mounting bracket.
5. Connect the top air and debris intake pipe to the PVC pipe network by using the
provided flexible pipe and collars (DO NOT GLUE!)
6. Connect the low voltage wire to the terminals on the side of the power unit (as shown
in section 5).
7. Verify that the permanent filter and the optionnal disposable bag are in place and that
the debris canister is properly installed with the latches secured.
Plug in the unit‘s power cord into the electrical outlet.
Install the muffler (
) to the exhaust pipe circuit by using the provided flexible
pipe and collars (DO NOT GLUE!). (you may elect to vent to the outside
with the help of a vent cap (not supplied).


