Étape 4
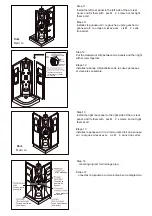
Install the drain on the shower base.
N.B. Refer to the manufacture's instructions of the
proper installation of your drain.
Step 4
Installez le drain sur la base de douche.
N.B. Référez-vous aux instructions du fabricant pour
l’installation de votre drain.
Step
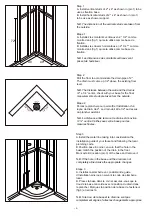
A. Prepare the mortar cement mix and apply it or of
places where the base is to be installed. Place the cement
in a manner that will adhere properly to your base.
B.Place the base in proper position and apply pressure to
ensure it is in contact with the surface.
N.B. Make sure that your base in leveled both from front
to back and left to right.
Étape
A. Préparez le mélange de mortier et ciment afin de
l’appliquez à ou endroits o la base doit être installée.
Mettez le ciment de fa on à ce qu’il adh re à la base.
B. Installez la base à sa place et appliquez une pression
afin d’assurer le contact avec la surface.
N.B. Assurez vous que la base soit de niveau de l’arrière
au devant et du coté gauche au côté droit.
Step
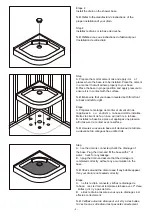
A. nce the drain is connected,check the drainage of
the base .Plug the drain and fill the base with 2" of
water. heck for any leakage.
B. nplug the drain and assure that the drainage is
completed correctly ,without any accumulation in the
base.
N.B. Check around the drain to see if any bubble appear,
if so your drain is not sealed correctly.
Étape
A. ne fois le drain connecté, vérifiez le drainage de
la base. ixez le drain et remplissez la base avec 2" d’eau.
érifiez qu’il n’y a pas de fuite.
B. etirez le drain et assurez-vous que le drainage s’est
effectué correctement.
N.B. Vérifiez autour du drain pour voir s’il y a des bulles.
Si c’est le cas, votre drain n’est pas celé correctement.
3
Summary of Contents for PN-RD4003-223
Page 1: ...PN RD4003 223 Installation Instruction Sheet Manuel d installation...
Page 8: ...Step 1 ix the parts tape 1 ixez les morceaux 7...
Page 19: ...10 BS RT3660L BS RT3660R 3 3 8 85mm 4 3 8 110mm 3 3 8 85mm 4 3 8 110mm...
Page 25: ...SUITE CONTINUED FORET 1 8 1 8 DRILL BIT A 05 A 04 SUITE CONTINUED 16...


