1 Loose Bar
1 Roll-Up
:
2 Bent Oak Arm Units
1 Hardware Pack:
1 Hanging Kit:
PARTS LIST :
Instruction Sheet
3” Carriage Bolts
Washers
Lock Washers
Hex Nuts
Chain Assemblies
(1)
(2)
(2)
(2)
(2)
(2)
Tips for Assembly :
Tip 1: Do not tighten bolts completely until fully
assembled
Tip 2: For a more uniform look, face all bolts in the
same direction
Tip 3: Before assembly, lay the chain sets on a flat
surface. Make sure chains are completely untwisted.
ASSEMBLY :
Note: The “top” bar of the roll-up features a thin
wooden strip with brass tacks. The “bottom” bar
has a thicker wooden strip attached with screws.
You Will Need :
One 7/16” wrench and a mallet or hammer
1 Spreader Bar with Logo
Step 1 : Set the arm units on the floor approximately 3 feet apart. If sitting in the
swing, the branded arm unit should be on your right hand side.
Step 2 : Locate the loose bar and insert a bolt into each hole. Tap the bolts with a
hammer until the head of the bolt is flush with the wood.
Step 2 : Take the loose bar and attach it to the inside of one arm unit under the
curved arm. Secure with a washer, lockwasher and nut. Repeat on the other side.
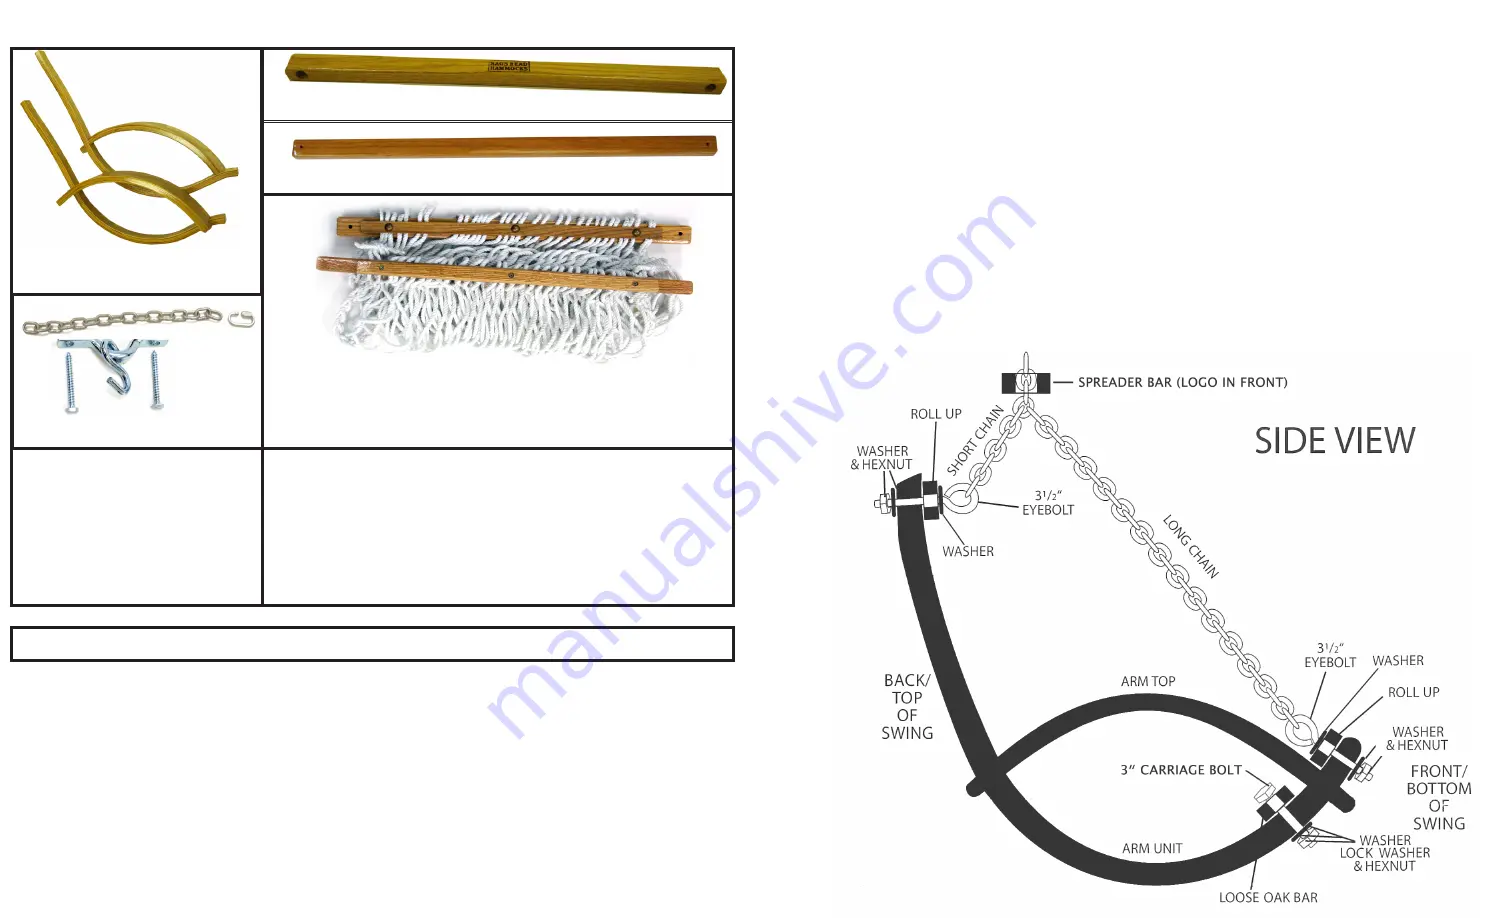
Step 4 : Attach the ‘top’ bar of the roll-up to the back of the swing using the eye-
bolt found on the ‘short’ chain piece (See Diagram). Secure with washer and nut.
Repeat on other side.
Step 5 : Attach the ‘bottom’ bar of the roll-up to the front of the swing using the
eyebolt found on the ‘long’ chain piece (See Diagram). Secure with washer and
nut. Repeat on the other side.
Step 6 : Install the spreader bar by inserting the unattached end of one of the
chain sets up through one of the holes in the spreader bar. Make sure the logo
faces front. Repeat on the other side, then slide the bar down the chain until it
settles.
Step 7 : Tighten all hardware
DIAGRAM :


