background image

Page | 23 


individually; however, the easiest way is simply to pick the dropdown for the LED being used and it will be auto-
populated. 


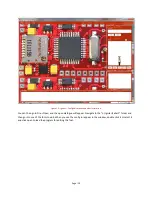
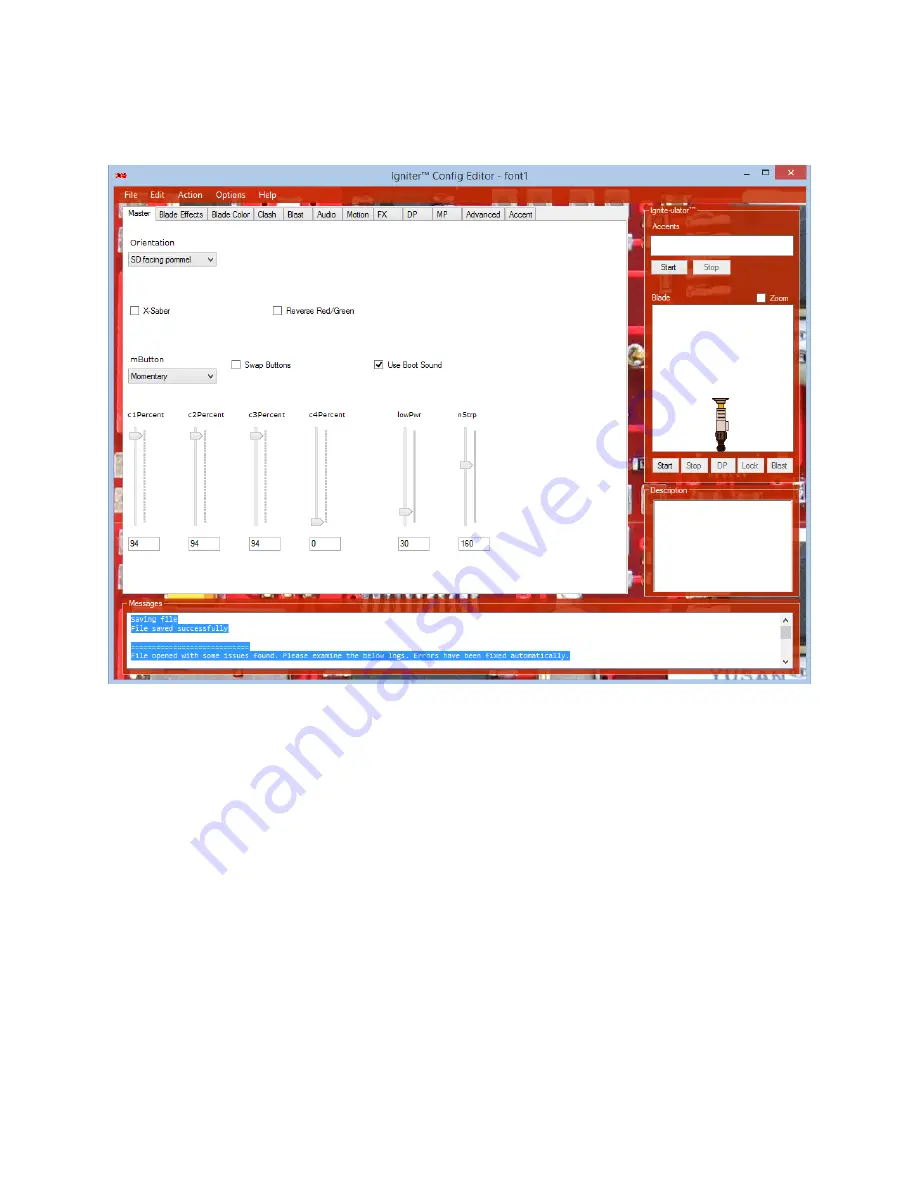
Figure 16 – Master settings in the config editor. Use the top dropdown to auto-set the 4 drive parameters below. Also set if the main switch 

is momentary or latching, and if the boot sound is being used. 

The rest of the settings are described as follows: 

ORIENTATION

 sets which rotation direction advances to the next font and which moves to the previous, along 

with setting which direction is up or down. Orientation is assuming that the SD card holder is facing towards the 
pommel; if the board is reversed then consider the reverse mapping for this setting. 

X-SABER 

is used to enable or disable delayed ignition secondary blades. 

REVERSE RED/GREEN 

can be enabled to fix certain NeoPixel LEDs where the red and green colors are swapped. 

MBUTTON

 defines if the main button is either latching or momentary. If set to latching, do not enable

 SWAP 

BUTTONS

, as that is only supported for two momentary switches. 

SWAP BUTTONS

 is used to swap which buttons are main and aux. This is especially useful if the two buttons are 

inside a control box, as it allows the top/bottom button to be whichever the user prefers. Think of this as look 
inversion for console shooter games. 

Summary of Contents for Igniter 3

Page 1: ... 2017 by Scott DeBoer Naigon s Electronic Creations Igniter 3 Igniter 2 Igniter and Naigon s Electronic Creations have no affiliation with Lucas Film Disney or its subsidiaries IGNITER 3 SETUP GUIDE ...

Page 2: ...paration 9 3 Wiring Diagrams 9 3 1 Basic Wiring 9 3 2 RGB Wiring 10 3 3 RGBW RGBA RGBX wiring 11 3 4 Color Changing Crystal Wiring 12 3 5 X Saber Wiring 13 3 6 Pixel String Wiring 14 3 7 Full Wiring With Accents 15 3 8 Dual Speaker Setup Using MaxAmp 16 4 Configuration Editing 17 4 1 Installation 17 4 2 Copy Files to your machine 17 4 3 Launching The Application 18 4 4 Changing Soundfonts 20 4 5 E...

Page 3: ... Accent 33 4 6 Format Micro SD 34 4 7 Copy Files Back To The Micro SD 35 5 Error Codes 35 6 Saber Operation 36 6 1 Idle Mode 36 6 1 1 Idle Mode Interaction Table 36 6 2 Running Mode 37 6 2 1 Running Mode Interaction Table 37 6 3 Saber Cinema 38 6 3 1 Saber Cinema Interactivity 38 6 4 Saber Apps 38 6 4 1 Color Editor 39 6 4 2 Motion Editor 39 6 4 3 Saber Says 40 7 Thanks 41 ...

Page 4: ...Page 4 ...

Page 5: ... scenario Unparalleled experiences with Saber Apps the most amazing way to get the full potential out of your saber SaberApps allows independent apps to be run on the board allowing for totally separate experiences from the main firmware From utility to editing to games this opens up a world of opportunities that were never before possible in a saber Configurability with on the fly editing two edi...

Page 6: ...teries are okay but since they are not protected they can allow large amounts of power to the board and do not act like a fuse when there is a wiring issue so for beginners it is recommended to use the standard Li ion with the protection circuit 2 1 3 BATTERY BRANDS Because only one battery is being used it is very important that a quality battery is selected to get the best experience from Ignite...

Page 7: ... have at least a 10amp PCB 2 1 5 LED CHOICES When using Igniter 3 with a 3 7v power source the LEDEngin LEDs will not work well This is because LEDEngin s green and blue dies require a forward voltage of 4 0v for maximum brightness Thus it is highly recommended to use the NECree RGB Red Green Royal Blue LED sold here at Naigon s Electronic Creations http saberigniter com NECreeRGB aspx The NECree ...

Page 8: ...w 8ohm speaker here 5 Accent Common VLED Used to power all three of the accent LEDs Optionally additional static LEDs can be powered from this pad The output is 3 3v and it is rated at 200mA 6 Accent LED pads 1 2 3 Each pad can hold one 20mA accent LED These LEDs will be sequenced by the chosen pattern 7 Accent LED pads 4 5 6 7 8 Remaining LED pads that are smaller in size 28AWG or smaller wire is...

Page 9: ...eedle nose pliers or forceps Make sure to keep pressure off the middle of the board hold it in your hands by the two edges It is important to note that once the board has been removed it cannot go back on plan accordingly before separating the boards 3 WIRING DIAGRAMS The following diagrams are the most common to get your board up and running Note It is very important that the correct resistor be ...

Page 10: ...l the popular Igniter specific features such as separate colors for clash lockup and blaster ClashShade BlastShade and BladeShade and the popular feature Saber Dual Phase among many others The recommended LED to use with this setup is the NECree RGB LED that is sold right from our store This LED was specifically designed to have the brightest possible colors throughout the entire color range produ...

Page 11: ...niter 3 a fourth die can be utilized for even more flash effects and even more main blade colors The following diagram shows a Cree XML RGBW which is the recommend RGBW LED to use https flipelectrical com products led world 10w cree xlamp xm l rgbw rgb white color led emitter 4 chip 20mm star pcb board Any combination for a fourth die could be used For instance an RGBA LED would allow for very ric...

Page 12: ...f an RGBA is used a second resistor would be needed for the amber die as well 3 4 COLOR CHANGING CRYSTAL WIRING With the advent of color mixing many people are wanting a blade matching crystal chamber to go along with their build If you want to experience this thrill then look no further The following diagram shows how to get this LED wired and working Note This diagram is only for in hilt LEDs Pi...

Page 13: ...om the battery I recommend a 1ohm for R2 x2 and a 22 33ohm for R1 3 5 X SABER WIRING The following diagram shows the wiring of the X Drive module with the Igniter 3 This is the same wiring as for the Spark Color 2 as well Three NECree RGB LEDs are shown standard tri Crees could be used as well but those would require resistors STTH2L06 diodes for all three red dies so of course the NECree RGB is m...

Page 14: ...rate SD card with the string blade dat and appNN files These strings are not only super bright but they also support Extension and Retraction Flow allowing for super realistic growing and shrinking blades and Impact Blast the ability to replicate bolts hitting the blade in defined spots The Pixel strings are quite easy to work with as there are only 3 wires coming out of each strip When using the ...

Page 15: ...e 8 Wiring of the NeoPixel string style blades When using the triangular prism or doubled 144 led meter strips make sure to wire all three in parallel 3 7 FULL WIRING WITH ACCENTS The following diagram shows how to wire all accent LEDs and the recharge port which will utilize every feature of Igniter 3 except for C4 This will be the typical diagram for most folks that are looking for a build that ...

Page 16: ... bass sounds with a dual speaker setup then using the MaxAmp in conjunction with the on board amp allows a dual speaker setup that will provide the best sound a saber can produce And since this is running two MaxAmp amps at once you can be assured this would be the loudest saber setup short of using wiring the saber directly into a receiver The below diagram shows the full wiring with two speakers...

Page 17: ...y Igniter configuration 4 1 INSTALLATION To install the application launch the msi file from the installer zip file You can get the file from SaberIgniter com A version is also included on the micro SD card that came with Igniter but I recommend going to the site to get the newest version in case any enhancements have been made to the program Click through the wizard until the application launches...

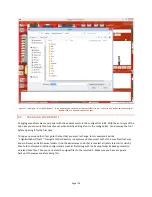
Page 18: ...lect all the files from the micro SD card and drag them into the Saber1 directory When done all the files should be copied to your hard drive as shown below Figure 11 After creating a new directory called c Igniter Saber1 the files are copied from the micro SD card on the right to the new Saber1 folder on the left From here edits can be made to the files from the config editor 4 3 LAUNCHING THE AP...

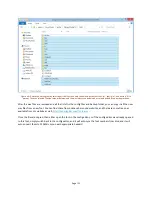
Page 19: ...an then go to File Open and the open dialogue will appear Navigate to the c Igniter Saber1 folder and then go into one of the fonts to edit When you see the config ini appear in the window double click it or select it and click open to load the program for editing this font ...

Page 20: ...e font before opening it for the first time To copy a new sound font first go to the font that you want to change In this example it will be c Igniter Saber1 font1 Navigate to that directory in explorer and then select both of the wav files font wav and multi wav and all the wav folders I find the easiest way to do that is to select all edit select all or ctrl A then hold control and click the con...

Page 21: ... the config files and backup folder you can copy in all the new wav files from a new font You can find these from online saber sound websites and there are some free ones available from my website as well http SaberIgniter com fonts aspx Once the files are copied then either open the font in the config editor or if the config editor was already opened to this font simply switch back to the config ...

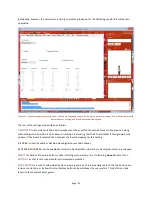
Page 22: ...dividual setting will show a description in the Description textbox below the Ignite ulator Further for any setting where the text is in red changing the value will show the change in Ignite ulator After any edits are made simply go to File Save to ensure that all the changes are written back to the config The Config Editor will prompt before trying to open another font or close the program if the...

Page 23: ... is assuming that the SD card holder is facing towards the pommel if the board is reversed then consider the reverse mapping for this setting X SABER is used to enable or disable delayed ignition secondary blades REVERSE RED GREEN can be enabled to fix certain NeoPixel LEDs where the red and green colors are swapped MBUTTON defines if the main button is either latching or momentary If set to latch...

Page 24: ... motion do not turn off NSTRP sets the number of LEDs in the NeoPixel string blade that is being used This allows the timing to be correct for the Extension and Retraction Flow effects When using an in hilt LED this setting is not used 4 5 2 BLADE EFFECTS The blade effects tabs contain settings for the blade s pulsing scheme along with the settings for the extension and retraction effects ACTIVATI...

Page 25: ...GHT and MAXBRIGHT in the Ignite ulator to see in real time how the settings adjust the blade The values for INLEN and OUTLEN set the length of the blade effect for retraction and extension respectively Setting these to 0 will auto detect the length of the sound file and match the blade length to the file allowing for varying file lengths to work perfectly Set INCURVE and OUTCURVE to adjust the ove...

Page 26: ...feature When enabled the low clash color will be that of the blade instead of alternating between a high and low value of the clash color The four settings C1CLSH C2CLSH C3CLSH and C4CLSH contain the settings for the clash color Set these values and use the Ignite ulator to see the color chosen by hitting the Lock button Note that even if LOCKCTYPE is set to Blade the Lock button will still show t...

Page 27: ...that has a value of zero BLSTLEN is for the length of the blast effect in milliseconds This sets the blade length independently of the length of the sound BLWAIT allows some padding after the blast sound is completed to still perform the EzBlast move Setting this to 100 200ms is recommended to allow some time to do the moves NIMPACTBLST sets the range for the Impact Blast effect when using string ...

Page 28: ...ime Enabling allows for great demoing ability of the sound font and ensures that a different hum will be selected each time if enabled for them HUMSTART sets the time when the hum will start mixing in with the outNN wav sound as a reverse offset in milliseconds For instance if the outNN wav being played is 2 seconds long and humStart is set to 500ms then the hum will start mixing in at 1500 millis...

Page 29: ... Use the thresholds to set how easy hard of a swing is required to register a swing and slash sound respectively The swngWait is used to set the swing sensitivity lower values allow for quicker swings but can produce two swing sounds for one really long swing higher values will always make one swing sound but really quick swings may be missed Recommended is 300 500ms 4 5 8 FX The FX tab controls a...

Page 30: ...10 20 percent Similarly FXPER is the setting for the likeliness of the FX sound being played after an action swing does not count as an action for FX Setting to 100 means it will happen after every action setting to 0 means it will not happen Recommended is 63 or about 2 3 of the time after an action FXIDPER is the new value for the probability that the sound will play in the idle menu Setting to ...

Page 31: ...N wav or dualBNN wav depending on the current color to allow for a great transition with varying sound lengths Any other value is an actual time in milliseconds that the transition will take GXTHRESH sets how much twist is required to activate the feature 20 means a very tiny twist will active it whereas 120 and upwards require a very hard twist Recommended is 90 GYZTHRESH sets how much motion in ...

Page 32: ...ti wav will use the mult wav from the font that the transition is going into DP will use the dualANN wav sound for the font that is being exited MPLEN sets the length of the blade effect transition in milliseconds Similar to the DualPhase length setting to zero will allow the length to be determined from the multi wav sound MPOSET allows the hum to stop playing for a short period allowing for the ...

Page 33: ...or BarGraph mode the top value sets the length that an LED will be on once selected Think of these almost like percents if using 4 leds and setting 10 10 30 50 respectively then 50 of the time they will all be on 30 of the time 3 of the 4 will be on 10 of the time 2 will be on and 10 of the time one will be on Further since these are milliseconds it means that all four will be on for about 50 mill...

Page 34: ...a files and that the file chunks are contiguous on disk This will allow the fastest possible access times for the card FAILURE TO DO THIS CAN RESULT IN CHOPPY AUDIO AND A LESS SMOOTH EXPERIENCE To format the card I highly recommend SDFormatter as it does a better job of formatting than Windows https www sdcard org downloads formatter_4 After installing run the program to launch the main window Whe...

Page 35: ... access times can suffer causing a jerky experience Once this step is done the micro SD card is ready to be loaded back on to Igniter 3 to enjoy the new settings and fonts 5 ERROR CODES Igniter 3 comes equipped with an on board SMD error LED which blinks to indicate certain SD or read failures making install a snap When an error occurs the led will blink a certain number of times and then will pau...

Page 36: ... are running the idle pattern and the saber is ready for use In this mode there are two ways to interact with the saber The first is hitting the AUX button to advance to the next font When you are on font three hitting AUX goes back to font1 Igniter 3 always assumes that there are 9 fonts present on the config card unless configured otherwise so make sure they are always present on the micro SD ca...

Page 37: ...s this can cause the micro SD card to get corrupted and then it would need to be reformatted Granted this is very rare but it is better to put the saber into Idle before disconnecting the power 6 2 1 RUNNING MODE INTERACTION TABLE The following table lists all the interactivity that is possible with the saber while in Running mode Entry Label Action Description Aux Button AUX Press Pressing the au...

Page 38: ... The following table describes the interactivity for Saber Tracks Entry Label Action Description Aux Button AUX Press Advances to the next track When the last track file is reached it goes back to the beginning Main Button MAIN Press Latch This button will activate the saber allowing you to have full light saber capabilities while the saber is running Main Button MAIN Hold Unlatch If the saber is ...

Page 39: ... to navigate the fonts to select the one to edit Entry Label Action Description Aux Button AUX Press Advances to the next font Main Button MAIN Press Latch This button will activate the saber for editing Aux Button AUX Hold Plays the instructions Aux Button AUX Hold Point down Enters the Saber Apps menu 6 4 1 4 COLOR EDITOR EDITING Once a font is selected the Color Editor is in editing mode for th...

Page 40: ...er Blade NA Clash Hold Aux Same behavior as rotating the saber and holding Aux see above Main Button MAIN Hold Unlatch Holding or unlatching the main button will cause the retraction sound to play and all changes made to this font will be saved to disk The saber will then enter the Saber Apps menu Main Button MAIN Hold Unlatch hold Aux button If the aux is held when the main is held or unlatched t...

Page 41: ...ound Hit saber Blade CS Clash Plays the clash sound Main Button MAIN Hold Unlatch Holding or unlatching the main button will cause the retraction sound to play and the game will end with the final score being played This is similar to getting an incorrect swing but the loser sound will not be played 7 THANKS Thanks to Kyle Miller CJS Props Shayé Whitmer and Jimmy Hutson for all the testing and sup...

Page 42: ...Page 42 Revision History Date Revision 16 December 2017 Initial version for Igniter 3 ...

Reviews: