

18
19
naishkites.com
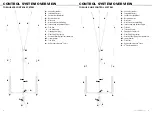
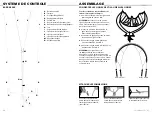
TORQUE LOOP
TORQUE LOOP
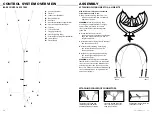
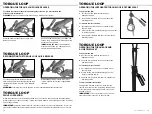
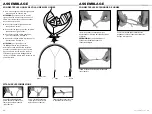
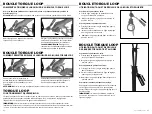
OPERATING THE TORQUE LOOP QUICK RELEASE
To release yourself from the kite in an emergency situation, you must activate the
Torque Loop Quick Release.
Grab the handle of the Torque Loop Quick
Release as shown.
Push the handle away from your body. The
Torque Loop will open and release from the
harness hook as shown.
IMMEDIATELY LET GO of the handle. The
Kite Leash will keep you attached to your
kite while the kite depowers.
TORQUE LOOP
TORQUE LOOP
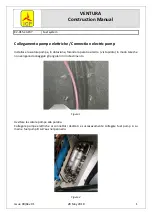
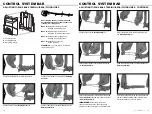
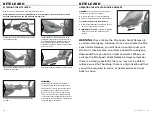
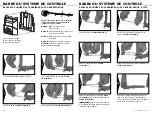
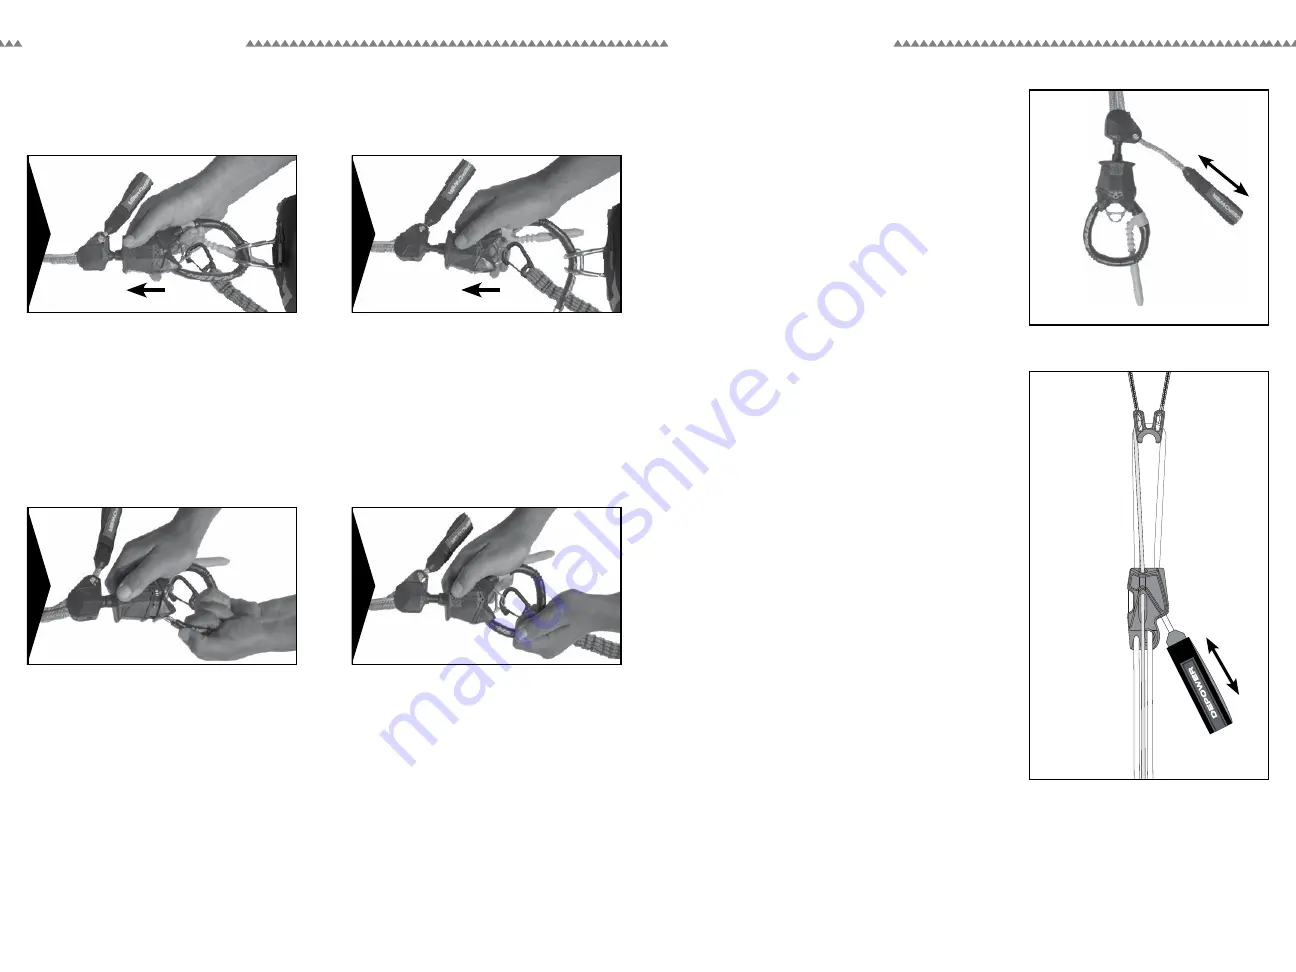
OPERATING THE INTEGRATED TORQUE LOOP BTB TRIM CLEAT
OPERATING THE TORQUE ATB AND
5-LINE TRIM CLEAT
To depower the kite:
1
- Pull the trim line towards your body to
depower the kite.
2
- Lock the trim line back in the trim cleat at the
desired position.
To increase power to the kite:
1
- Pull slightly on the trim line to release it from
the trim cleat.
2
- Slowly let the trim line feed through the trim cleat
to increase power.
3
- Lock the trim line back into the trim cleat at the
desired position.
To depower the kite:
1
- Pull the trim line towards your body to
depower the kite.
2
- Lock the trim line back in the trim cleat at the
desired position.
To increase power to the kite:
1
- Pull slightly on the trim line to release it from
the trim cleat.
2
- Slowly let the trim line feed through the trim
cleat to increase power.
3
- Lock the trim line back into the trim cleat at the
desired position.
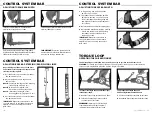
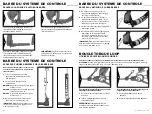
To adjust the trim cleat height:
To adjust the position of the trim cleat, remove
tension from the trim line by landing the kite, then
move the the trim cleat along the trim line to the
desired position.
IMPORTANT:
It is not possible to move the trim
cleat when there is tension on the trim line.
1
TORQUE LOOP
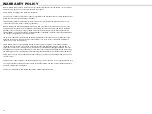
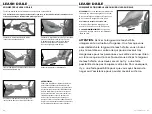
RECONNECTING THE TORQUE LOOP QUICK RELEASE
Push the quick release to the top position and
hold in place. Firmly insert the end of the trim loop
into the quick release. Listen for “click” and hold
in place.
WARNING:
Check to make sure the handle is securely in position before launching your kite.
While holding trim loop in place, lower quick
release. Check to ensure loop is engaged and
locked in.
1
2
2
WARNING:
Always use a Kite Leash when using a Naish control system.
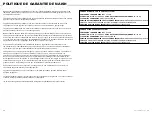
SWIVEL OPERATION
When front lines become twisted after a kite loop or a rotation, they can easily be untwisted by
grasping the top of the Torque Loop—above the release handle—and rotating it until the front lines
are no longer twisted.
IMPORTANT:
Continuous rotations in the same direction can put excess strain on the flagging line. To ensure the
product always works properly and to diminish wear, be sure to manually untwist the flagging line after each session.