


20
21
naishkites.com
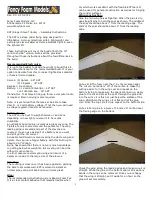
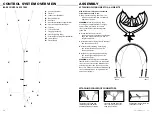
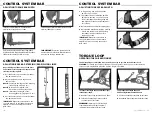
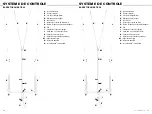
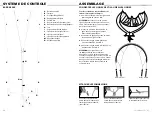
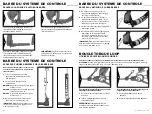
Connect the snap shackle on the Kite Leash to the
leash attachment ring.
All Naish Control Systems are delivered with a Kite Leash.
When activating the Torque Loop Quick Release in an emergency situation, the Kite Leash will
keep the rider attached to the kite while the kite depowers.
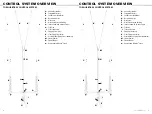
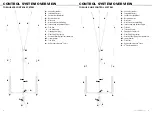
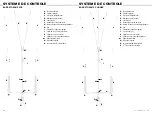
KITE LEASH
ATTACHING THE KITE LEASH
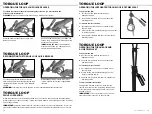
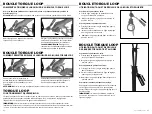
KITE LEASH
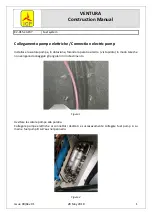
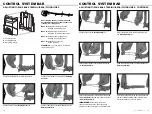
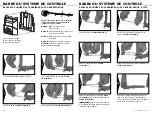
OPERATING THE KITE LEASH QUICK RELEASE
WARNING: Only activate the Kite Leash Quick Release in
a serious emergency situation. Once you activate the Kite
Leash Quick Release, you will have no control over your
kite and it may become an extreme hazard for everyone
downwind from you both on land and water. When you
activate the Kite Leash Quick Release, always remember
there is a strong possibility that you may not be able to
retrieve your kite. Therefore, there is a high likelihood that
you will be required to swim, or need assistance to get
back to shore.
WARNING:
To completely free yourself from
the kite in an emergency situation;
1
-
Activate the Torque Loop Quick Release.
2
-
Then activate the Kite Leash Quick Release.
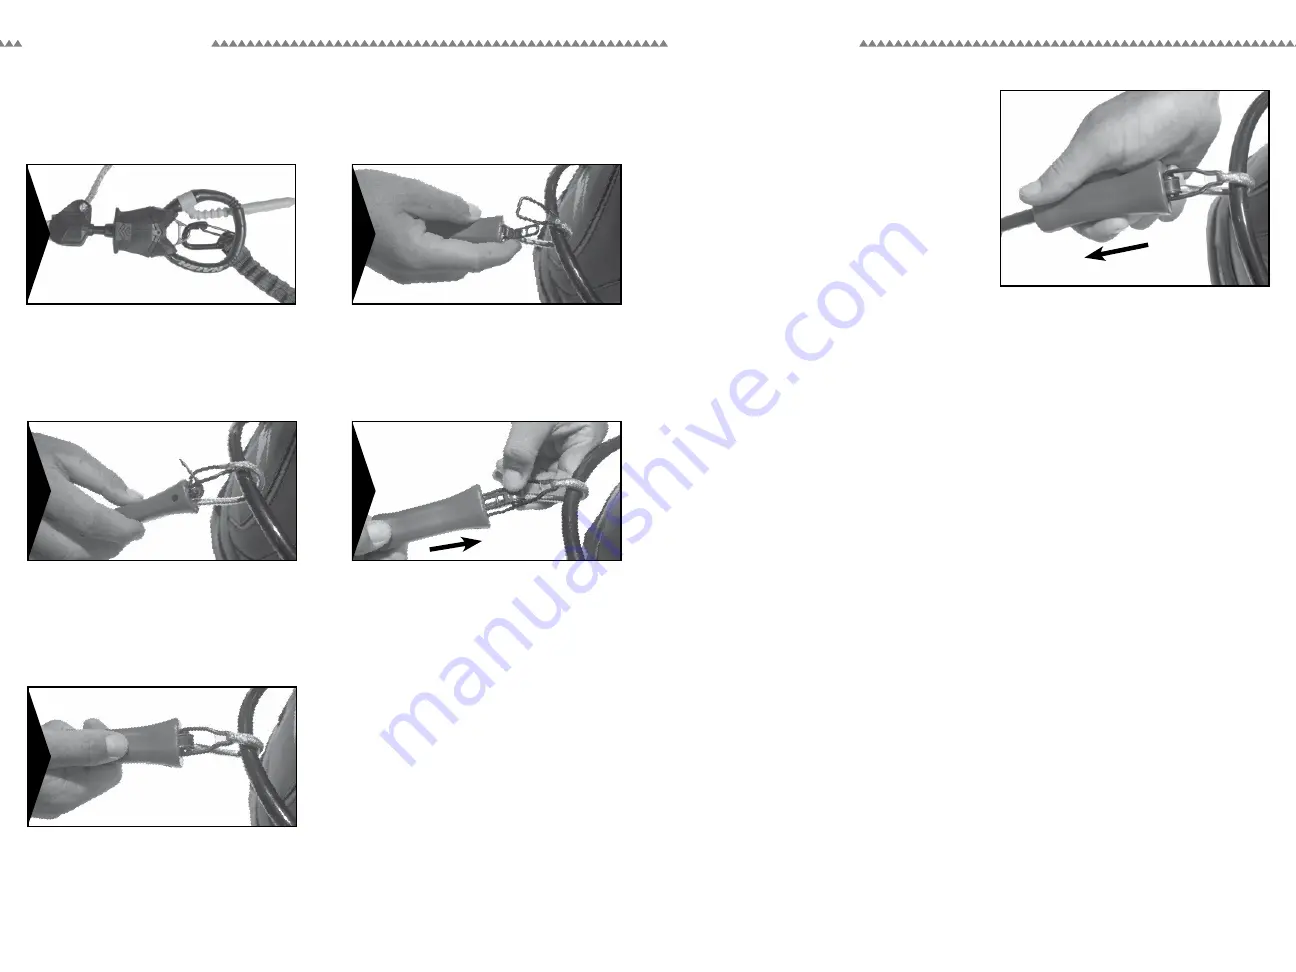
To activate the Kite Leash Quick Release:
1
- Grab the Quick Release handle and push it
away from your body as shown.
2
- IMMEDIATELY LET GO of the Quick Release
handle so you are completely free from
the kite.
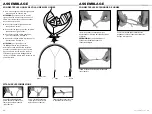
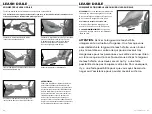
1
a
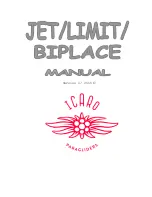
Connect the Kite Leash Quick Release to the
handle pass leash on the back of your harness.
Push the Quick Release handle up to open the
Kite Leash loop then put the Kite Leash loop
around the handle pass loop on the back of your
harness as shown.
Insert the arm of the Quick Release mechanism
into the Kite Leash loop.
3
2
Push the Quick Release handle up and over the arm.
Secure the Quick Release handle into position
as shown.
5
4
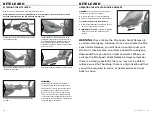
WARNING:
Check to make sure the Kite Leash handle is
securely in position before launching your kite.
Some harnesses-to-leash connections may not
be suitable to ensure a perfect release of the
Naish leash. Prior to use, be sure your leash-to-
harness connection releases completely when
activating the release handle and that no surface
prevents the Kite Leash Loop from sliding over the
connection point to the harness.