


6
LISTENING TO THE BLUETOOTH DEVICE
CONNECT THE LATEST BLUETOOTH DEVICE
Select BT as the audio source using the key on the remote control, the display should display “BT”.
For first time use, the unit will go to Pairing mode automatically and the Blue LED will flash slowly.
Turn ON your Bluetooth device (e.g. Smart Phone) settings and scan for devices, “Delta 20” will be shown
on your device’s Bluetooth list.
Connect your device to the BT Speaker with Bluetooth, your device menu will show “Connected”, the
Blue LED will change to stable ON.
You can play your music wirelessly with this system.
During Bluetooth connection, if you want to pair another Bluetooth device, you can disconnect the
current connection by pressing and holding the key for 3 seconds until “DISCOVER” appears in the
display; or disable the BT connection by your mobile device menu, the speaker will then go to Pairing
mode and other devices can be connected.
1.
2.
3.
4.
5.
6.
This is a quick method to connect the unit with the latest Paired device.
When the unit is on another mode, press key to switch to Bluetooth mode, it will connect with the
latest device automatically; the BT LED will keep ON when connection is successful. If the speaker cannot find
the latest Paired device in 10 seconds, it will then go back to the Pairing mode and be ready for the pairing
from other Bluetooth devices.
1.
2.
PAIRING
This system can pair with most Bluetooth 2.0 & 2.1 devices. Pairing may vary by device. Consult your Bluetooth
device’s owner’s manual for pairing instructions.
Remark:
For devices with Bluetooth 2.0, your device may request you to enter a passcode during pairing, press “0000”
on your device.
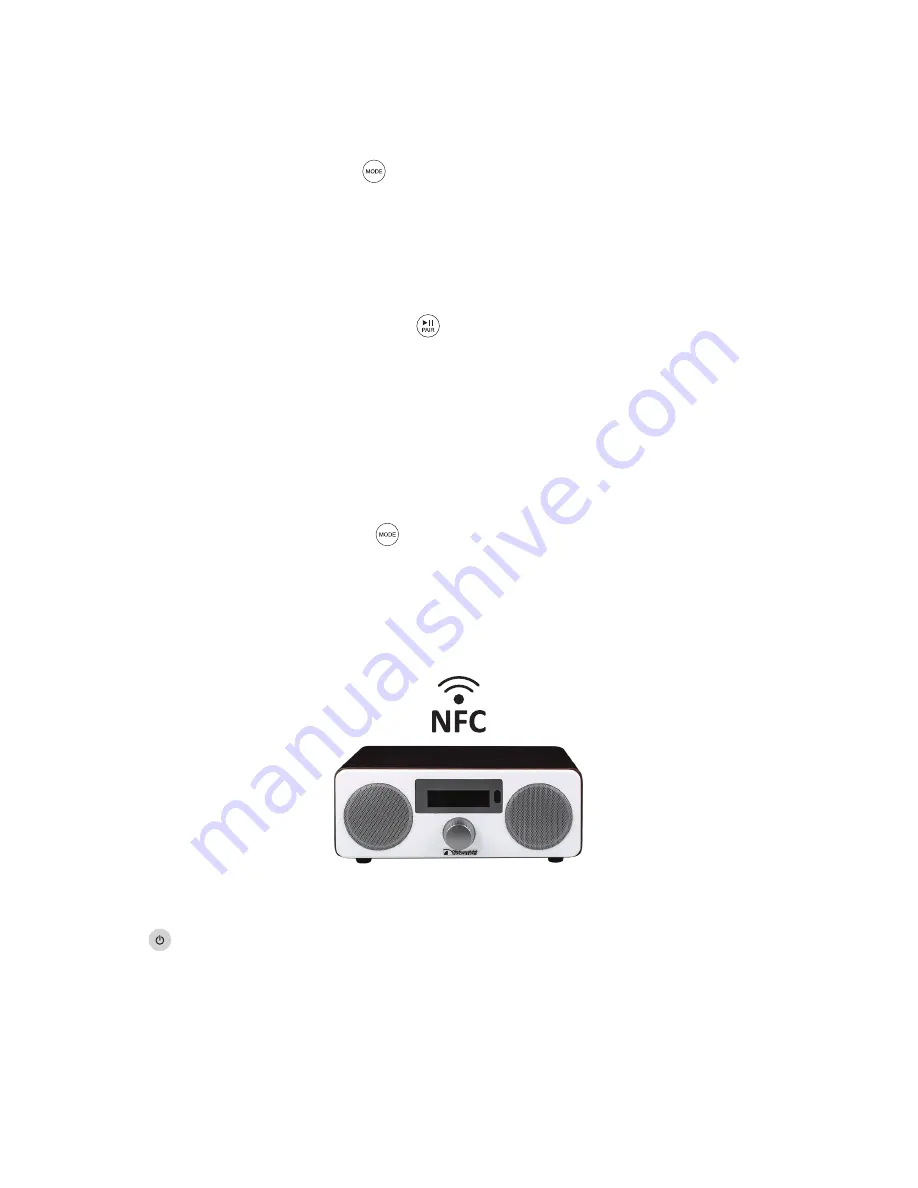
PAIRING YOUR BLUETOOTH DEVICE WITH NFC (NEAR FIELD COMMUNICATION) FUNCTION
Press key on your remote to switch on unit.
Turn on the NFC function on your Bluetooth device (I.E. Smart Phone).
Place your device surface near the NFC sensor area of your DAB+ Clock Radio (located on top of unit),
(Some devices may have a pop
up message to confirm the DAB+ Clock Radio connection, select YES to accept).
To disable the connection, just place your device surface near the NFC sensor area of the DAB+ Clock
Radio again or turn off the NFC function on your device.
IMPORTANT PLEASE NOTE: If you wish to connect a different device TURN unit off and then please repeat
above steps (1-3) for new device.
1.
2.
3.
4.
5.
Your Bluetooth Speaker can be paired with most Bluetooth devices, pairing may vary on your device. Please
consult your Bluetooth device owner’s manual for pairing instructions.
Summary of Contents for DELTA 20
Page 1: ...DELTA 20 User manual...
Page 2: ......


