EN
WWW.NAKAYAMATOOLS.COM
11
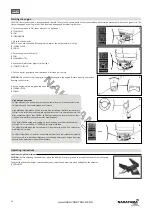
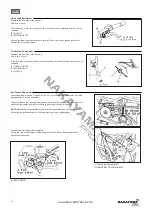
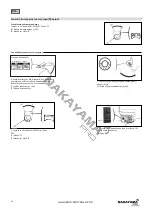
Tilling depth adjustment
Install the hitch attachment in the hitch box with a hitch pin.
The tilling depth adjustment can be made as follows:
Remove the pin, loosen the bolt securing the drag bar and sliding the drag bar up or down as necessary.
(1) HITCH BOX
(2) HITCH PIN
(3) DRAG BAR
(4) PIN
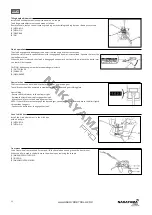
Clutch operation
The clutch engages and disengages the power from the engine to the transmission.
When the clutch lever is squeezed the clutch is engaged and power is transmitted. Squeeze the lever, the
tool will be rotated.
When the lever is released, the clutch is disengaged and power is not transmitted, release the clutch lever
,the tool will be stopped.
CAUTION: Reduce engine rpm before operating main clutch.
(1) CLUTCH LEVER
(2) ENGAGED
(3) DISENGAGED
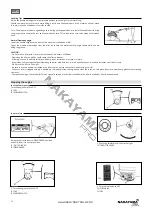
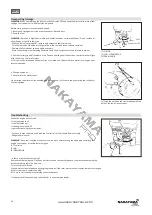
Gear selection
The transmission can be shifted into the forward gear and reverse gear.
The shift lever should be operated in accordance with the attached gear shifting plate.
Gear shifting :
- Return the throttle lever to the extreme right.
- Release the clutch lever to disengage the clutch.
- Move the shift lever to the desired gear position.,
NOTE: If the shift lever will not engage the desired gear, squeeze the clutch lever and move the tiller slightly
to reposition the gears.
- Squeeze the clutch lever to engage the clutch.
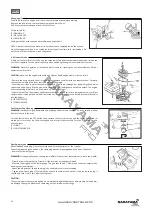
Use of a hitch box
Install the hitch attachment in the hitch box
with a hitch pin.
(1) HITCH BOX
(2) HITCH PIN
Front wheel
Use a front wheel to move the tiller on road, lift the handlebars up and ground the front wheel.
When the tiller is used in the field, move the wheel up by replacing the lock pin.
(1) WHEN USED IN THE FIELD
(2) LOCK PIN
(3) WHEN MOVED ON ROAD
Summary of Contents for 042808
Page 1: ...en el WWW NAKAYAMATOOLS COM ART NO MB6100 042808...
Page 17: ...EL WWW NAKAYAMATOOLS COM 18 1 2 3 4 1 2 3...
Page 18: ...EL WWW NAKAYAMATOOLS COM 19 4 5 1 2 3 4 5 6 7 8 9 10 11 12 13 14 1 2 3 4 5 6...
Page 20: ...EL WWW NAKAYAMATOOLS COM 21 SAE 20W 50 SAE30 1 2 MAX 3 MIN 1 1 95...
Page 22: ...EL WWW NAKAYAMATOOLS COM 23 1 1 2 3 4 1 2 3...
Page 23: ...EL WWW NAKAYAMATOOLS COM 24 1 2 3 6 8o 300mm 1 2...
Page 25: ...EL WWW NAKAYAMATOOLS COM 26 20 3 50 6 100 300 1 2 2 2 2 1 2...
Page 26: ...EL WWW NAKAYAMATOOLS COM 27 0 6 L 1 2 3 1 2 OFF ring ON 1 O RING 2 0 7 0 8mm 1 2 1 4 1 2...
Page 27: ...EL WWW NAKAYAMATOOLS COM 28 3 8mm 1 2 5 10mm 1 2 3 60 65mm 2 4 2 6 in 1 2 1...
Page 28: ...EL WWW NAKAYAMATOOLS COM 29 1 2 OFF ON 3 4 5 1 O RING 2 3 1 ON OFF ON ON 1 2 ON 3 ON OFF ON...
Page 29: ......


