WWW.NAKAYAMATOOLS.COM
EN
13
Choosing the right cutting blade (optional)
Choose a suitable recommended cutting attachment according to the object to be cut.
Heavy weeds: 9’’ 8-tooth
Light vegetation: 9’’ 4-tooth or Nylon line head
Grass: Nylon line head
Warning: When sharpening, removing, or reattaching the blade, be sure to wear thick, sturdy gloves and use only proper tools and equipment to prevent Injury.
Setup (W)
(1) Cover
(2) Holder
1. Detach the line head assembly completely.
2. Put on the blade, making the marked side face the holder, put on the outer holders, and fasten the blade with the blade nut.
Important: Change the cutting attachment guard, which is suitable for the metal blade.
Tightening torque: 1.5 - 2.0 Nm
Attach the main handle for safe operation.
Cutting method
a) Use the front left side cutting.
b) Guide the blade from your right to left with it tilted slightly to your left.
c) When mowing a wide area, start working from your left end to avoid interference of cut grass .
d) The blade may be seized by weeds if the engine speed is too low, or the blade cuts too deep into weeds. Adjust the engine speed and cutting depth according
to the condition of object.
Warning: If the grass or other object gets caught in the blade, or if the unit starts to shake or vibrate, turn off the engine and check the whole unit. Change the
blade if it has been damaged.
Turn off the engine and make sure the blade has completely stopped before checking the blade, and removing any object got caught ln.
Operation
1. Check the bolt to fasten the blade and be sure the bolt has no fault, and no abrasion.
2. Be sure that the blade and the holder have been fas tened according to instruction and that the blade turns smoothly without abnormal noise.
Warning: The rotating parts fastened incorrectly may cause serious accident to the operator.
Make sure that the blade is not bent, warped, cracked, broken or damaged.
If you find any error to the blade, discard it and replace with a new one, which is certified by your supplier.
Warning: By using the shoulder strap, hang the unit on your right side. Adjust the strap length so that the cutting head may become parallel to the ground. Make
sure to use shoulder strap and cutting attach ment guard. If not, it is very dangerous when you slip or lose your balance.
Controlling the blade bounce
Blade thrust can cause serious personal injury. Carefully study this section. It is important that you understand what causes blade thrust, how you can reduce
the chance of blade thrust and how you can remain in control of the unit if blade thrust does occur.
1. What causes blade thrust:
Blade thrust can occur when the moving blade contacts an object that it cannot cut. This contact causes the blade to stop for an instant and then suddenly
move or ounce away from the object that was hit. The operator can lose control of the unit and the blade can cause serious personal injury to the operator or
any person nearby if the blade contacts any part of the body.
2. How you can reduce the chance of blade thrust:
a. Recognize that blade thrust can happen. By un derstanding and knowing about bounce, you can help eliminate the element of surprise.
b. Cut fibrous weeds and grass only. Do not let the blade contact materials it cannot cut such as hard, woody vines and bushes or rocks, fences, metal, etc.
c. Be extra prepared for bounce if you must cut where you cannot see the blade making contact such as in areas of dense growth.
d. Keep the blade sharp. A dull blade increases the chance of bounce.
e. Avoid feeding the blade too rapidly. The blade can bounce away from material being cut if the blade is fed faster than its cutting capability.
f . Cut only from your right to your left.
g. Keep your path of advance clear of material that has been cut and other debris.
3. How you can maintain the best control:
a. Keep a good, firm grip on the unit with both hands.
A firm grip can help neutralize bounce. Keep your right and left hands completely around the respec tive handles.
b. Keep both feet spread apart in a comfortable stance and yet braced for the possibility that the unit could bounce. Do not overreach. Keep firm footing and
balance.
Transporting the unit
When you finish cutting in one location and wish to continue work in another spot, turn off the engine, lift up the unit and carry it paying attention to the blade.
Never forget to place the protective cover over the blades.
When transporting the unit over long distances, detach the blade and fasten the unit by ropes.
Hedge-trimmer and pole pruning head
Warning: This product is equipped with extremely sharp blades, and when used improperly these blades can be ex tremely dangerous and improper handling
can cause accidents, which may in turn lead to serious injury or death. For this reason, you should always be care ful to follow the following Instructions when
using your trimmer.
Never hold the trimmer in a way in which the blades are pointed towards someone else.
Never allow the blades to come into proximity with your body while the engine of the trimmer is in opera tion.
Always be sure to turn off the engine before chang ing the angle of the blades, removing branches which have become stuck in the blades, or at any other time
when coming into close proximity with the blades. Always wear work gloves made of leather or some other sturdy material when using the trimmer.
Always place the blade cover provided with the trim mer over the blades when not in use.
Summary of Contents for PS3100
Page 1: ...en el WWW NAKAYAMATOOLS COM ART NO PS3100 PS5100 029106 029090...
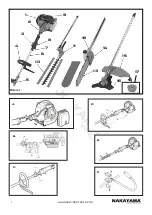
Page 3: ...3 WWW NAKAYAMATOOLS COM i l g 1 j h k m n o...
Page 4: ...4 WWW NAKAYAMATOOLS COM t p q u V W TIGHTEN LOOSEN r s...
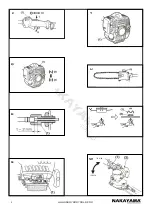
Page 5: ...5 WWW NAKAYAMATOOLS COM 6 5 3 0 6 0 9mm 4 2...
Page 6: ...6 WWW NAKAYAMATOOLS COM 14 15 18 19 16 17...
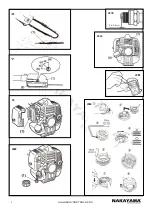
Page 7: ...7 WWW NAKAYAMATOOLS COM 22 21 22 20...
Page 17: ...17 WWW NAKAYAMATOOLS COM EL 1 2 3 4 5 15...
Page 18: ...18 WWW NAKAYAMATOOLS COM EL 60 3 m 1 2...
Page 23: ...23 WWW NAKAYAMATOOLS COM EL 3 5mm X 1 2 1 2 Y 1 40 1 2...
Page 24: ...24 WWW NAKAYAMATOOLS COM EL Z 1 ON OFF OFF 2 1 2 3 Z1 1 Z2 1 25 50 100 0 6 0 7mm ON OFF...
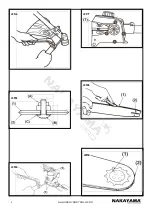
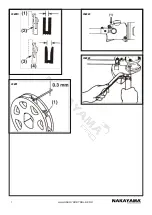
Page 26: ...26 WWW NAKAYAMATOOLS COM EL Z17 1 Z18 1 2 Z19 1 2 Z20 1 2 3 4 Z21 0 3mm 1 1 0 6 0 7 mm 2...
Page 27: ......


