background image


Directions 


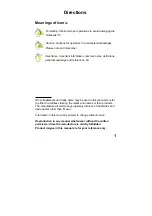
Meanings of icons: 

 
Forbidding: forbid improper operations to avoid damaging the 
Notebook PC. 

 
Caution: cautions for operators to avoid potential damages. 
Please note and remember. 

 
Importance: important information, common notes, definitions, 
general knowledge and references, etc. 


Other trademarks and trade name may be used in this manual to refer 
to either the entities claiming the marks and names or their products. 
The manufacture disclaims any proprietary interest in trademarks and 
trade names other than its own. 
 
Information in this manual is subject to change without notice. 


Reproduction in any manner whatsoever without the written 
permission from the manufacture is strictly forbidden. 

Product images in this manual are for your reference only. 

Summary of Contents for PC-81005

Page 1: ...etc Other trademarks and trade name may be used in this manual to refer to either the entities claiming the marks and names or their products The manufacture disclaims any proprietary interest in tra...

Page 2: ...armful interference to radio or television reception which is found by turning the equipment off and on the user is encouraged to try to correct the interference by one or more of the following measur...

Page 3: ...Attention 11 3 2 How to enter the suspend mode 11 4 Keep the data for future possible use 12 4 1 HDD Partition 12 4 2 Class the data in the HDD 12 5 Getting Started 13 5 1 Install the Rechargeable Bat...

Page 4: ...8 2 2 Hibernate 22 8 2 3 Log Off 22 8 2 4 Restart the System 22 8 3 Power Saving 23 8 3 1 Connect the Adapter without using Battery Pack 23 8 3 2 Adjust the brightness of LCD Screen 23 9 Upgrading You...

Page 5: ...ccur some heat during operating or charging DO NOT leave the Notebook PC on your lap or any part of the body in order to prevent discomfort or injury from heat exposure 11 INPUT RATING Refer to the ra...

Page 6: ...ndicator 8 HDD Status Indicator Light is blue when the HDD is in active mode 9 WiFi Indicator 10 Numeric Keypad Indicator Click Fn NUMLK to turn on the light and the numeric keypad is unlocked 11 Cap...

Page 7: ...GA Port 1 3 Left Side 1 Ethernet LAN Port 2 USB Port 2 0 3 Microphone Jack 4 Headphone Jack 5 Express Card Port The USB card can only be inserted in one orientation Force to insert the card may in res...

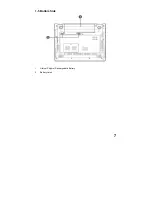
Page 8: ...7 1 5 Bottom Side 1 Lithium Polymer Rechargeable Battery 2 Battery Latch...

Page 9: ...down the LCD Screen if the Notebook PC will not be used for a long time DO NOT clean the LCD Screen with chemical cleaners The LCD Screen DOES NOT come into contact with hard objects E g cloth button...

Page 10: ...oard But the deteriorate of the Printed circuit board will occur and will result in malfunction of the keyboard Contact your dealer for advises at this moment 2 5 Touch Pad Keep your hand clean when u...

Page 11: ...the Notebook PC lightly Use the fanner to dry the Notebook PC and the accessories and then send it to the service center for advice DO NOT use hair drier to dry the Notebook PC or the high temperature...

Page 12: ...rent power cords to connect the different outlets or the hotel may provide universal outlets to support your power cord as well as voltages If you drive your car with the Notebook PC DO NOT leave the...

Page 13: ...o avoid losing the data In order to improve the performance of your Notebook PC the HDD of your Notebook PC can be formatted with some partitions C D and so on Save files to the any partitions except...

Page 14: ...ct all lines 2 Shut down and turn over the computer to access its base in flat and clean work surface 3 Slide the Battery Latch toward the arrow 4 Draw the Battery Pack towards the arrow to release th...

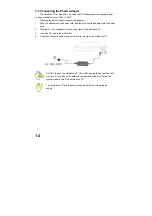
Page 15: ...apter with the power cord 2 Plug the DC end of adapter into the power jack of the Notebook PC 3 Insert the AC end to the wall outlet 4 Check the connections above correctly before turning on the Noteb...

Page 16: ...en Display OSD Click Function Fn F10 Shift between LCD Screen and external monitor Fn F11 Decrease the brightness of screen Fn F12 Increase the brightness of screen LCD Screen is made of glass and may...

Page 17: ...F12 Decrease Increase brightness of LCD Screen Other Key Combinations Click Ctrl Shift Esc or Ctrl Alt Del to open Task Manager windows Click Windows Key R to open Run windows Click Windows Key F to o...

Page 18: ...ect the card lightly inby the card will exit from the port 7 Internet Connection 7 1 Connecting with the network via Wired LAN Before connecting the network with your computer setup your network syste...

Page 19: ...Protocol TCP IP Property windows Select the General label on the Internet Protocol TCP IP Property windows and enter the address of your IP and DNS or select Obtain an IP address automatically 7 2 Wir...

Page 20: ...ss LAN environment See the manual of the Express Card for more information If your computer cannot connect with network you may have to reset your network system change the telecommunication line or c...

Page 21: ...completely charged The Battery Pack has limit on the number times it can be recharged In any case the Battery Pack s usage time will eventually decrease and a new Battery Pack must be purchased from...

Page 22: ...atures above or below this range will shorten the life of the battery If the temperature is too high it may cause fire or explode DO NOT throw the Notebook PC in municipal waste Check local regulation...

Page 23: ...d the Notebook PC turns off the Power Indicator Light will turn off Press the POWER button to restarting the system Activate the Hibernate function Click the left button of the mouse on the Hibernate...

Page 24: ...you can take advantage of power management settings to conserve battery life 8 3 1 Connect the Adapter without using Battery Pack The Battery Pack has a limit on the number times it can be recharged D...

Page 25: ...nt to use the external keyboard or mouse connect the external keyboard and external mouse by the USB port When you disconnect the external keyboard or external mouse from the computer grasp the connec...

Page 26: ...Menu Follow the below steps to enter the BIOS Setup Menu 1 Click F2 button quickly during loading the system then the system will enter the below menu 2 Click the left right direction keys to select B...

Page 27: ...Order and click the ENTER button to enter the below menu Click the up down direction keys to select the first one setup item and click F10 button to popup the dialogue box as shown below On the menu s...

Page 28: ...nter for advice 5 DO NOT place the Notebook PC into the dirty carrying case to again Q4 After entering the standby mode why the system cannot reactivate and how to check this problem A Definition Stan...

Page 29: ...wer Management menu Q8 If the image isn t clear A Check that the lens is clear or not if not clean with the soft cloth Q9 If the mobile moves slowly A The camera needs some light when gathering the da...

Page 30: ...data cache L2 Cache Size 512 kB on die second level cache Memory Min 128 MB Max 1GB Memory Type 200 PINS DDR2 SO DIMMs Memory Access Time Can support 400 533 667 MHz DDRII module GPU Ultra low power i...

Page 31: ...r Sound Card Type AC97 Codec Network Card 100Mbps I O Device Mouse Touch Pad Keyboard U S 85 key keyboard Condition Operating Temperature 5 35 Operating Humidity 35 85 Storage Temperature 20 55 Storag...

Page 32: ...ndard LAN LAN Type 10 100Base T Port RJ45 Audio Port Headphone Port Speaker Built in Microphone Microphone Port USB Port USB A Port x3 USB2 0 SD Card Port Support SD MS MMC Card Express Card Port Expr...

Reviews: