67
S08
MAINTENANCE
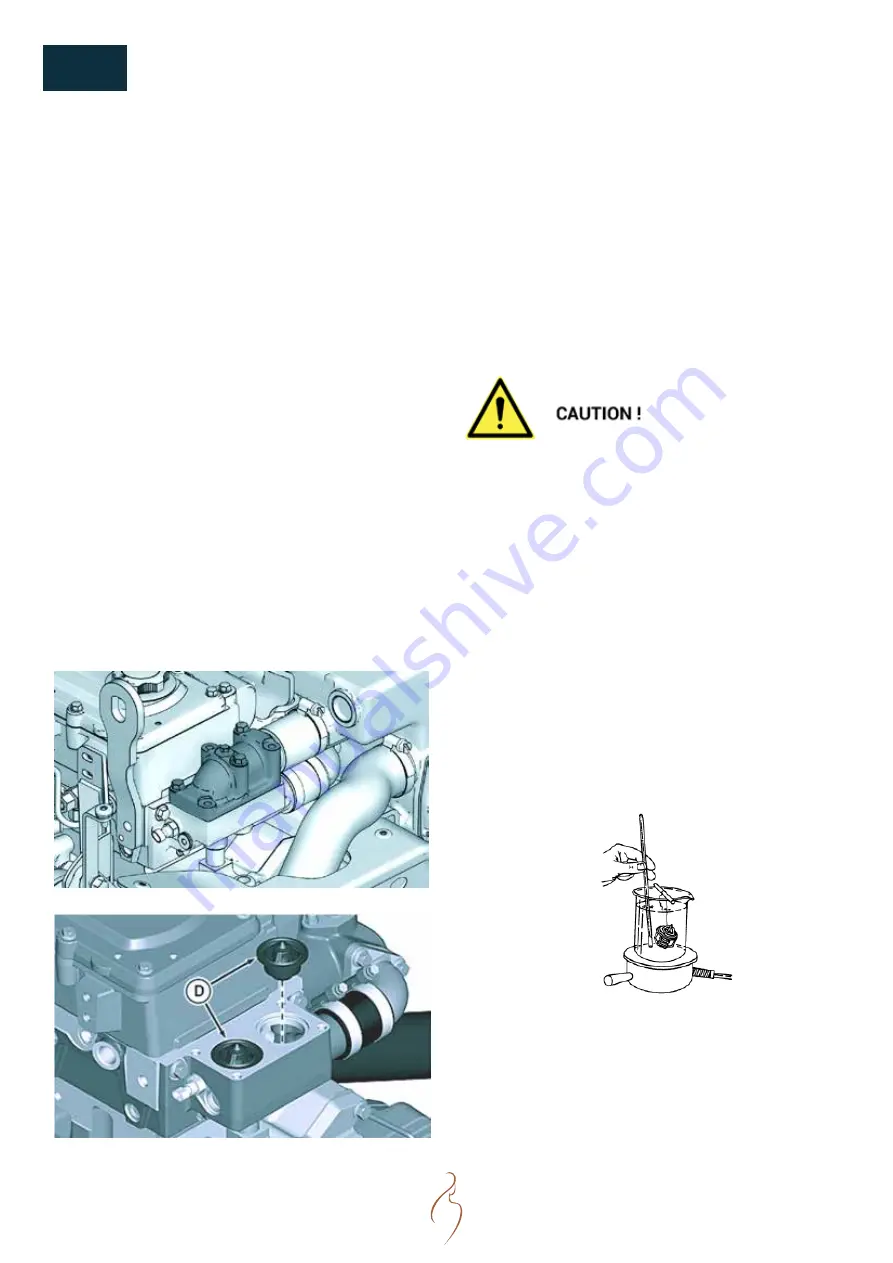
REMOVING AND INSTALLING THERMOSTATS
1. Visually inspect area around thermostat housing and
cover for leaks.
2. Remove coolant tank pressure cap and partially drain
coolant system.
3. Unbolt cap screws from the thermostat housing.
4. Remove cap screws attaching thermostat housing
to the exhaust manifold.
5. Remove gasket and discard all gasket material. Clean
all sealing surfaces.
6. Inspect and test thermostats (
D
) for proper opening
temperature.
7. Install thermostats with a new gasket. Install
thermostat housing cap screws finger tight.
8. Tighten all cap screws to the following specifications
: 35 Nm (25 lb.-ft.).
TESTING THERMOSTATS
1. Remove thermostats.
2. Visually inspect thermostats for corrosion or damage.
Replace thermostats as a matched set as necessary.
3. Inspect thermostat with wiggle wire in vent notch. If
wire movement is restricted, replace thermostat if
cleaning does not free movement.
DO NOT allow thermostat or thermometer to rest
against the side or bottom of container when heating
water. Either may rupture if overheated.
4. Suspend thermostats and a thermometer in
acontainer of water.
5. Stir the water as it heats. Observe opening action
of thermostat and compare temperatures with
specifications.
6. Remove thermostat and observe its closing action as
it cools. In ambient air the thermostat should close
completely. Closing action should be smooth and slow.
7. If any one thermostat is defective, replace both
thermostats.
Thermostat and thermometer in water
Summary of Contents for N9.330 CR2
Page 2: ......
Page 4: ......
Page 39: ...39 S06 COMPONENTS ENGINE VIEWS N9 CR2 SERIES 1 6 12 19 10 3 13 8 16 2 14 5 18...
Page 40: ...40 ENGINE VIEWS N9 CR2 SERIES S06 COMPONENTS 5 21 12 20...
Page 52: ...52 NOTES...
Page 106: ......
Page 107: ......


