20
Cooling system - Seawater
I
Caution! :
When the craft is in the water, there is a
risk of water penetrating the craft when working on the
seawater circuit. Water can penetrate the craft via com-
ponents located below the waterline. Close the seacock
(if fitted) or prevent water discharge before working on
the seawater system !
Cleaning the seawater system is essential to prevent
the formation of deposits and salt crystals.
Your generating set may not be fitted with a seawater
cooling system (such as in the case of a Keel Cooling
system).
Cleaning the seawater filter
The seawater filter is an optional component. These in-
structions are given as an example only.
• Check the condition of the seawater filter with the
engine stopped. If deposits have formed, remove
the filter in order to clean it.
• Remove the cover and then the filtering part
A
. Re-
move all the debris on the housing.
• Rinse the filter and the housing with fresh water
and check the condition of the seal, then re-install
all the components and check there are no water
and/or air leaks in the circuit when operational.
Draining and rinsing the seawater circuit
• Close the seacock.
• Disconnect the hose running from the seacock.
• Place the hose in a receptacle filled with fresh wa-
ter. Ensure the receptacle you use is large enough
as the seawater pump must never be run without
water.
• Check that no one is in the vicinity of the engine
and then start it. Let the engine run for several min-
utes, checking that the receptacle is at all times
filled with fresh water.
• Once the circuit is fully rinsed, re-connect the hose
correctly to the seawater filter.
• Drain also the exhaust circuit. A small amount of
water may remain in the bottom of the waterlock
box.
• Run the engine for few minutes in order to check
for leakage.
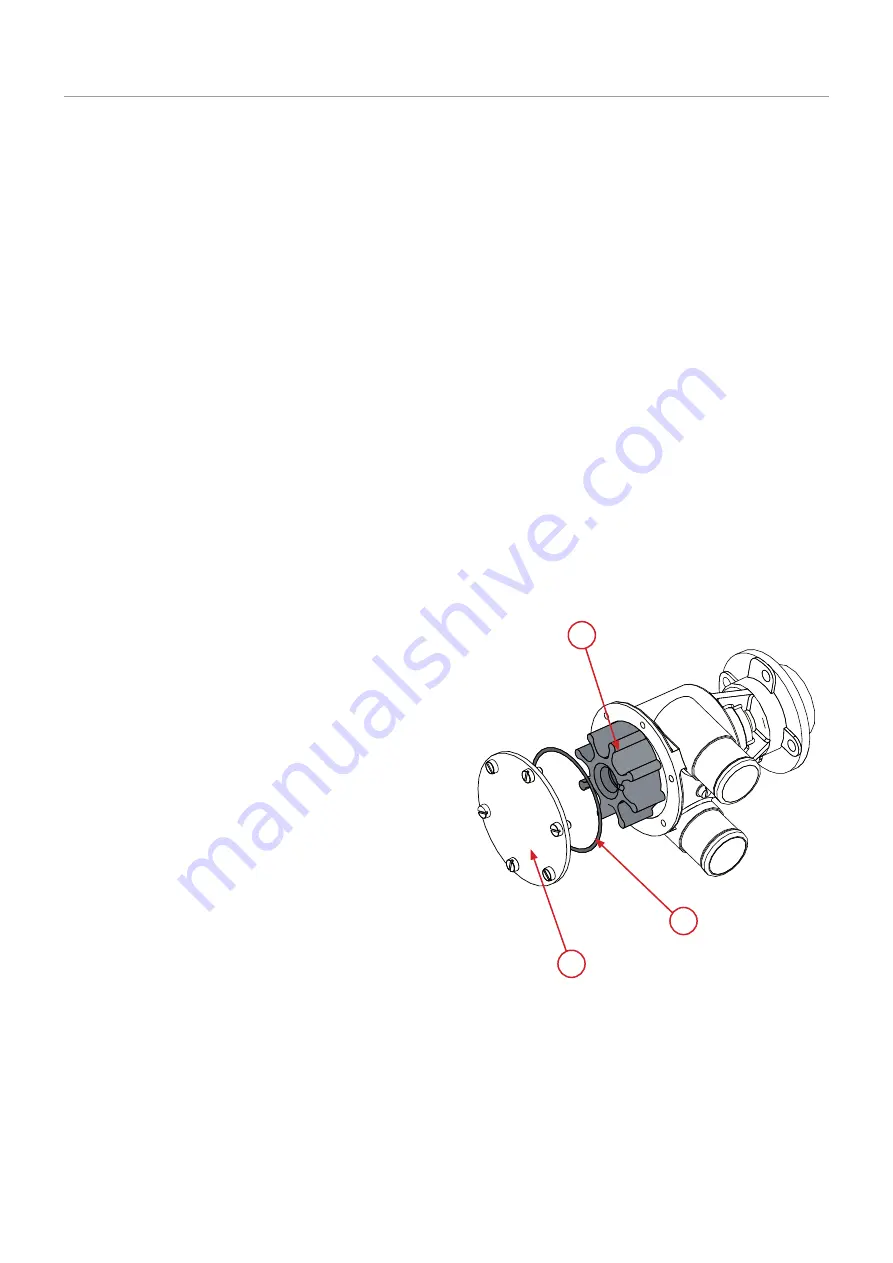
Replacing the seawater pump rotor
The seawater pump rotor is an essential component. It
must be replaced regularly along with the seal. A worn
rotor could crack and damage the cooling system. Al-
ways have a replacement rotor on board the craft.
• Close the seacock.
• Remove the seawater pump cap
A
and the seal
B
,
then remove the rotor
C
without damaging it.
• Check the condition of the rotor: replace it if even
the most minor defect is noted. If the rotor is dam-
aged, drain the seawater system and check that
the heat exchanger is not clogged by pieces of rub-
ber. Clean it if necessary.
• Clean the elements.
• Fit a new rotor by turning it clockwise.
• Lubricate the pump casing and the inside of the lid
with waterproof grease for rubber.
• Refit the water pump cap using a new seal.
• Open the seacock and then start the engine to
check that the circuit is leak-tight.
B
A
C
Maintenance


