Operation
JuLI™ Stage - User Manual
33
Map mode
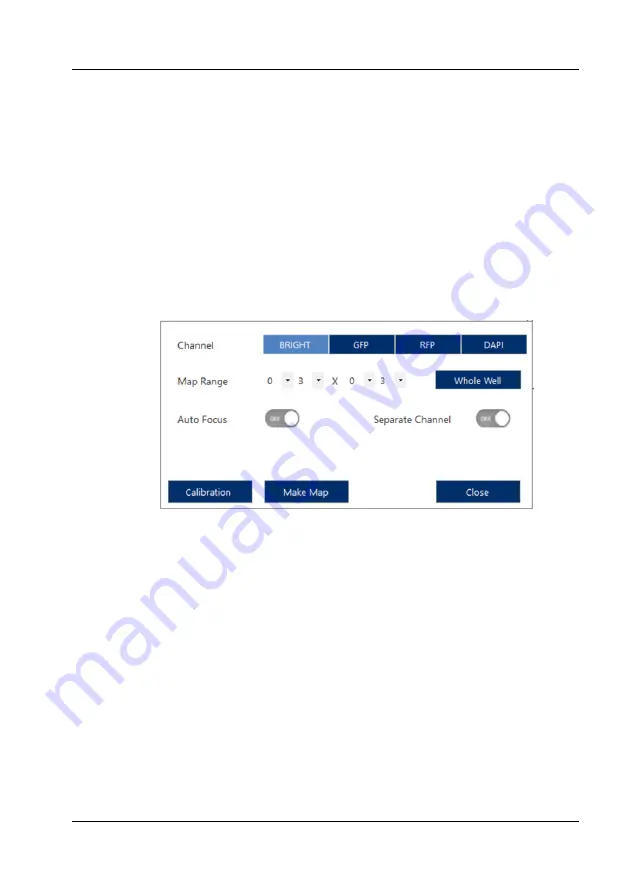
To browse big samples, look for imaging positions, or calibrate the stitching you can
use the Map Mode.
Click
Map Mode
and then
Make Map
to open the menu.
1. Select the channel, map range, and check whether or not to use the autofocus
or to separate the channels (if
Separate Channel
is turned off, all selected
channels will be overlayed in the map).
2. Click
Make Map
and browse the enhanced view of your sample in the map view.
3. Click
Cancel
or
Apply
to return to the map mode.
4. To toggle the map view click
Load
(in
Preview
tab only). The navigation zoom
can be toggled by clicking
N
(in
Preview
tab only).
5. In the
Setup
tab you can also add these positions to the position list
Calibration for map mode (Stitching calibration)
If there are unwanted overlapping regions in stitched images or during map mode
you can correct these.
1. Click
Calibration
in the menu.
2. Select
Horizontal Axis Mode
.
3. Click
Calibration distance
to adjust the Y-axis overlapping location. Drag the
images into appropriate positions.
4. Click
Vertical Axis Mode
.
5. Click
Calibration distance
to adjust the X-axis overlapping location. Drag the
images into appropriate positions.
Summary of Contents for JuLi Stage
Page 1: ......


