background image


Using your iBridge

®

 IBR-ITAB Series 

Z-Wave

®

 Home Automation System 

R

33

3 B

a

yv

ie

w

 Ave

nue,

 Am

ity

ville,

 N

ew

 Y

o

rk

 1

1701 

F

o

r S

a

le

s and R

epai

rs

, (800) 645-9445   

F

o

T

e

chni

ca

l S

e

rv

ic

e,


(800) 645-9440 or v

is

it us

 at 

h

ttp

://t

ec

h

.n

a

p

c

o

s

ec

u

rit

y.

co

m

(N

ot

e:

  T

ech

n

ical

 S

e

rv

ice is fo

r sec

u

ri

ty

 pro

fession

als on

ly

)


P

ubl

ic

ly

 traded on

 NA

S

D

A

Q


Sy

m

bol

: N

S

S

C


© NAPCO 2013

                                                                                                                                                                                                         OI378B  12/13 

Summary of Contents for iBridge IBR-ITAB Series

Page 1: ... Bayview Avenue Amityville New York 11701 For Sales and Repairs 800 645 9445 For Technical Service 800 645 9440 or visit us at http tech napcosecurity com Note Technical Service is for security professionals only Publicly traded on NASDAQ Symbol NSSC NAPCO 2013 OI378B 12 13 ...

Page 2: ...s risks or waivers Your Napco Limited Warrantee and other terms and condi tions govern your use of all Napco wireless products and services Before charging assembling or using your IBR ITAB iBridge tablet keypad device for the first time read and understand the important safety and legal infor mation packaged with your device Z Wave applications and UL Automation functionality is supplementary onl...

Page 3: ...ED SETTINGS REPLACE FAILED DEVICES 15 ADVANCED SETTINGS REMOVE FAILED DEVICES 16 ADVANCED SETTINGS ADD NEW CONTROLLER AS PRIMARY 17 ADVANCED SETTINGS LEARN 19 ADVANCED SETTINGS REBUILD MESH 20 ADVANCED SETTINGS DEVICE ASSOCIATION START 21 CAMERA MANAGEMENT 22 ADD SCENES 24 ADD EVENTS 27 ADD GROUPS 30 GROUPS SELECT DEVICES 32 GROUPS VIEW DEVICES 33 USING YOUR SYSTEM CLIMATE CONTROL 34 USING YOUR SY...

Page 4: ... product The battery should only be replaced by a Napco approved service facility TURNING ON YOUR IBR ITAB Press and hold the Back Power Button until the screen displays startup text indicating the IBR ITAB has turned on and will begin the startup process Af ter a short time a popup appears tap Napco RCM Application to continue Note To automatically start the Napco RCM Application check the Use by...

Page 5: ...example contain lists of de vices to select a device in the list simply tap the device to highlight it Drag To scroll or move slowly touch and hold to select a menu item then drag your finger up and down the touch screen to scroll through the menu selections Using the Back Power Button in Menus When in menus like the one shown at right the Back Power Button can be used In all other screens a back ...

Page 6: ...switch thermostat etc Additional controllers and devices can be included into or excluded from the network at any time by means of simple button presses on both the controller and the device Controllers can be static physically immo bile such as a wall switch controller or mobile such as a portable key fob controller If you are new to home automation you may wish to read the following glossary of ...

Page 7: ...des automatically send their Node Information Frame when a button on the node is pressed those controllers in need of the Node Information Frame are programmed to request it automatically when needed Event Action Configuration Table Used to associate security alarm system events to your home automation system For example a burglary alarm triggers certain lights to turn on and certain cameras to st...

Page 8: ...e dimmer at the top of the staircase that is wired to a ceiling fixture In order to create associations devices at both ends of the association must be designed by the manufacturer to support Associations devices are usually labeled Supports Z Wave associations Replication Refers to the protocol replication between Controllers that is used to exchange protocol replication data between different Co...

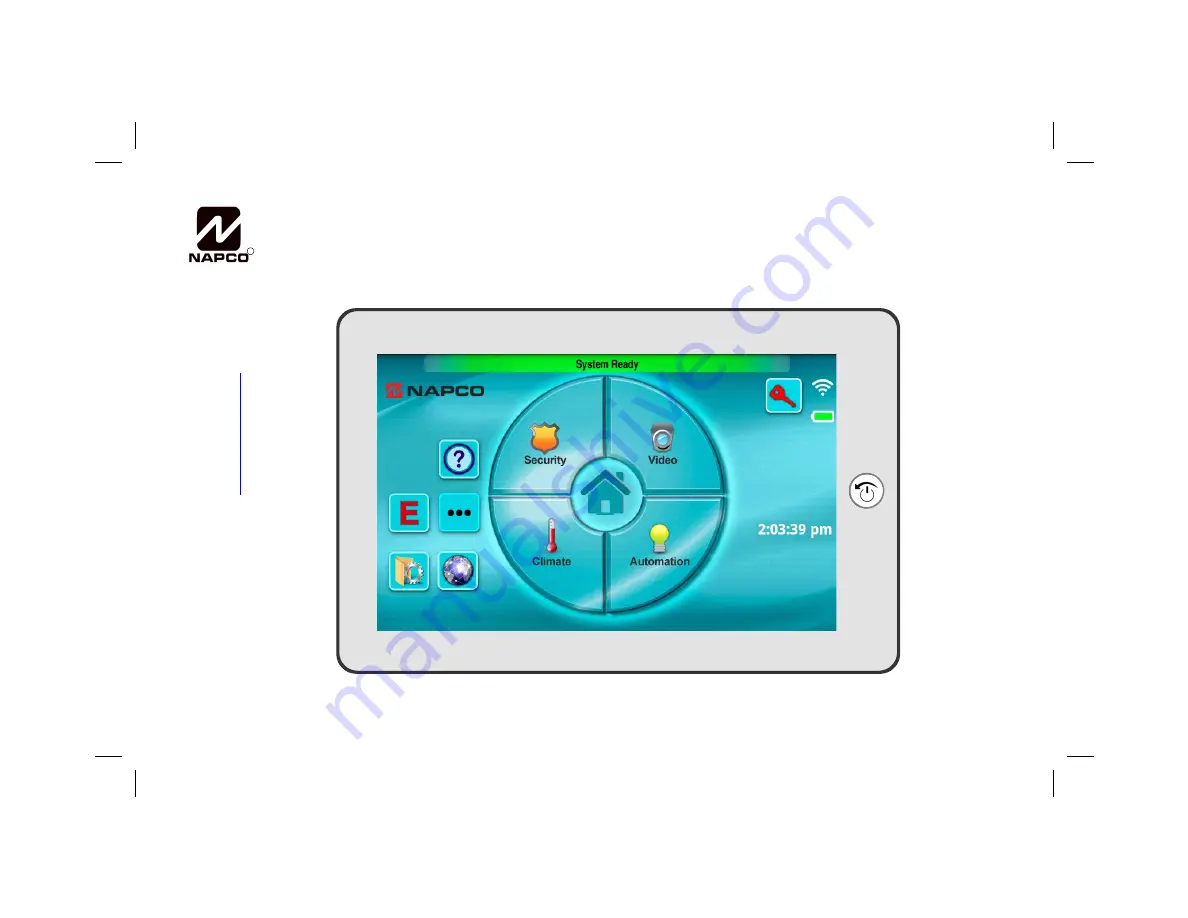
Page 9: ...signal a Fire Police or Auxil iary emergency USER SETTINGS Tap to ac cess the screens to allow changes to the way your IBR ITAB operates see USER SET TINGS MENU HELP On screen instructions for Z Wave functions BROWSER Tap to open the IBR ITAB web browser allowing access to the Internet SECURITY This icon is your gateway to your alarm system From here you can arm disarm bypass and control all syste...

Page 10: ...ing of videos page 22 Help Z Wave Device Setup Events Scenes Groups Cameras Tap to configure up to 32 pre set home auto mation conditions page 24 Tap for mode specific assistance Tap to associate alarm events to your home automation system page 27 Tap to manage multiple devices at one time page 30 Tap the User Settings button then tap Z Wave to open ...

Page 11: ...ntation for the specific device you wish to add to ensure correct operation 3 Wait for the NodeType Description and Status of the de vice to appear in the table For example adding a light switch may indicate Switch as the NodeType Switch1 as the Description and Active as the Status Test the new device In the Test column tap the button or arrows for a dimmer as required For example the Test column ...

Page 12: ...ess others require two see the documentation for the specific device you wish to add to ensure correct operation After a short time the status message field will indicate Node Removed Tap the back arrow at the top left to return to the Automation Management screen IMPORTANT The addition and removal of thermo stats from the system may cause uncontrolled and un desired thermostat settings to be in e...

Page 13: ...ars tap the text field to open the keyboard Type a new device Description When finished tap Done then tap OK to save The new device Description ap pears in the list For example the Description of the highlighted switch as shown in the image at right can be changed from Switch_3 to the more descriptive Den Light Note If you wish to add the edited device to one of two built in All Groups then check ...

Page 14: ...ed however the memory data within each device will not be erased Therefore to completely erase the memory within each Z Wave device simply follow the steps detailed in the section REMOVE Z WAVE DEVICES on page 12 for each device Tap the back arrow at the top left to return to the Automation Management screen IMPORTANT The addition and removal of thermostats from the system may cause uncontrolled a...

Page 15: ...led press OK to close the warning popup and continue 3 In the Advanced Settings screen tap in the Select column to highlight the failed device you wish to replace in the image below device 19 with the Type named Dimmer is selected 4 Tap the Replace Failed Devices button Wait for the system to check to be certain the selected device is non operational or is missing the message Checking for failed d...

Page 16: ...vice has failed press OK to close the warning popup and continue 2 Tap in the Select column to highlight the failed device you wish to remove in the image be low device 19 with the Type named Dimmer is selected 3 Tap the Remove Failed Devices button Wait for the system to check to be certain the selected device is non operational or is missing the message Checking for failed device will appear 4 W...

Page 17: ...EMOTE the Pri mary Controller again use the Learn button see page 19 for instructions Why add a new Primary Controller Some Z Wave devices available in the marketplace only oper ate in low power during Learn mode therefore the use of a port able hand held Primary Controller held within 6 feet of the device when adding may be necessary In addition your sys tem may include distant devices connected ...

Page 18: ...ing Controller Node Added Update complete The new Primary Controller will appear in the device list with a NodeType that will vary with the manufacturer will likely indicate Controller or Controller P The former Napco IBR ZREMOTE Primary and current Napco IBR ZREMOTE Secondary Con troller will appear with a NodeType of Napco S 5 Test the devices Use the new Primary Controller to operate devices an...

Page 19: ... consult the documentation for the Primary Controller of this other network for the exact procedure but at some time during this process it will be requested to press the Learn button of the Controller you wish to add to the other network namely the IBR ZREMOTE When so requested tap the Learn button shown in the image below Replication refers to the protocol replication between Control lers that i...

Page 20: ...p Rebuild Mesh 2 In the Confirmation popup that appears tap OK to proceed 3 When finished the message Rebuild Mesh Complete ap pears 4 Tap back arrow at the top left to return to the Z Wave Device Setup screen In the Test column tap the button or slide bar for a dimmer to test the devices as required Note Devices that cannot be added will be listed with an asterisk in place of the first letter of ...

Page 21: ...ure correct operation of its Learn button used during the Association process as follows 1 Tap Device Association Start Wait for the status message field to indicate Association Proc ess Started Activate Master Device Node 2 At the target master device that is wired to the electrical load press the Learn button on the device Wait for the status mes sage field to indicate Master Node Registered Act...

Page 22: ...s see next page Above each entry are the following headings that can be added or edited as follows DEVICE Defines the piece of equipment to be triggered The default entry of Camera can be tapped to allow the selection of non camera entries IP ID TYPE Defines the way the system will identify the DE VICE either using the default MAC the unique Media Ac cess Control address of the device or IP the TC...

Page 23: ...light a Command then tap Delete Command to remove the selected Command from the system Edit Command Name Tap in the Select column to highlight a Command then tap this button to open the Edit Command Name dialog tap the existing text to open the key board allowing the Command Name text to be changed as needed Edit Command Function Tap in the Select column to highlight a Command then tap this button...

Page 24: ...nes are powerful tools for home automation because they let simple actions control complex tasks that greatly enhance your home automation experience To add a new Scene 1 In the empty Scene Management screen shown below left tap Add Scene 2 In the Enter Scene Name dialog shown below right tap the empty text field to open the keyboard and type a new Scene name Examples may include Movie Night Dinne...

Page 25: ...tems to add to scroll through the list press and hold an item in the Type or Name col umn then drag your finger up or down Tap Done to add the item s to the Scene Creation screen when finished tap Save Exit to save your Scene For example when selecting items for Movie Night you can turn off all lights except certain dimmers set the thermostat to a selected temperature and lock the doors To make us...

Page 26: ...n Tap in the empty field to open the keyboard to add your user code as required SECURITY WARNING If you create a Scene or Event that involves arming the alarm control panel and the system is configured to use the Napco Classic keypad style then ensure the User Code entered into the Scene or Event configuration screens is an ARM ONLY Code If not subsequent acti vation of the Scene or Event will dis...

Page 27: ... programmed as an Action Up to 10 Actions are allowed per Trigger Restriction Select limitations that if met will allow the Action Examples include time of day limitations day of week limi tations and security alarm zone status conditions Event Example For an Event named Arrive at Home Opening the garage door zone Trigger will turn on all lights Action but only between 5 PM and 10 PM Restriction t...

Page 28: ...tart the Event also tap to select the Start Time and End Time of the Trig ger see Note below Note The End Time applies only to switch devices returned to their original state after the End Time passes The End Time field is ignored for all Action devices that are not switches default is None 2 Add an Action Tap the Actions button to open the Action For screen shown at right then tap the Select Item...

Page 29: ...e number press Done to save Then tap the Status field for that zone and select either Open Closed or Alarm When finished tap the Save Exit button to save your settings and enable the Event Tap the back arrow at the top left to return to the Automation Management screen SECURITY WARNING If you create a Scene or Event that involves arming the alarm control panel and the sys tem is configured to use ...

Page 30: ...and switches located in that room Devices can be added to two or more Groups To add a new Group 1 Tap Add Group In the Enter Group Name screen tap the text field to open the keyboard Type a new name of the Group for example Den for all devices located in that room When finished tap Done then tap OK to save or Cancel to exit without saving ADD GROUPS Groups ...

Page 31: ...inished tap Save Only the devices that remained highlighted when Save was tapped will be added to the Group The Group Management screen automatically appears shown below right listing all Groups In the Group Management screen to add or remove the devices in a Group simply tap in the Select column to select the Group then tap Select Devices see next page ADD GROUPS CONT D Groups ...

Page 32: ... wish to view 2 Tap the Select Devices button 3 In the Item Selection screen that appears scroll through the list to view the devices in the Group To make changes scroll through the list and tap in the Select column to highlight the devices you wish to add When finished tap Save to return to the Group Management screen GROUPS SELECT DEVICES Groups View Devices ...

Page 33: ...e Select column to select the Group Name you wish to view 2 Tap the View Devices button 3 In the View Group Devices screen that appears scroll through the list to view the devices in the Group Tap the back arrow at the top left to return to the Group Management screen GROUPS VIEW DEVICES Groups View Devices ...

Page 34: ...ty to View the current temperature of the monitored room displayed under the word CURRENT Change the heat and cool set point temperature degree setting tap the up down arrows next to the words SET TO Turn the heating and cooling system on or off Tap Auto to run pre programmed temperature set tings Note The SET TO option is not available when the thermostat is set to Off Tap the back arrow at the t...

Page 35: ...List to select All Lights All Devices with the Type name of Light will be listed In the example shown below a Device with the name of Dimmer is listed first accompanied by its activation slide bar To the right are three buttons Tap the back arrow at the top left to return to the Napco Security Application Home Screen USING YOUR SYSTEM AUTOMATION Drop Down List All Lights On Tap to turn on all ligh...

Page 36: ...e in the system appears as a button To turn on a Scene simply tap its button Using an example in the screen below Disarm is used after disarming your alarm system In this example the foyer lights near the entry door are turned on the ther mostat temperature is turned to a pre set temperature and the living room dimmer lights adjust to 80 Scenes are powerful tools for home automation because they a...

Page 37: ...o tap the text field to open the keyboard USING THE ONSCREEN KEYBOARD Tap to save when finished typing Backspace Moves cursor one column to the left deleting the character in that position Shift Tap twice or press and hold for ALL CAPS light turns on Symbols Tap to switch to the numbers and symbols keyboard see next page for more options Enter Return key Tap to end a paragraph Period Press and hol...

Page 38: ...nal sym bols shown on next page light turns on ABC Tap to switch back to the Standard keyboard shown on previous page Enter Return key Tap to end a paragraph Period Press and hold to open a small window with a set of common symbols Numbers and Symbols On the Standard keyboard shown on the previous page tap the 123 key and switch to the Numbers and Symbols keyboard shown below ...

Page 39: ...r Return key Tap to end a paragraph Additional Symbols On the Numbers and Symbols keyboard shown on the previous page tap the unlit ALT key and switch to the Additional Symbols keyboard shown below ALT key is lit ALT Tap to return to the Numbers and Sym bols keyboard shown on previous page light turns off ABC Tap to switch back to the Standard ALL CAPS keyboard ...

Page 40: ...uent testing and due to but not limited to any or all of the following criminal tampering electrical or communications disruption it is possible for the system to fail to perform as expected NAPCO does not represent that the product system may not be compromised or circumvented or that the product or system will prevent any personal injury or property loss by burglary robbery fire or otherwise nor...

Reviews: