7
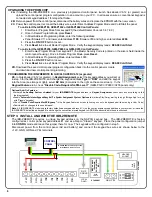
STEP 4: WIRE IBR-ZREMOTE NETWORK CONNECTIONS TO
ISEE-WAP AND ROUTER
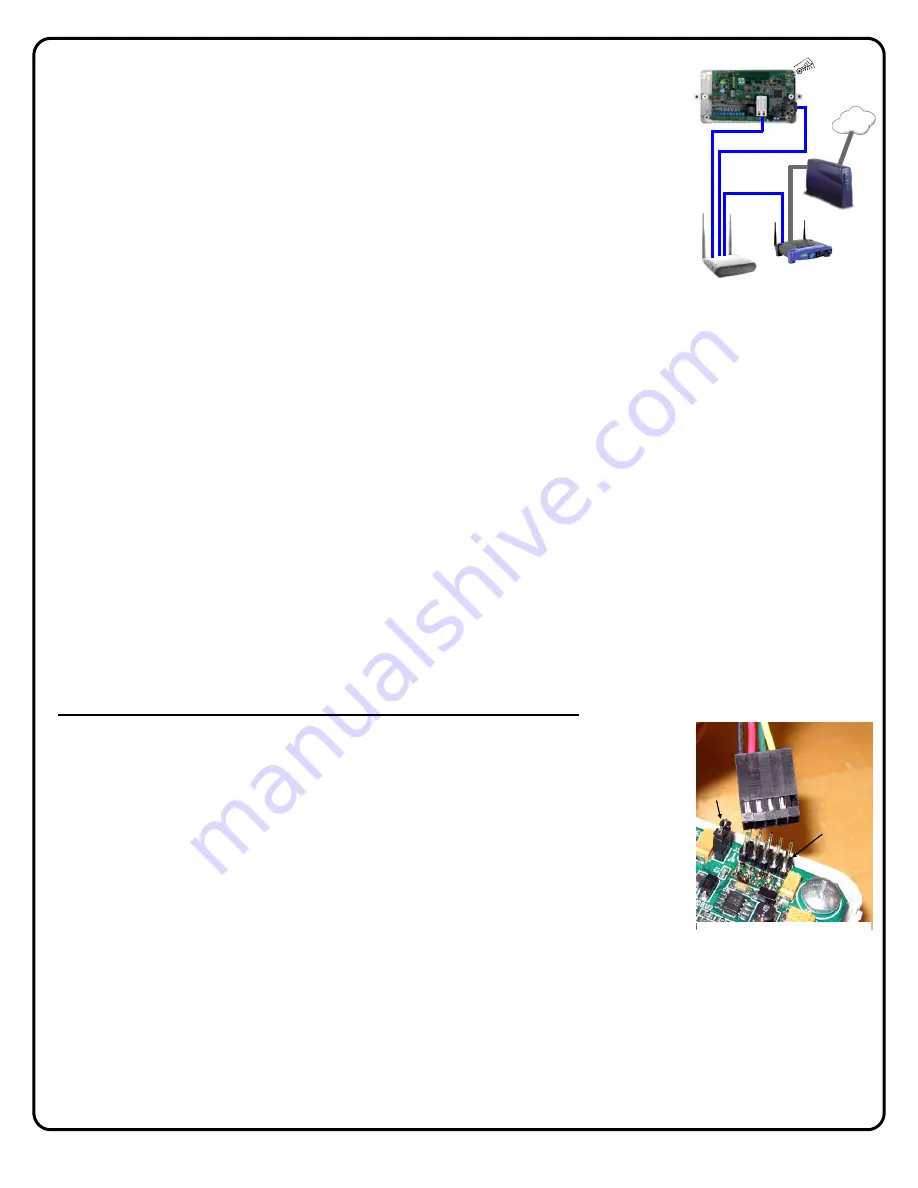
Using
three
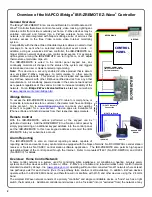
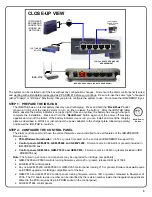
(3) standard CAT5 network cables, connect...
...one end of the
1st cable
into another open LAN socket on the ISEE-WAP, the other end into
the IBR-ZREMOTE receptacle labeled "
ETHERNET
" (located on the front next to the local
download jack).
...one end of the
2nd cable
into another open LAN socket on the ISEE-WAP, the other end into
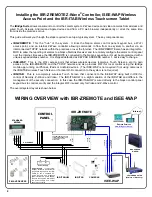
the other IBR-ZREMOTE receptacle located on the right side of the IBR-ZREMOTE (as shown
in the diagram on page 4).
...one end of the
3rd cable
into an open LAN socket on the customer's existing router, the other
end into an open LAN socket of the ISEE-WAP.
Note:
See the diagram "
2: WIRING
OVERVIEW with the IBR-ZREMOTE
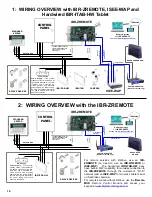
" on page 17 for connections without an ISEE-WAP
when no wireless tablets and/or iSeeVideo cameras are wanted.
Note: Customer's router
must
support DHCP
. Reconnect the battery connection and power the control panel. Wait
two (2) minutes for all devices to fully power and complete their network connections. Remember, the panel configuration
jumper is set to
CONFIG
mode, so the keypads will power up and display "
OUT OF SYSTEM
".
STEP 5: CONFIGURE THE IBR-ZREMOTE KEYPAD ADDRESS & KEYPAD TYPE
Note:
The IBR-ZREMOTE requires a unique keypad address on the Napco keypad bus. By default, the IBR-
ZREMOTE is configured as keypad address #1 and as a Napco "Classic Keypad". If not changing the keypad address
and/or keypad type, move the panel
CONFIG
jumper back to
NORM
, and go to step 7.
If the IBR-ZREMOTE is going to be set as keypad address #1 and set as a Napco "Classic" keypad, you will only have to
set the keypad addresses for any other additional conventional wired keypads connected to the control panel. Configure
each additional keypad as you normally would by moving the configuration jumper to
CONFIG
and entering Keypad
Configuration Mode by pressing
1 1 1 2 3 FUNCTION
(
or MENU
) on each alpha keypad.
5A.
The IBR-ZREMOTE
Keypad Address
and
Keypad Type
can be configured in one of three ways:
•
Using a configuration keypad (such as a Napco GEM-RP1CAe2 or GEM-K1CA) to configure
the IBR-ZREMOTE (recommended method)
•
Using an app on your iPhone, iPad or Android device to configure the IBR-ZREMOTE
•
Using the IBR-ITAB Tablet to configure the IBR-ZREMOTE
If the IBR-ZREMOTE
Keypad Address
and/or
Keypad Type
needs to be changed, please use one of the three methods
below.
USING A CONFIGURATION KEYPAD TO CONFIGURE THE IBR-ZREMOTE
(Recommended Method)
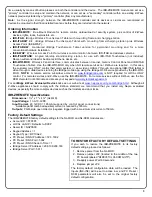
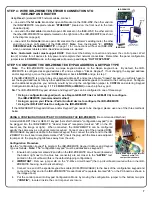
A model GEM-RP1CAe2 or GEM-K1 keypad (henceforth called a "configuration keypad") can
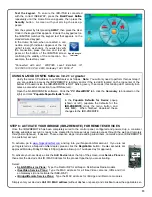
be plugged into the IBR-ZREMOTE "Header Socket" receptacle (marked "
J3
" on the PC
board; see the image at right). When connected, the IBR-ZREMOTE can be configured
exactly the same way as a physical Gemini keypad. Connect one end of the provided RCM-
PROGCABLE keypad bus cable to the Gemini keypad, then connect the other end to the IBR
-ZREMOTE circuit board receptacle marked "
J3
" (insert the plug with the black wire adjacent
to jumper J4; the plug keying tab faces away from the unit).
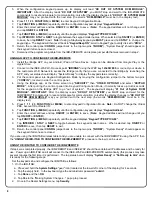
Configuration Procedure
Use the "configuration keypad" to program the IBR-ZREMOTE
Keypad Address
and
Keypad
Type
as follows.
Note:
The "configuration keypad" must be addressed as keypad #1.
1. Ensure both jumpers marked
J2
and
J3
on the IBR-ZREMOTE circuit board (located at
the bottom right next to the blue bus connector) are set closer to the "
4-WIRE
" text
printed on the circuit board (this is the default shipping configuration).
2.
IMPORTANT:
Remove jumper
J4
on the " Z-Wave circuit board" (the top circuit board located within in the IBR-
ZREMOTE housing, next to silver battery).
3. Connect one end of the special keypad bus cable (RCM-PROGCABLE) to the back of the configuration keypad and
connect the other end to the IBR-ZREMOTE "Header Socket" receptacle (marked "
J3
" on the PC board as shown in
the image above).
4. Put the control panel into Keypad Configuration Mode by moving the configuration jumper to the bottom two pins
("
CONFIG
" ), located inside the control panel enclosure.
CUSTOMER ROUTER
(Wireless or Wired-only)
BROADBAND
MODEM
Internet
ISEE-WAP
(
(
(
(1) CAT5 Ethernet
Connection
(2) CAT5 Ethernet
Connection
(3) CAT5 to Router
IBR-ZREMOTE
(
(
(
RCM-PROGCABLE plugs into the
"Header Socket" (J3)
Jumper J4 also shown.
J4
J3
Summary of Contents for iBridge Suite
Page 18: ...18 NOTES...


