EN
W415-3006 / A / 05.27.21
27
gas installation
7.3 propane gas cylinder mounting
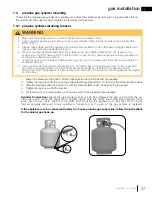
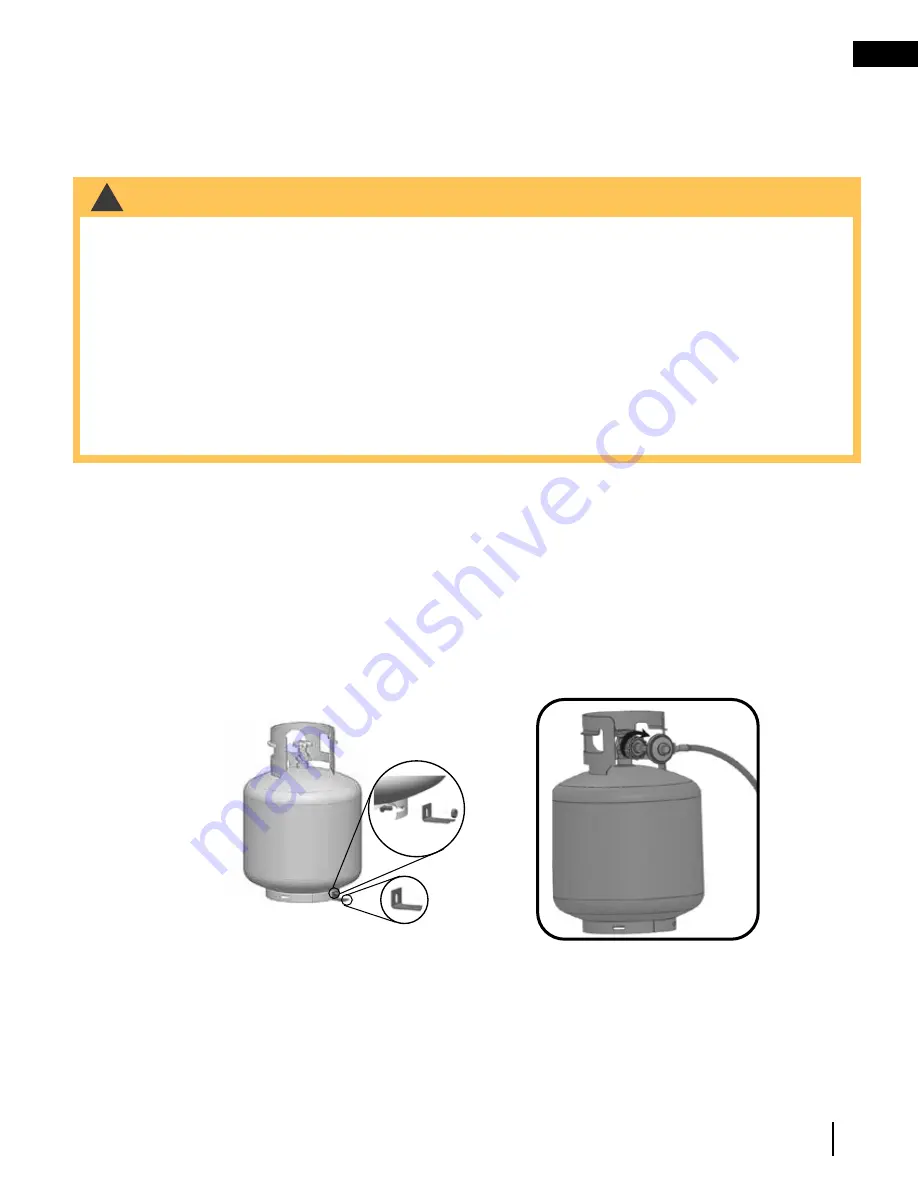
To prevent the propane gas cylinder from tipping over, ensure the cylinder support ring is on a level surface. Place
the cylinder into the support ring and tighten the thumb screw to secure.
7.3.1 propane cylinder retaining bracket
1. Fasten the bracket to the bottom of the propane bottle using the bolt and nut supplied.
2. Tighten the lag screw into the mounting surface leaving approximately 1/4” (6mm) of thread above the surface.
3. Slide the propane bottle into position so that the bracket slides under the head of the lag screws.
4. Tighten the lag screw onto the bracket.
5. For fastening to a concrete surface, a concrete anchor will be required (not supplied).
Cylinder Connection:
Ensure the gas regulator hose is kink free. Remove the cap or plug from the cyl-
inder fuel valve. Insert the black QCC1 regular nipple onto the QCC1 fuel valve. Hand tighten clock-
wise. Do not use tools. Leak test all joints prior to using the appliance. A leak test must be per-
formed annually and each time a cylinder is hooked up or if a part of the gas system is replaced.
If the applaince is to be connected directly to a house propane gas supply line, follow the instructions
for the natural gas hook-up.
!
WARNING
• Make sure the cylinder valve is in its full off position (turn clockwise to stop).
• Check cylinder valve features to ensure it has proper external mating threads (Cylinder valve marked: USE
WITH TYPE 1).
• Inspect hose shipped with the appliance for damage. Never attempt to use damaged or plugged equipment.
See your local propane gas dealer for repairs.
• When connecting regulator assembly to the cylinder valve, hand tighten black QCC1 nut clockwise to a
positive stop. DO NOT use a wrench to tighten. Use of a wrench may damage the quick closing coupling nut
and result in a hazardous condition.
• Locate the hose out of pathways where people may trip over it or in areas where the hose may be subject to
accidental damage.
• Open cylinder valve fully (counter-clockwise). Turn the on/off valve at the appliance slowly to the on position
and use a soapy water solution to check all connections for leaks as indicated in the diagrams before
attempting to light the appliance. If a leak is found, turn tank valve off and do not use the appliance until repairs
can be made.


