3.0 FINIShING
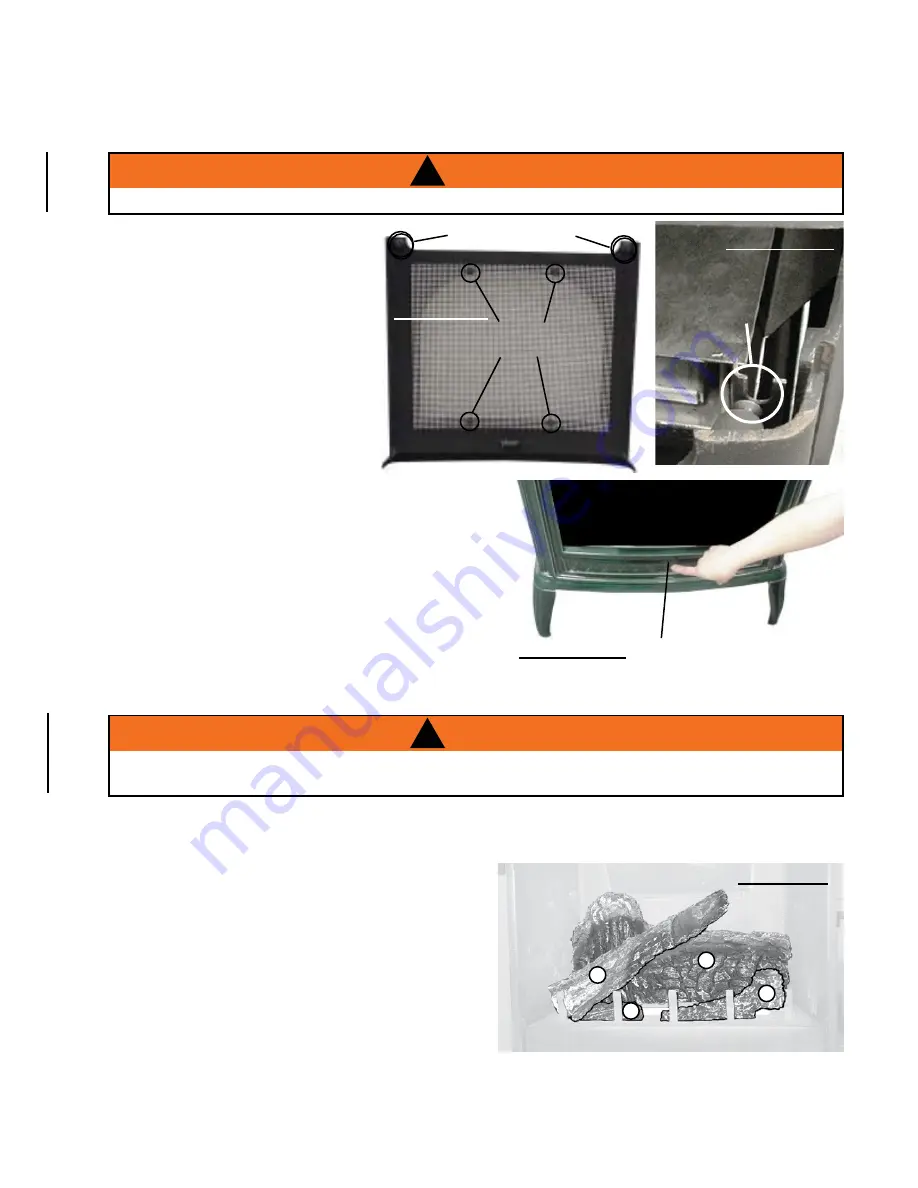
3.1 CAST FrONT INSTALLATION
sCrEEN
sECurINg bOlTs
CasT frONT
sECurINg bOlTs
3.1.1
Place the cast front face down on
a protective surface such as a
carpet or blanket to avoid
scratching the finished surface.
Attach the screen to the inside of
the front using four bolts and
washers.
3.1.2
Lift the top casting off the unit.
3.1.3
Fit the securing bolts on the cast
front into each of the respective
retainer brackets (located at either
side on the top). Insert and
tighten the securing screw from
the bottom up (located at the lower center behind
the cast front).
This will hold the cast front in place. Replace the
top casting.
3.1.4
To remove the front, repeat in reverse order.
sECurINg sCrEw
!
WARNING
!
WARNING
!
front / screen must be installed while the appliance is in operation.
3.2 LOG pLACEmENT
Blocked burner ports can cause an incorrect flame pattern, carbon deposits and delayed ignition.
Phazer
TM
logs glow when exposed to direct flame and provide a unique and realistic glowing effect. Use only certified
Phazer
TM
logs available from your Napoleon dealer.
Place log #1 onto the burner, centering it onto the
burner tray and pushing it as close to the rear wall of
the firebox as possible. Move logs #2 and #3 into
position, lining up the studs located on the burner
with the holes on the bottom of the logs. Sit the notch
at the bottom of log #4 against the left outermost
grate post and position the top of the log into the
pocket provided on the rear log (#1).
1
4
2
3
!
WARNING
!
WARNING
!
Failure to position the logs in accordance with these diagrams or failure to use only logs specifically
approved with this heater may result in property damage or person injury.
TOP
frONT
rETaINEr
fIgurE 3.1.1
fIgurE 3.1.3-1
fIgurE 3.1.3-2
fIgurE 3.2a
10
W415-0204 / F / 10.23.08


