W415-1013 / C / 11.19.13
68
EN
87.1B
Burn only dry, clean unpainted wood that has been seasoned. It produces more
heat and less soot or creosote. Freshly cut wood contains about 50% moisture
while after proper seasoning only about 20% of the
water remains. As wood is burned, this water boils
off consuming energy that should be used in heating.
The wetter the wood, the less heat is given off and
the more creosote is produced. Dry
fi
rewood has
cracks in the end of the grain.
Both hardwood and softwood burn equally well in this
appliance but hardwood is denser, will weigh more
per cord and burn a little slower and longer.
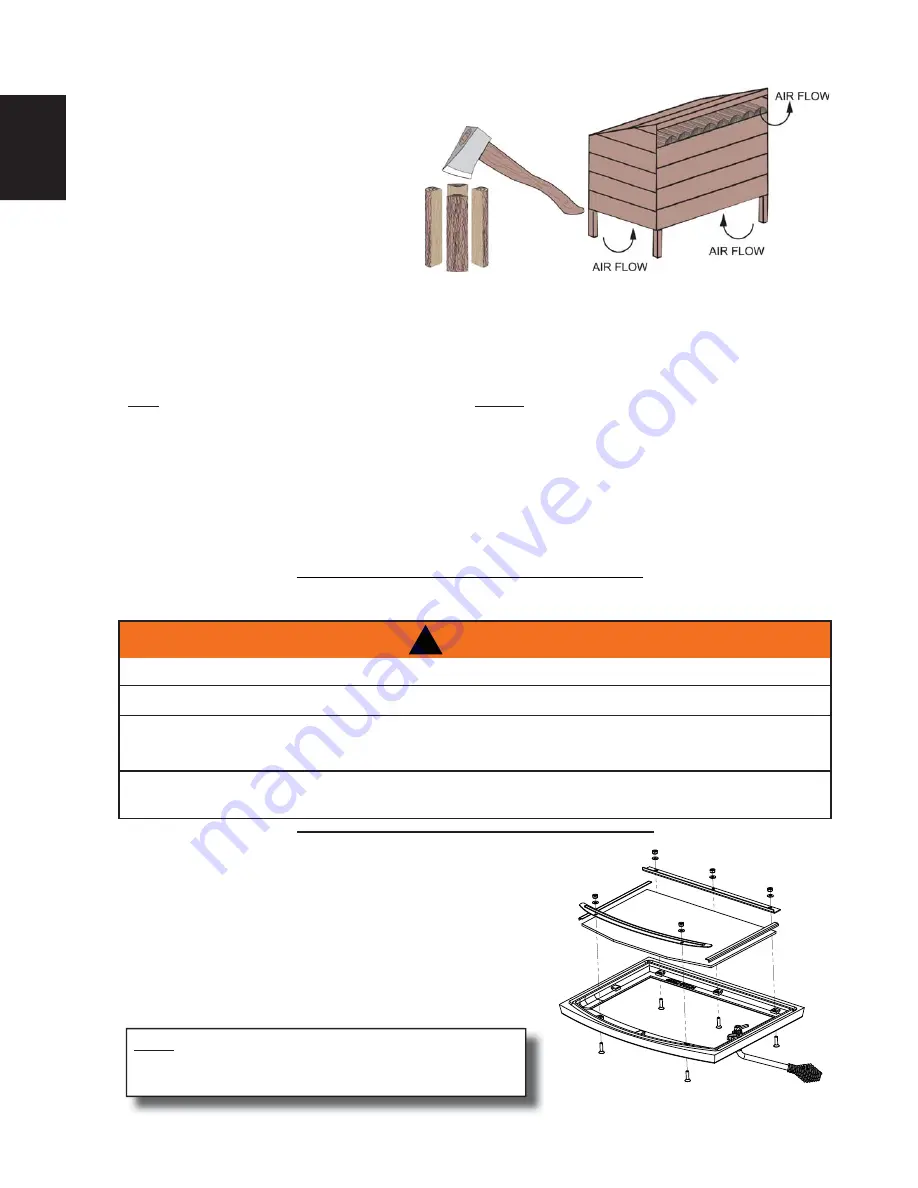
Firewood should be split, stacked in a manner that air can get to all parts of it and covered in early spring to be ready for
burning that fall. Dry
fi
rewood has cracks in the end grain.
Cut the wood so that it will
fi
t horizontally, front to back, making for easier loading and less of a likelihood that the wood will roll
onto the glass.
Manufactured
fi
relogs made by compressing 100% natural wood
fi
bre can be safely used as fuel. Do not use manufactured
fi
relogs if they contain additives such as paraf
fi
n, wax, binders etc. Never burn more than two manufactured
fi
relogs at a time.
DO’S
•
Build a hot
fi
re.
•
Use only dry wood.
•
Several pieces of medium sized wood are better
than a few big pieces.
•
Clean chimney regularly.
•
Refuel frequently using medium sized wood.
•
“Fine Tune” the air settings for optimum
performance.
DONT’S
•
Take ash out immediately. Let it accumulate to a
depth of at least one inch. A good ash layer provides
for a longer lasting and better burning
fi
re.
•
Burn wet wood.
•
Close the door too soon or damper down too quickly.
•
Burn one large log rather than two or three smaller,
more reasonably sized logs.
•
Burn at continually “low setting”, if glass door is
constantly blackened. This means the
fi
rebox
temperature is too low.
9.6 GLASS
REPLACEMENT
1. When the appliance is cool, open the door and place the door
frame down careful not to scratch the paint.
2. Remove the screws and brackets holding the glass in place.
Remove all broken glass.
3. Wrap the edges of the new glass with a U-shaped strip of
fi
berglass gasket, covering 1/4” (6mm) on each side.
4.
Place the glass with the
fi
berglass gasket in position and replace
the brackets and screws. When
fi
nished, you should be able to
move the glass slightly, horizontally and vertically.
NOTE
For replacement glass, size, thickness and speci
fi
cations
see “REPLACEMENTS” section.
!
WARNING
DO NOT USE SUBSTITUTE MATERIALS.
GLASS MAY BE HOT, DO NOT TOUCH GLASS UNTIL COOLED.
CARE MUST BE TAKEN WHEN REMOVING AND DISPOSING OF ANY BROKEN DOOR GLASS OR
DAMAGED COMPONENTS. BE SURE TO VACUUM UP ANY BROKEN GLASS FROM INSIDE THE
APPLIANCE BEFORE OPERATION.
DO NOT STRIKE, SLAM OR SCRATCH GLASS. DO NOT OPERATE APPLIANCE WITH GLASS
REMOVED, CRACKED, BROKEN OR SCRATCHED.
56.2


