3-2
Operating Instruction
3.2.1 Continuous test
mode
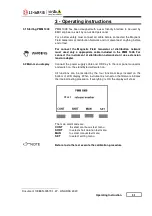
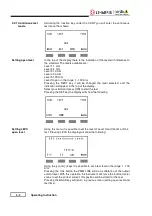
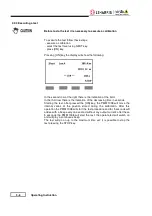
Activating the function key under the CONT you will enter the continuous
test menu that shows:
Setting open level
In the top of the display there is the indication of the level with reference to
the standard. The levels available are:
Level 1 1 A/m
Level 2 3 A/m
Level 3 10 A/m
Level 4 30 A/m
Level 5 100 A/m
Level X open, in the range 1 - 100 A/m
Pressing the NEXT key it will be changed the level selected, and the
indication will appear in the top of the display.
Select your field and press [ON] to start the test
Pressing the SET key the display will show the following
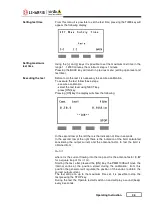
Setting LEVX
open level
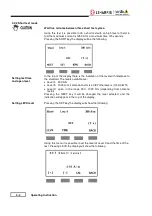
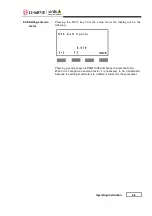
Using this menu it is possible to set the level of Level X and the time of the
test. Pressing LEVX the display will show the following:
Using the [+] and [-] keys it is possible to set a test level in the range 1 - 100
A/m.
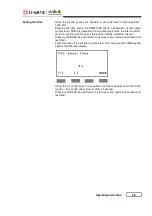
Pressing the CAL button the PMM 1008 will do a calibration of the output
current level. With this operation the instrument will move the internal motor
variac to set the correct current; this position will be stored for the test.
Pressing the BACK key will return in previous menu (setting open level and
test time).
Summary of Contents for PMM 1008
Page 9: ...General Information 1 3 Fig 1 1 PMM 1008...
Page 12: ...1 6 General Information This page has been left blank intentionally...
Page 16: ...2 4 Installation 3 Lock the loop to the support using the six screws...
Page 17: ...Installation 2 5 4 Lock the antenna mast on the Cart using the screw on the bottom...
Page 36: ...5 4 How to program This page has been left blank intentionally...
Page 40: ...Suggerimenti Commenti Note Suggestions Comments Note...

